
Sim racing car setup is the process of adjusting tyres, alignment, suspension, differential, and aero so the car does what you ask mid-corner. Get the order right — tyres and pressures first, aero last — and a mediocre baseline turns into a car you can actually lean on. The single biggest mistake is changing five things at once.
I build and race on a rig I welded myself — steel tube, load-cell pedals, a mid-torque direct-drive base as the daily — and I spend as much time in the setup menus as on track. This guide is the workflow I use across iRacing and ACC, the one I hand anyone who asks why their car feels “fine on the straight, hopeless in the corner.” It is not a list of magic numbers. It is the order of operations and the reasoning, so you can build a setup on any car instead of copying someone else’s and hoping.
What “Car Setup” Actually Changes
Setup decides how the four contact patches share load through a corner. Every slider you move is really moving grip from one end of the car to the other, or from one phase of the corner to another. A car that pushes wide on entry and snaps on exit is not “bad” — it is asking you to move balance, and there are six or seven levers that do it.
The trap is treating setup as a search for a faster number. It isn’t. A good setup makes the car predictable first and fast second, because a predictable car lets you brake later and get on throttle earlier with confidence — and that confidence is where lap time actually lives. On my telemetry overlay I care far more about a clean, repeatable input trace than about a hero lap I can hit one time in twenty.
The areas that matter, roughly in the order you should touch them: tyre pressures and compounds, then alignment (camber, toe, caster), then suspension (springs, dampers, anti-roll bars, ride height), then the differential, and finally aerodynamics. If you have never built a setup from scratch, start with the beginner workflow and come back here.
The Setup Order That Actually Works
Work from the contact patch outward. Tyres are where grip is generated, so optimal pressures come first — every other change is read through the tyre, and if pressures are wrong you will chase ghosts. Alignment shapes how the contact patch behaves under cornering load. Suspension controls how weight transfers and how fast. The differential decides how the rear axle behaves under power and off throttle. Aero is last because it only matters once the mechanical car underneath is sane, and because adding downforce can paper over balance problems you should have fixed mechanically.
Here is the rule I keep coming back to: change one thing, run three to five clean laps, read the result, then decide. If you change springs, the diff, and the rear wing in one stint, you have learned nothing — you cannot attribute the change in feel to any single input. This is the discipline that separates people who get faster from people who just keep loading new setups and wondering why nothing sticks.
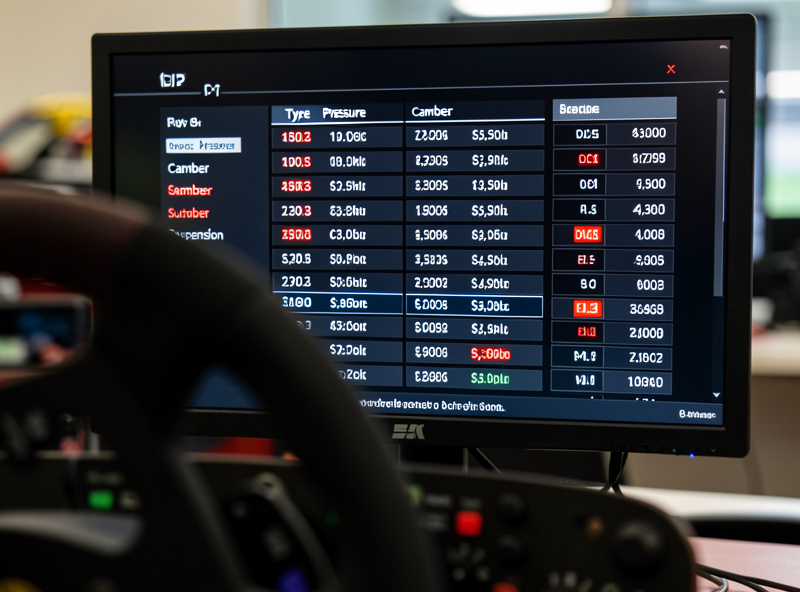
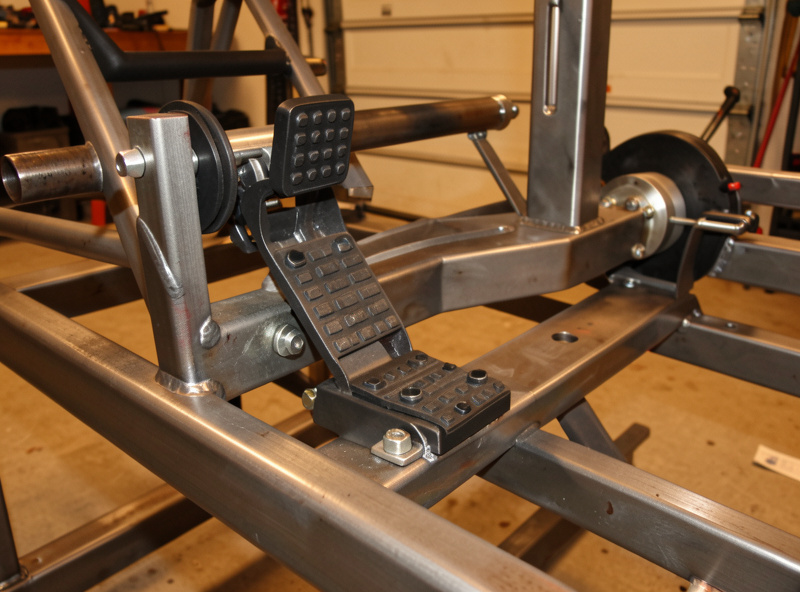
One more thing before the details: setup cannot fix a rig that flexes. If your wheel deck twists under load or your pedals slide on a carpet, the feedback you are tuning against is lying to you. I will say this more than once — rig rigidity comes before any slider in any menu. The car I build in the software has to be read on hardware that does not move.
Tyres and Pressures — The Foundation of Grip
Optimal hot tyre pressure puts the largest, most even contact patch on the road. Too high and the tyre balloons, riding on its centre with a smaller patch and a nervous feel; too low and the shoulders overheat while the middle stays cold, killing grip and chewing the tyre over a stint. Most road and GT cars in sim titles want a hot pressure somewhere in the high-20s psi, but the number that matters is the one your telemetry shows after the tyre is up to temperature, not the cold value you set in the garage.
The way I check it is the tyre temperature spread across inner, middle, and outer — if the middle runs hot relative to the shoulders, drop pressure; if the shoulders are cooking and the centre is cool, the tyre is under-inflated or you have too much camber. Compound choice is the other half: softer compounds give more peak grip for fewer laps, harder compounds trade outright pace for consistency over a long run. For a sprint you take the grip; for an endurance stint you take the tyre that is still alive on lap forty. The full method is in the tyre pressure and compounds guide.
Alignment — Camber, Toe, and Caster
Alignment is how the contact patch sits when the car is actually cornering, not when it is parked. Negative camber tilts the tyre top-inward so that, as the car rolls in a corner and the tyre deforms, the patch sits flat on the road at peak load. Too little and you lose grip mid-corner; too much and you sacrifice braking and straight-line grip because the tyre is riding on its inner edge everywhere else. You confirm camber the same way you confirm pressure — with even tyre temperatures across the tread at racing load.
Toe is the subtle one. A touch of toe-out at the front sharpens turn-in but adds tyre wear and straight-line drag; rear toe-in adds stability under power at the cost of a little rotation. Caster is almost free stability and self-centring weight in the wheel — I run plenty of it because it firms up the on-centre feel without much downside. The complete breakdown, with how each parameter reads on telemetry, is in the alignment guide.
Suspension — Springs, Dampers, Anti-Roll Bars, Ride Height
Suspension governs how much weight transfers and, crucially, how fast. Springs and ride height set the static platform; anti-roll bars tune the balance between the axles in steady-state cornering; dampers control the transient — the moment of turn-in, the moment you get on the brakes, the moment weight is moving. This is the deepest rabbit hole in setup and the one where copying numbers helps least, because damper feel is so dependent on how you drive.
The fast way to use the suspension as a balance tool: stiffen the anti-roll bar at the end that has too much grip to shift balance to the other end. Car understeers in a steady corner? Soften the front bar or stiffen the rear. Snappy on exit? Soften the rear. Ride height and rake change aero balance and roll centres at the same time, which is why I treat ride height as half-suspension, half-aero. The full damper and spring methodology — including why you set bump and rebound separately — is in the suspension tuning guide.
The Differential — How the Car Puts Power Down
The differential decides how the two driven wheels share torque, and in a modern sim that means three separate settings: power (on-throttle) lock, coast (off-throttle) lock, and preload. Power lock controls traction and exit behaviour — more lock ties the rear axle together for stability under throttle but can push the nose wide; less lock frees rotation but risks wheelspin and a loose exit. Coast lock controls the car as you lift and brake into a corner — more coast lock stabilises the rear on entry, less lets it rotate.
This is the setting people most often leave on default and most benefit from learning, because the diff is where corner exit is won or lost. On a front-drive car the logic flips and the diff fights mid-corner understeer instead. The way I dial mine in is one phase of the corner at a time: get entry stable on coast, then optimise exit traction on power, and accept the compromise in between. The complete walkthrough is in the differential setup guide.
Aerodynamics — Wings, Splitter, and High-Speed Balance
Aero is the last lever because it only earns its keep at speed and because downforce is never free — every bit of wing you add is drag you carry down the straight. Rear wing adds high-speed rear grip and stability; front splitter or front aero balances the nose at speed. The art is matching aero balance to mechanical balance so the car does not change personality between a slow hairpin and a fast sweeper.
For most tracks you run the least wing that keeps the car stable through the fastest corner that matters, then live with the straight-line cost. A car that is planted in the high-speed stuff but draggy everywhere is usually over-winged. Aero balance and mechanical balance have to agree, which is why I tune aero only after the mechanical setup is settled — details and the trackside method are in the aero setup guide.
A Workflow Beginners Can Actually Follow
If all of this feels like too many variables, it is — until you impose an order on it. The beginner path is: start from a known-good baseline setup, fix tyre pressures to get even temperatures, then make one balance change at a time using the anti-roll bars and the differential, and leave springs, dampers, and aero alone until the car is predictable. You do not need to touch every slider to be fast; you need to make the car do what you expect.
I walk through that exact sequence, with what to change for each handling problem, in the beginner car setup guide. The goal at this stage is not the theoretical optimum — it is a car you trust enough to brake later in, lap after lap.
Which Setting Fixes Which Problem
When the car misbehaves, you want the shortest path to the fix. This table maps the common handling complaints to the first setting I reach for, and where in the corner each one lives.
| Handling Problem | Corner Phase | First Setting to Try | Direction |
|---|---|---|---|
| Understeer on entry | Braking / turn-in | Front toe / coast diff | More front toe-out; less coast lock |
| Understeer mid-corner | Apex | Anti-roll bars | Soften front or stiffen rear bar |
| Oversteer on throttle | Exit | Power diff lock | More power lock; soften rear |
| Snap oversteer on lift | Entry | Coast diff lock | More coast lock |
| Nervous at high speed | Fast corners | Rear wing / rear ride height | More rear aero; raise rear slightly |
| Tyre overheating | Whole lap | Pressure / camber | Lower pressure or reduce camber |
| Vague on-centre feel | Straights / turn-in | Caster | More caster |
Treat this as a starting point, not gospel — every car and tyre model responds slightly differently, and the only way to know is to change one thing and read the result. But it will keep you from soft-front-barring a car that actually needs a diff change.
Reading Telemetry to Validate a Change
The reason I trust setup work over feel is telemetry. A telemetry overlay turns “it feels better” into “the car is two tenths quicker through this sector and the rear tyre temps are even now.” After every change I look at three things: the input trace (am I correcting less?), tyre temperatures (is the contact patch working evenly?), and the speed trace through the corner I was trying to fix. If the feel improved but the data did not, I was fooling myself — and that happens more than anyone admits.
Field of view belongs in this conversation too, because it changes how you read the car’s rotation. Most home setups run a FOV that is far too wide — it shows more of the cockpit and feels comfortable, but it shrinks your sense of speed and distance and makes the car feel like it rotates less than it really does. Set FOV from the geometry of your screen size and seating distance rather than by eye, and suddenly your inputs match what the car is doing. I have seen a correct FOV do more for someone’s consistency than a stack of setup changes, because they were finally seeing the slip instead of guessing at it.
This is also where the latency stack matters. If your wheel, sim, and display are not in sync, the feedback you are reacting to is late, and you will tune the car to compensate for lag rather than for grip. A wired, low-latency connection — I run the sim PC on a wired link straight to the router, never Wi-Fi — keeps online sessions honest, and a properly set field of view keeps your sense of speed and rotation accurate. Setup is only as trustworthy as the system you read it on.
Baselines: Where to Start Instead of a Blank Garage
Never build a setup from a default garage if you can avoid it. Almost every title ships a baseline or “fixed” setup that is deliberately safe — slightly understeery, conservative tyre pressures, soft enough that it forgives mistakes. That is your starting point, not your destination. Load it, drive five honest laps, and only then start moving things, because you cannot tune a problem you have not first felt clearly.
From a safe baseline I work in this sequence: first I get tyre pressures right so temperatures are even, because nothing else reads correctly until they are. Then I make the car rotate the way I want using anti-roll bars and the differential, which are the two highest-leverage balance tools. Only once the car turns predictably do I touch springs and dampers to refine the transient feel, and aero comes dead last. If I run out of time, the car is still fast, because the highest-impact changes happened first. That ordering is the whole reason a hub exists: it stops you wandering the menu at random.
A word on saving setups. Name them so you can roll back — base, base-pressures, base-pressures-diff, and so on — because the most common way people lose a good setup is by stacking ten changes onto one file and no longer remembering which one made it better. I keep a short stack of named files per car and per track type, and I throw away anything I cannot beat in two stints. The setup folder is a lab notebook, not a junk drawer.
Common Setup Mistakes I See Constantly
The mistakes that cost people the most are not exotic — they are the same handful, over and over. The first is maxing out everything: full camber, full diff lock, stiffest bars, biggest wing, on the theory that more is faster. It is not. Every one of those is a trade, and stacking the extremes gives you a car that is twitchy, hard on tyres, and slower than a sane middle. Setup is about balance, not maximums.
The second is chasing the wrong end of the car. A driver feels the rear step out on exit and immediately softens the front bar, when the fix was the power differential. Because they did not isolate the change, they “fix” oversteer by adding understeer somewhere else and end up with a car that is bad in two ways instead of one. Match the tool to the corner phase — the table above exists precisely to stop this — and change one thing at a time so you actually learn what the car wanted.
The third, and the one I care about most, is tuning against bad data. If your rig flexes, your pedals are uncalibrated, or your latency is high, you are not tuning the car — you are tuning your compensation for a broken signal. I have watched people spend an evening softening dampers to “calm the car down” when the real problem was a wheel deck twisting under a direct-drive base. Fix the hardware and the signal, and half the setup problems people obsess over simply disappear. That is why this guide keeps circling back to rigidity and latency: they are upstream of every slider in the menu.
Rig Rigidity Comes First
I will close the loop on the point I opened with. The best setup in the world is invisible on a rig that moves. If the wheel deck twists when the direct-drive base loads up, or the pedal tray flexes when you stand on the brake, every change you make is read through that flex and you cannot tell the car from the chassis. The rig I race on is welded steel tube precisely because rigidity under load is the whole game — the same instinct that says a stiff base on a solid rig beats a fancier wheel rim on a wobbly desk every time.
If you are building or stiffening a rig, the brackets and button-box plates I run came off my own 3D printer, and the printed mounting hardware is genuinely part of why the cockpit does not move. Hardware first, setup second: that order never changes.
Frequently Asked Questions
What should I adjust first in a sim racing car setup?
Start with tyre pressures so the contact patch works evenly, then alignment, then suspension and differential, and finally aero. Every other change is read through the tyre, so fixing pressures first stops you from chasing problems that are really pressure issues.
Do I need to change every setup setting to be fast?
No. Most lap time comes from correct tyre pressures plus balance changes using anti-roll bars and the differential. Leave springs, dampers, and aero on a known-good baseline until the car is predictable, then refine from there.
How many laps should I run between setup changes?
Three to five clean laps per change, and change only one thing at a time. If you adjust several settings at once you cannot attribute the result to any single input, so you learn nothing about what the car actually needed.
Why does my car feel different in a sim than the numbers suggest?
Usually rig flex or latency. If the wheel deck or pedals move under load, or the wheel, sim, and display are out of sync, you are tuning against feedback that is late or distorted. Fix rig rigidity and run a wired, low-latency connection first.
Should I copy a fast driver’s setup or build my own?
Use a known-good setup as a baseline, but build the final car around how you drive. Damper and differential feel are personal, and a copied setup that suits someone else’s braking style can feel worse for you even if it is theoretically quicker.
Does aero matter on slow tracks?
Less than people think. Aero only earns its keep at speed and always costs straight-line drag, so on slow, twisty tracks you run the least wing that keeps the fastest corner stable and fix the rest of the balance mechanically.
Related Guides
This hub links to every part of the car setup system. Work through them in order, or jump to the one fixing your current problem:
- Sim Racing Car Setup for Beginners — the step-by-step starting workflow.
- Tyre Pressure and Compounds — the foundation of grip.
- Understanding Sim Racing Alignment — camber, toe, and caster.
- Suspension Tuning for Sim Racing — springs, dampers, bars, ride height.
- Differential Setup Guide — power, coast, and preload.
- Aerodynamics Setup — wings, splitter, and high-speed balance.