A belt-tensioner system pulls a belt across your shoulders or chest to simulate the G-forces of braking and acceleration, sitting neatly between cheap haptics and expensive actuated motion. Instead of moving the whole rig, it tugs your body in sync with the car’s longitudinal load — and the result is a surprisingly convincing sustained-force cue for a fraction of a 2DOF platform’s cost and floor space. For a lot of home racers, this is the most sensible motion upgrade they’ll ever make, because it delivers the one thing transducers can’t: sustained force.
This guide is part of the sim racing motion and haptics cluster. I’ll lay out exactly what belt tension does, how it compares to traction-loss systems and full actuated platforms, and where it fits in a sensible build — because the value of these systems is genuinely high but widely misunderstood.
How Belt-Tensioner Systems Work
A belt-tensioner system uses motors to vary the tension on belts attached to a harness. Under braking, the belts pull you forward; under acceleration, they pull you back into the seat. The system reads the same longitudinal-G telemetry an actuated platform would and translates it into belt pull rather than rig pitch. The brain interprets that sustained tug as load transfer, which is exactly the cue that makes braking points and throttle modulation feel grounded.
The key word is sustained. A tactile transducer can buzz you under braking, but it can’t hold a steady force the way real deceleration does. Belt tension can. That single capability is why these systems feel like a genuine step toward motion rather than just more vibration — they add a channel transducers physically lack. It’s the difference between being told the car is braking and being made to feel the weight of it, and once you’ve driven with that cue, a static rig feels like it’s missing a sense.
Belt Tension vs Traction-Loss Systems
Belt tensioners and traction-loss systems are often mentioned together but solve different problems. Belt tension reproduces longitudinal G — braking and acceleration. Traction-loss rotates the seat or the front of the rig to mimic the rear stepping out, so it’s about yaw and oversteer feel. They’re complementary, not competing: belt for straight-line load, traction loss for rotation.
Which you want depends on how you drive. For circuit racing where braking precision matters most, belt tension is the higher-value add. For drift and rally-style driving where catching the rear is the whole game, a traction-loss setup earns its place first. Some rigs run both, stacking longitudinal and rotational cues — but if you’re choosing one, match it to your discipline rather than buying both by default.
Belt Tension vs Full Actuated Motion
Compared to a 2DOF or 6DOF actuated platform, a belt-tensioner system is cheaper, lighter, quieter, and far easier to fit into a normal room — because nothing physically moves the rig. The tradeoff is that belt tension is a single-channel sensation: it reproduces longitudinal force but can’t deliver the independent pitch and roll an actuated platform does. You feel braking and acceleration, but not the rig leaning into a corner.
For many drivers that tradeoff is entirely worth it. Owners consistently report that belt tension captures a large share of what makes motion feel real — the sustained load — without the cost, noise, and space of actuators. If you’ve got transducers already and want the next meaningful step without committing to a platform, belt tension is the upgrade I’d reach for. The 2DOF vs 6DOF guide covers the actuated tier when you’re ready to weigh it.
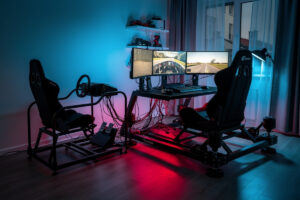
There’s also a practical-living argument that rarely gets made. A belt-tensioner system makes no noise to speak of, takes up no extra floor space, and doesn’t move a loaded cockpit around the room — so it’s viable in a shared house, an apartment, or any space where an actuated platform would be a non-starter. I’ve pointed plenty of space- and noise-constrained racers toward belt tension precisely because it sidesteps the three biggest reasons people regret buying a platform. The motion you can actually live with beats the motion that ends up unused in a corner.
Combining Belt Tension With Haptics
The strongest non-platform setup combines belt tension with tactile transducers, because the two cover different halves of the sensory picture. Transducers deliver the fast transients — lockups, kerb strikes, wheelspin, road texture — while belt tension delivers the slow sustained load of braking and acceleration. Run together, they give your body both the high-frequency detail and the low-frequency force, which is most of what an actuated platform provides minus the pitch and roll.
In practice this means routing your force feedback, transducer effects, and belt tension off the same telemetry so they agree with each other. When the wheel, the seat, and the belts all tell you the front is locking at the same instant, you react without conscious thought — that redundancy is the real prize. It’s also a far cheaper way to reach that multi-channel feel than a platform, which is exactly why I treat belt-plus-haptics as the natural ceiling for anyone not ready to dedicate a room and a budget to actuators.
Belt Tension, Traction Loss, and Actuated Motion
| System | What It Reproduces | Cost | Floor Space | Best For |
|---|---|---|---|---|
| Belt tensioner | Longitudinal G (braking/accel) | Low-Medium | Minimal | Circuit racing, sustained-G feel |
| Traction loss | Rear rotation / oversteer | Medium | Moderate (rig swings) | Drift and rally feel |
| 2DOF platform | Pitch and roll | High | Significant | True motion in a normal room |
| 6DOF platform | All six axes | Highest | Large dedicated space | Maximum fidelity |
What Belt Tension Actually Feels Like to Drive
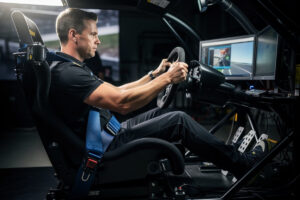
The first thing that strikes people about belt tension is how much it changes braking, not cornering. As you stamp the brake, the belts haul you into the harness in proportion to deceleration — so a heavy threshold-braking zone physically pulls harder than a light lift. That gives your body a direct, analog readout of brake pressure that the eyes alone never provide, and it makes consistent braking points dramatically easier to hit because you’re now feeling the deceleration, not just watching the corner arrive.
Acceleration is the mirror image: the belts ease and the seat takes your weight as the car drives forward, with a sharper shove on a punchy corner exit. The effect is subtle compared to the wallop of a transducer kick, but it’s the right kind of subtle — it’s information, not theatrics. After a few sessions you stop noticing the belts as hardware and simply start braking later and more repeatably because your body finally has the longitudinal-load data it was missing. That’s the whole point of motion, and belt tension delivers it without a single moving panel under the rig.
Installation and Tuning Considerations
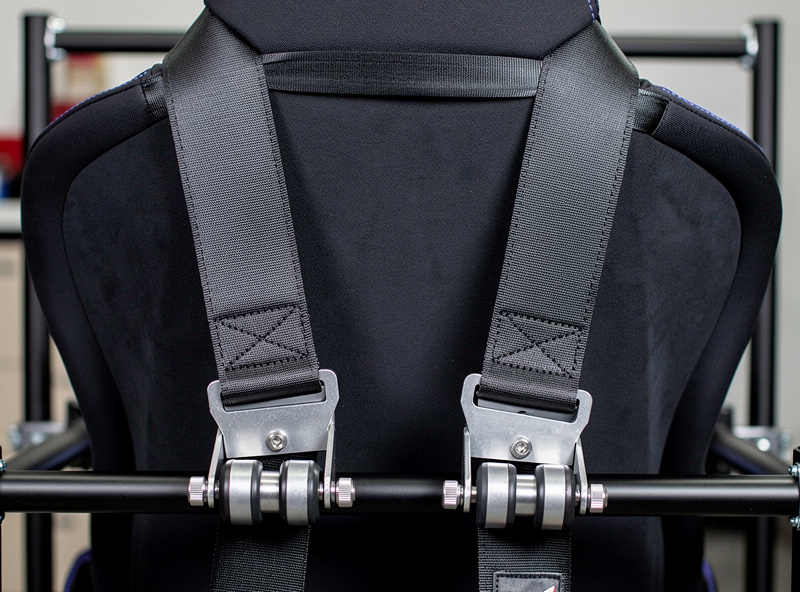
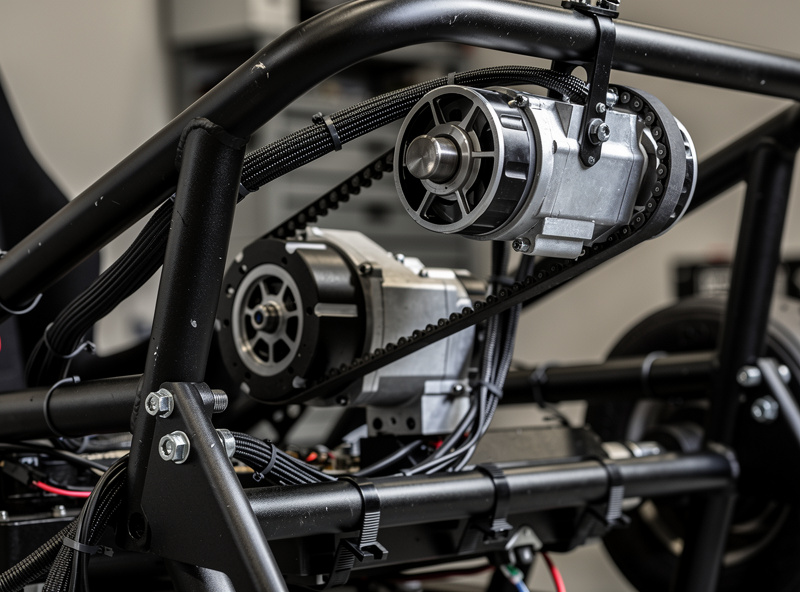
Installing a belt-tensioner system is more involved than bolting on a transducer but far simpler than building an actuated platform. The motor units mount to the rig frame behind and beside the seat, and the belts run forward to a harness the driver wears. Because the system applies real force to your body, the mounting points have to be genuinely solid — this is where a welded or properly braced frame pays off, and a flimsy stand simply isn’t a safe anchor for sustained pull.
Tuning is mostly about gain and response curve. Set the maximum tension high enough that heavy braking is clearly felt but not so high that it’s uncomfortable over a long stint — endurance racers in particular dial it back from sprint settings. The response curve decides how aggressively tension tracks the G input; a slightly progressive curve keeps light braking gentle while still delivering a firm pull at the threshold. As with tuning bass shakers, the trap is over-driving it: max tension everywhere is fatiguing and washes out the contrast that makes the cue useful. Start conservative, drive several stints, and raise it only until heavy braking feels right.
Where Belt Tension Fits in Your Build
The order I’d recommend is rig rigidity first, then pedals and wheelbase, then tactile transducers for high-frequency detail, then a belt tensioner for sustained G. That sequence gives you both the transient and the sustained channels before you ever spend on a full platform — and for many racers it’s where motion sensibly stops. A belt-harness-equipped rig with good haptics feels deeply connected to the car.
If you do want to install one, the belts attach to a proper racing harness, so a solid 4-point sim racing harness is the foundation the system pulls against, and firm mounting points on the frame matter as much as they do for transducers. To run the haptics that pair with belt tension, a multi-channel amplifier for transducers rounds out the setup. Get the foundation rigid, layer the channels in order, and you’ll feel the car load up and let go without ever moving the whole rig.
Disclosure: As an Amazon Associate I earn from qualifying purchases. The product search links above point to genuinely stocked gear that fits the setup described, at no extra cost to you.