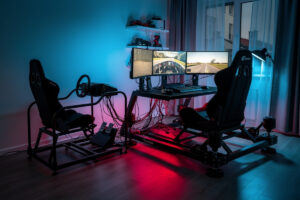
You do not need a four-figure motion platform to feel the car move. The cheapest credible path to sim racing motion is a single large tactile transducer under the seat driven by a basic amplifier and tuned in free software — a setup that costs less than a mid-tier wheel rim and transforms a static rig the moment you fire up a session. From there, a second small transducer for high-frequency detail and a belt tensioner for sustained G build a genuinely convincing motion experience for a fraction of an actuated platform. Budget motion is about spending in the right order, not spending big.
This guide is part of the sim racing motion and haptics cluster, and it lays out the staged, affordable path I’d point any beginner toward — the exact sequence that gets you the most sensation per dollar before you ever consider a platform.
Stage 1: One Tactile Transducer
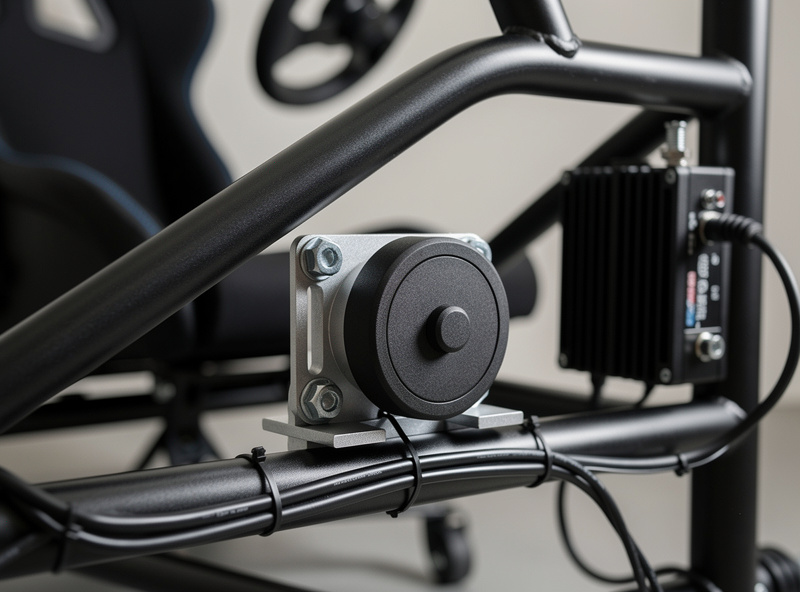
The single highest-value motion upgrade in the entire hobby is one large low-frequency tactile transducer bolted under the seat. It reproduces engine rumble, road texture, kerbs, and lockups straight from the sim’s audio or telemetry, and it’s the upgrade that makes a static rig feel alive instantly. Per dollar, nothing else in sim racing comes close.
You need three things: the transducer, a basic amplifier to drive it, and free software to feed it effects. A solid low-frequency tactile transducer paired with an inexpensive mini amplifier for a bass shaker is the whole stage-one kit. Mount it to a rigid surface tied into the seat rails — energy lost to a soft mount is the most common reason a cheap transducer underwhelms. Get this stage right and you’ve already crossed the biggest perceptual gap in motion: from nothing to something.
How much should you spend at stage one? Less than you’d guess. A single capable low-frequency transducer and a small amp together cost well under what most people pay for a set of rim buttons, and that’s the entire entry ticket to motion. There’s no need to buy in pairs or chase the biggest unit on day one — one well-mounted, well-tuned transducer is more convincing than two cheap ones flopping around on soft brackets. Start small, prove the concept on your own rig, and let the experience tell you whether you want more.
Stage 2: Tune It With Free Software
The software is free, so this stage costs nothing but an evening. SimHub’s Shakeit module reads your sim’s telemetry and turns it into transducer effects you can tune individually — engine RPM, road texture, lockup, wheelspin, gear shift. Proper tuning is what separates a brilliant cheap setup from a buzzy one; the rule is a quiet bed of constant effects with a few loud transients on top.
Spend the time here before buying anything else. A single well-tuned transducer outperforms two badly-tuned ones, and the tuning skills carry forward to every later upgrade. I walk through the whole process in the SimHub bass shaker setup guide. The point of stage two is that you extract the full value of stage-one hardware for zero additional cost — most people skip this and wonder why their shaker feels flat.
Stage 3: Add a Detail Transducer
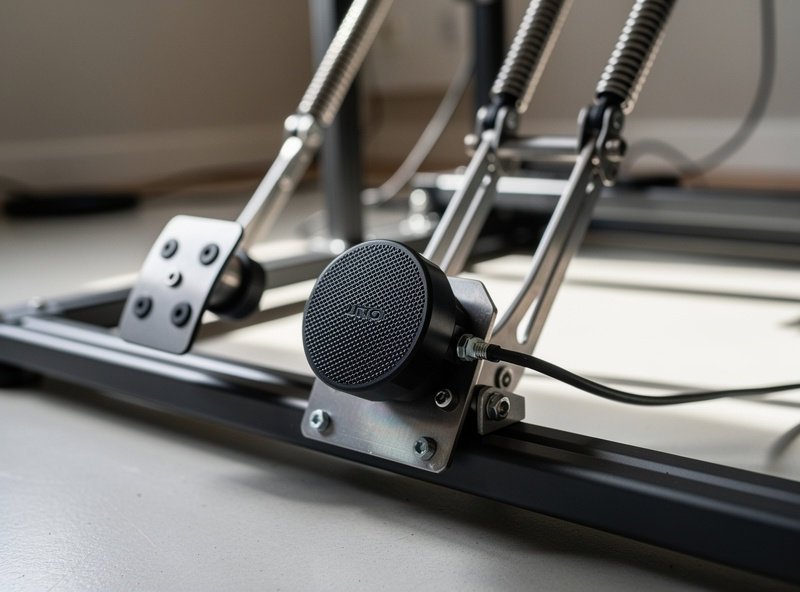
Once the seat unit is tuned, the next affordable step is a smaller, higher-frequency transducer on the pedal deck for braking and traction detail. Where the big seat unit handles rumble, the small puck reproduces the sharp transients — lockup and ABS pulses felt through your foot, exactly where your brain expects brake information. This is the upgrade that turns motion from immersion into something you can drive on.
The cost is modest and the gain is real: localized cues you can act on. Understanding why the two units do different jobs is worth a read of bass shakers vs tactile transducers before you buy, so you get the right device for the cue rather than two of the same. A second compact tactile transducer puck on the pedal tray is a small spend for a big jump in usable information.
Stage 4: Belt Tension for Sustained G
The final affordable stage — well short of any actuated platform — is a belt-tensioner system that pulls you forward under braking and back under acceleration. This adds the one channel transducers physically can’t: sustained longitudinal force. A transducer plus a belt tensioner covers both the transient and the sustained halves of motion, which is most of what a platform delivers minus pitch and roll.
This is where I’d stop for most budgets. The combination of tuned transducers and belt tension feels deeply connected to the car, costs a fraction of a 2DOF rig, fits a normal room, and makes no noise. The belt tensioner guide covers it in depth, and if you do eventually want actuated motion, the 2DOF vs 6DOF guide weighs that tier honestly.
The Budget Motion Path, Stage by Stage
| Stage | What You Add | Relative Cost | What It Reproduces |
|---|---|---|---|
| 1 | One seat transducer + amp | Low | Engine rumble, road, kerbs |
| 2 | Free SimHub tuning | Free | Distinct, readable cues |
| 3 | Pedal-deck detail puck | Low | Lockup, ABS, traction detail |
| 4 | Belt-tensioner system | Medium | Sustained braking/accel G |
Budget Motion Mistakes to Avoid
The most expensive budget mistake is skipping haptics to save for a platform that then sits half-tuned because the money ran out. Build the cheap stages first, run them for a month, and only then decide if you want actuated motion — most people find they don’t. The second mistake is underpowering the transducer off a spare speaker output and concluding the unit is weak; give it a proper amp.
The third is mounting to a flexy surface, which swallows the vibration before it reaches you. And the fourth is buying motion before the rig is rigid — a wobbly frame undermines every cue. Spend in order: rigidity, pedals, wheelbase, then haptics and belt tension. Done this way, a modest budget delivers motion that genuinely makes you more consistent, as the full motion guide explains.
Disclosure: As an Amazon Associate I earn from qualifying purchases. The product search links above point to genuinely stocked gear that fits the budget setups described, at no extra cost to you.
Frequently Asked Questions
What is the cheapest way to add motion to a sim rig?
One large tactile transducer under the seat with a basic amplifier, tuned in free SimHub software. It bolts to an existing frame, needs no floor space, and delivers the highest immersion-per-dollar of any sim racing upgrade.
Can you get sim racing motion on a budget without a platform?
Yes. A staged path of a seat transducer, free software tuning, a pedal-deck detail puck, and a belt tensioner covers both transient and sustained motion for a fraction of an actuated platform, and fits a normal room.
Do budget bass shakers need an amplifier?
Yes. Transducers are passive and need an amp like speakers do. Running one off a spare speaker output at low power is the most common reason a cheap transducer underwhelms; give it a proper dedicated amplifier.
What order should I add budget motion upgrades?
Seat transducer first, then free SimHub tuning, then a pedal-deck detail puck, then a belt tensioner for sustained G. Get rig rigidity, pedals, and wheelbase sorted before any of it, since a flexy frame undermines every cue.
Is a belt tensioner or a motion platform better for a budget?
A belt tensioner. It reproduces sustained braking and acceleration force for a fraction of a 2DOF platform’s cost, makes no noise, and needs minimal space. Most budget racers never need to go beyond transducers plus belt tension.