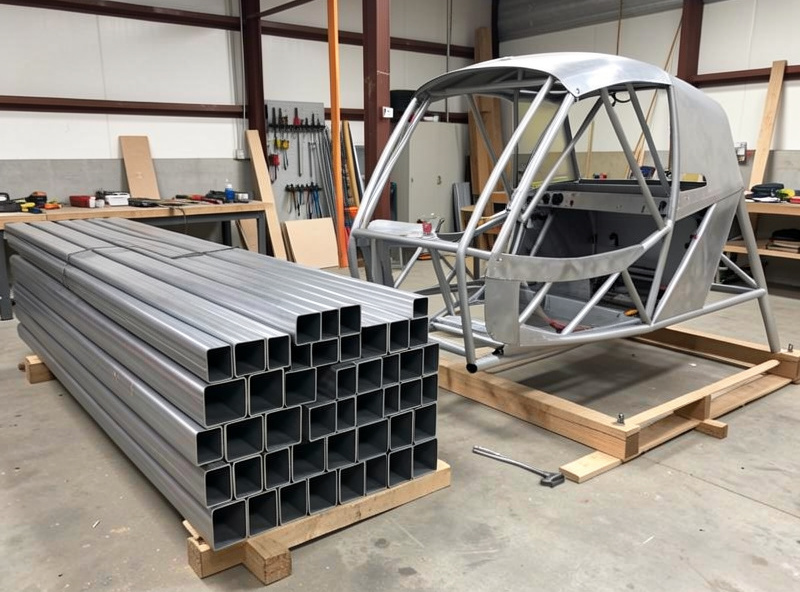
For a home sim rig, 40×40 mm square mild-steel tube with a 2 mm wall is the right default: stiff enough for any prosumer direct-drive base, cheap, light enough to move with help, and easy to weld with a hobby MIG. Go to 3 mm wall only for the pedal deck if you run a heavy hydraulic set, and put the rest of your effort into triangulation, not thicker steel.
Tube sizing is where I see the most wasted money and the most wasted weight. People either buy 50×50×3 because “more is better” and end up with a rig they can’t lift alone that isn’t meaningfully stiffer where it counts, or they grab thin 25 mm tube because it’s cheap and then feel the wheel deck flex under their first hard braking. Neither is necessary. Steel stiffness is mostly about geometry — how far the material sits from the neutral axis — so a slightly bigger tube beats a much thicker wall almost every time. Let me show you the sizes that actually matter and where each one belongs on the frame.
What Size Steel Tube Is Best for a Sim Rig?
40×40 mm square hollow section is the home-rig standard for a reason: it hits the stiffness a direct-drive base needs without the weight and cost of going bigger. I’ve built the main structure of three rigs from it and never once wished for more in the frame rails. Below 40 mm you start feeling flex at the wheel deck; above it you’re adding weight and cost for rigidity you can’t feel.
Square section beats round here for practical reasons beyond stiffness. Flat faces make clamping, drilling, and bolting on interfaces trivial — a round tube wants to roll under the drill and gives you a line contact instead of a face for brackets. Square tube also resists torsion better than round for a given wall in a bolt-and-bracket world, and torsion is exactly the load a sim frame sees. Stick with square or rectangular hollow section graded to a common structural standard like ASTM A500, which is the cold-formed welded carbon-steel tubing your metal supplier stocks. It welds cleanly with 0.8 mm wire and needs nothing exotic.
How Thick Should the Wall Be?
2 mm wall is the sweet spot for the whole frame; step up to 3 mm only for the pedal deck if you’re stomping a stiff hydraulic brake. Wall thickness adds stiffness far less efficiently than outer dimension does, because bending stiffness scales with how far the steel sits from the center, not just how much steel there is. A thicker wall piles material near the neutral axis where it does the least good.
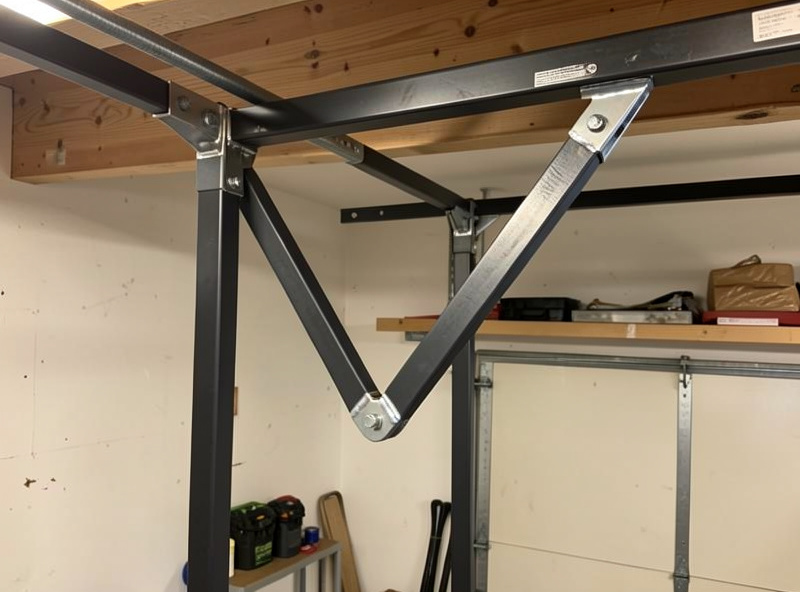
This is the counterintuitive part worth internalizing: the second moment of area — the number that governs how much a beam resists bending — grows dramatically with the tube’s outer size and only modestly with wall thickness. So if you’re choosing between 40×40×3 and 50×50×2 at similar weight, the bigger, thinner tube is usually stiffer in bending. I learned this the hard way on my first pedal deck: I bought 40×40×2 for everything, felt the deck flex under my load-cell brake at 60 kg, and assumed I needed thicker steel. What actually fixed it was a diagonal brace back to the main frame — triangulation — not a thicker wall. That triangulation-over-mass principle runs through the whole welded steel rig build guide, but the lesson belongs here too: geometry beats mass.
Steel Tube Sizes for a Sim Rig, Compared
Here’s how the common sizes actually behave on a rig, from what I’ve built and felt. Match the tube to the job — you don’t need one size everywhere.
| Tube size (mm) | Wall (mm) | Stiffness | Weight | Best use on the rig |
|---|---|---|---|---|
| 25×25 | 2 | Low | Very light | Monitor arms, keyboard trays only |
| 30×30 | 2 | Medium-low | Light | Seat sub-frame, light accessory arms |
| 40×40 | 2 | High | Moderate | Main frame rails, wheel deck, uprights |
| 40×40 | 3 | High+ | Heavier | Pedal deck under heavy hydraulic brake |
| 50×50 | 2 | Very high | Heavy | Overkill for home; big motion-adjacent builds |
The takeaway: 40×40×2 for the structural frame, drop to 30×30 for the light accessory bits to save weight where stiffness doesn’t matter, and only reach for 3 mm wall or 50 mm section in the specific spots that see the highest concentrated load. Mixing sizes intelligently gives you a rig that’s stiff where it counts and not needlessly heavy everywhere else. If you’re weighing this against extrusion instead, my steel tube vs aluminum profile comparison covers that fork.
How Much Steel Do You Need to Buy?
A single-seat cockpit with a wheel deck and pedal deck takes roughly 6 to 8 meters of 40×40 tube, plus a meter or two of smaller section for accessory arms. Buy 10–15% extra — you will miscut, and a mis-mitered joint you try to save always looks like a mis-mitered joint you tried to save.
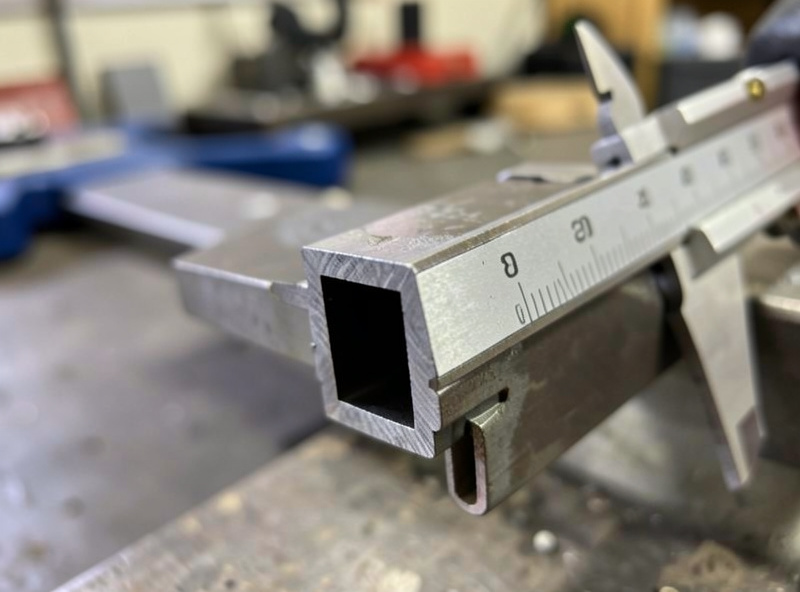
Steel comes in standard lengths, usually 6 meter sticks that your supplier will cut down for transport. I plan the exact cut list in CAD before I buy so I know how the cuts nest into full lengths and don’t over-order — the same up-front planning the full rig build guide insists on before you cut anything. Weigh the cost of a little extra tube against the cost of a second trip to the metal yard mid-build: the extra stick is cheaper than the wasted Saturday. And check the actual wall thickness with a caliper when it arrives — “2 mm” tube from a budget supplier sometimes measures 1.8, which is usually fine for a sim rig but worth knowing before you set your welder.
Does Tube Size Change How Hard It Is to Weld?
Yes, and thinner is actually harder, not easier. Thin-wall tube warps faster and burns through more easily under a hobby MIG, so 2 mm at 18–19 volts with matched wire speed is about as forgiving as it gets. Drop to 1.5 mm and you’re fighting burn-through; jump to 3 mm and you need a hotter setting and slightly slower travel to get penetration.
The practical upshot: 40×40×2 isn’t just the stiffness sweet spot, it’s also the weldability sweet spot for a first-time rig builder. It’s thick enough to be forgiving of a slightly hot bead and thin enough that a small welder runs it cleanly. If you’re new to the torch, that overlap is a gift — you’re learning to weld on the exact material you want structurally. The same welder I built the rig on is one I’ve used for heavier fabrication too — thin structural tube is the easy end of what a hobby MIG handles. For the light bolt-on arms, I often skip welding entirely and print bracketed mounts on my own printer, the 3D-printing bench I keep for exactly these small parts.
Where Should You Buy the Steel, and What Should You Check?
Buy from a local steel supplier or a metal recycler, not a big-box hardware store, because the hardware-store markup on tube is brutal and the selection is thin. A proper steel yard sells 40×40×2 by the meter or the stick at a fraction of the price, and a recycler will often sell you offcuts by weight for pocket change.
My last frame came almost entirely from a scrap-metal dealer’s offcut bin — 40×40 tube left over from someone’s fabrication job, at maybe a third of new-stick prices. The catch with recycled steel is you inspect it yourself: reject anything with deep pitting, a visible bend, or heavy rust scale, because pitting weakens the wall and scale fouls your welds. Surface rust is fine and grinds off in seconds. A slight bow in a long stick you can often use for a short cut where the bow doesn’t matter. Run your hand down each length — you’ll feel a bend before you see it, and you’ll feel pitting as roughness under your palm.
Three things I always check before I hand over money. First, actual wall thickness with a caliper on a cut end, because budget tube labeled 2 mm sometimes measures 1.8, which changes my welder settings. Second, whether the tube is genuinely square in section — cheap tube can be slightly parallelogram, which makes clean miter joints a nightmare and shows up as gaps at the corners. Third, whether it’s galvanized: zinc coating is a hard no for indoor welding without grinding it back to bare steel first, because the fumes are genuinely toxic. Bare mild steel or lightly rusted is what you want. Get those three right at the yard and the build goes smoothly; miss them and you find out mid-weld, which is the worst time to learn your tube is 1.7 mm and burning through.
One more sourcing note: buy all your structural tube in one purchase from one batch if you can. Mixing tube from two suppliers means slightly different wall thicknesses and sometimes different exact outer dimensions, and those small mismatches make your joints fussy. Consistency at the yard saves you fighting the frame on the bench.
Frequently Asked Questions
What size steel tube is best for a sim rig?
For a home rig, 40 by 40 mm square mild-steel tube with a 2 mm wall is the standard: stiff enough for any prosumer direct-drive base, cheap, and easy to weld with a hobby MIG. Below 40 mm you start feeling flex at the wheel deck, and above it you add weight and cost for rigidity you cannot feel.
How thick should the steel tube wall be?
2 mm wall is the sweet spot for the whole frame. Step up to 3 mm only for the pedal deck if you run a stiff hydraulic brake. Wall thickness adds stiffness far less efficiently than outer size, because bending stiffness depends mostly on how far the steel sits from the center, not just how much steel there is.
Is bigger tube or thicker wall stiffer?
Bigger outer dimension, almost every time. The second moment of area that governs bending resistance grows dramatically with the tube’s outer size and only modestly with wall thickness. Between 40x40x3 and 50x50x2 at similar weight, the bigger, thinner tube is usually stiffer in bending.
How much steel tube do I need for a sim rig?
A single-seat cockpit with a wheel deck and pedal deck takes roughly 6 to 8 meters of 40 by 40 tube, plus a meter or two of smaller section for accessory arms. Buy 10 to 15 percent extra to cover the miscuts every build produces, since a second trip to the metal yard costs you a whole session.
Should I use square or round steel tube?
Square, or rectangular hollow section. Flat faces make clamping, drilling, and bolting on brackets trivial, and square tube resists torsion better than round for a given wall in a bracketed rig. Round tube rolls under the drill and gives a line contact instead of a flat face for mounting interfaces.
Related Articles
- Welded Steel Sim Racing Rig: The Complete Build Guide
- Steel Tube vs Aluminum Profile Sim Rig: Honest Rigidity Test
- 80/20 Aluminum Profile Sim Rig: A Complete Build Guide
- Steering Wheel Mounting Options for a Sim Rig