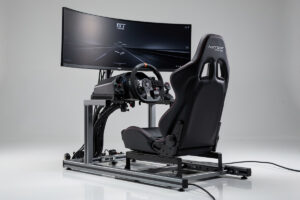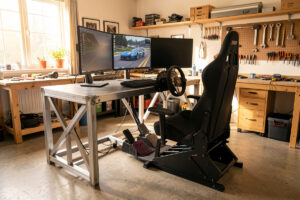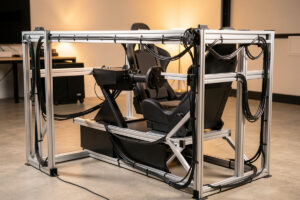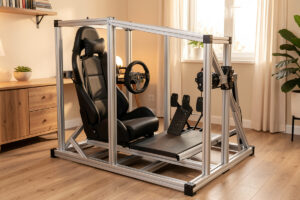
An 8020 aluminum profile sim racing rig is a cockpit built from extruded T-slot aluminum bar bolted together with brackets and T-nuts — no welding, fully reconfigurable, and stiff enough to run any direct-drive base when you size and brace it correctly. A solid 4040-profile build runs roughly $400 to $900 in materials and goes together in an afternoon.
I ran an 8020 aluminum profile rig for a long stretch before I welded my current steel cockpit, and I still recommend the profile route to most people who ask. The 80/20 system — the T-slot extrusion everyone means when they say 8020 — gives you a frame you can take apart, extend, and re-square as your gear changes, which matters far more than people expect when you add a shifter, a second monitor, or a motion kit two years in. This is the full build: which profile to buy, the hardware that actually holds it together, the bolt-up order, and where to add bracing so it never flexes under load.
What 8020 Aluminum Profile Actually Is
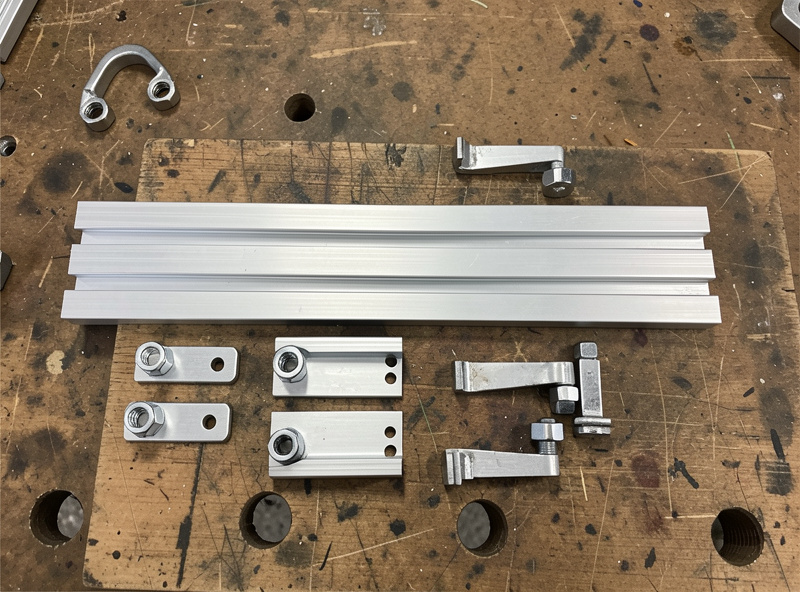
8020 profile is extruded aluminum bar with T-shaped slots running down every face. Those slots accept T-nuts that slide in and lock, so you can bolt brackets, plates, and other lengths of profile anywhere along the bar without drilling a single hole. The system is named for the original manufacturer, but “8020” has become the generic term the way people say it for any T-slot aluminum extrusion of the same standard.
The magic is the slot. Because a T-nut can sit anywhere along a length, the whole frame is adjustable — slide your seat mount back 40 mm, move the pedal plate, raise the wheel deck, all without cutting metal. That adjustability is the single biggest reason to choose profile over welded steel for a first build: you will get the geometry wrong on your first attempt, and with profile, fixing it is a matter of loosening four bolts, not firing up a grinder.
Choosing Your Profile Size
Profile comes in series defined by the slot size and the bar cross-section. The numbers describe the dimensions in millimeters: a 4040 bar is 40 mm by 40 mm with a standard 8 mm slot; a 4080 is 40 mm by 80 mm; the lighter 2040 is 20 mm by 40 mm. For a sim rig that has to hold a strong direct-drive base steady, the structural members want to be 40-series, not 20-series. I built my frame from 4040 with a few 4080 lengths at the highest-load points.
The temptation is to save money with 20-series bar, and for a belt-drive wheel on a light rig you can get away with it. But the moment you bolt a 12 Nm base to a 2040 wheel deck, you will feel the deck twist. Spend the extra on 40-series for the spine of the rig — the main rails, the wheel deck, and the pedal mount — and reserve lighter profile only for non-structural extras like a monitor crossbar or a keyboard tray. The table below is how I size a build.
| Profile Series | Cross-Section | Slot Size | Best Use on the Rig | Direct-Drive Rated |
|---|---|---|---|---|
| 2040 | 20 x 40 mm | 6–8 mm | Monitor crossbars, trays, accessories | Light belt-drive only |
| 4040 | 40 x 40 mm | 8 mm | Main rails, seat base, general frame | Up to ~12 Nm |
| 4080 | 40 x 80 mm | 8 mm | Wheel deck, pedal plate, high-load points | Any consumer base |
| 4040 heavy | 40 x 40 mm (thick wall) | 8 mm | Stiffer main frame on a budget | Up to ~18 Nm braced |
Brackets, T-Nuts, and the Hardware That Holds It Together
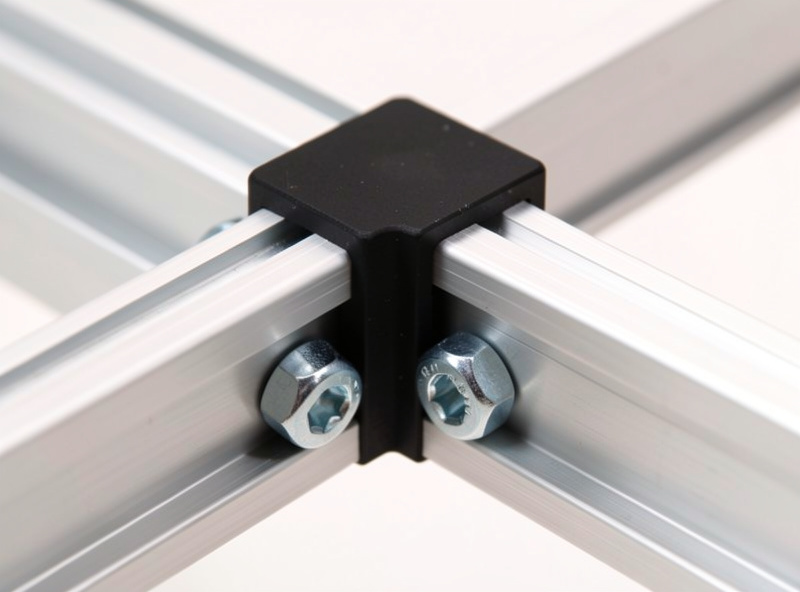
The profile is half the bill; the hardware is the other half, and it is where first-time builders trip. Every joint needs a bracket and the right T-nuts. The two main bracket types are corner brackets (an L-plate that bolts across a 90-degree joint on the outside face) and internal hidden connectors or anchor fasteners that join bars end-to-face from inside the slot. Corner brackets are stronger and easier; hidden connectors look cleaner. I use heavy corner brackets everywhere load matters and save the hidden type for visible accessory mounts.
T-nuts are the detail that catches people: they must match your slot size. An 8 mm slot needs M8-compatible T-nuts; order the wrong size and nothing fits. Drop-in or roll-in T-nuts that you can add after the frame is partly assembled are worth the small premium over end-feed nuts that only slide in from the open end of a bar. Buy a generous box of 8020 T-nuts and corner brackets — you will always use more than you planned, and running out mid-build means a stalled rig.
As an Amazon Associate I earn from qualifying purchases.
The Build Sequence
Order matters when you bolt up a profile rig. Build the base rectangle first — the two long floor rails and the cross members — and get it square with a framing square before you tighten everything down. A frame built out of square will never feel right and will fight you when you mount the seat. Leave every bolt finger-tight until the whole base is assembled, then square it and torque it down in sequence.
From the squared base, add the seat uprights, then the seat itself, then mock up your driving position before you commit the wheel deck and pedal plate heights. This is the step people rush and regret. Sit in the rig, hold a broomstick where the wheel will be, and stretch to where the pedals will sit. Only when the position feels right do you bolt the wheel deck and pedal plate to their final positions. Because it is all profile, you can still slide things later — but getting it close on the first pass saves a lot of fiddling. The mounting specifics for each contact point live in their own guides: the steering wheel mounting options, the pedal plate and heel rest guide, and the seat choice and mounting guide.
Bracing Against Flex
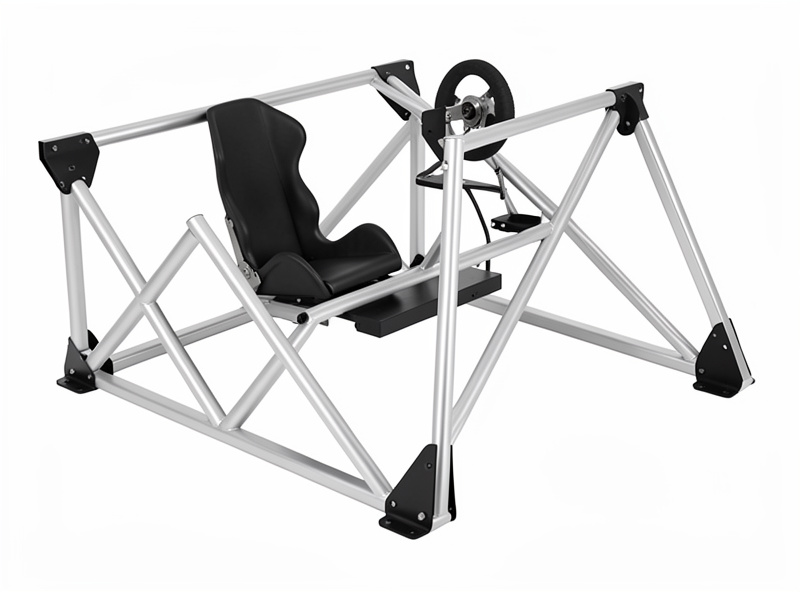
A rectangle made of bolted bar wants to rack — to lean into a parallelogram under side load. The fix is triangulation. Add diagonal gusset plates at the corners that take the most load: the joint where the wheel deck meets the main rails, and the front corners where the pedal plate mounts. Gussets turn a wobbly rectangle into a rigid truss, and they are cheap insurance. On my profile rig, adding two gusset plates at the wheel deck killed almost all of the deck twist I could feel on my telemetry overlay as smeared force traces.
The other bracing trick is doubling up: where a single 4040 bar flexes, two bolted side by side, or a single 4080, will not. Put the mass where the load is. The pedal end deserves the most bracing because braking forces are the largest forces on the rig — a load-cell pedal set can push 60 to 90 kg into the plate, all of it trying to fold the front of the frame forward. Brace there first. If you want the deeper comparison of bolt-together versus a CNC-cut frame, I covered it in the CNC vs bolt-together aluminum rig comparison.
Where 8020 Beats Welded Steel, and Where It Does Not
Welded steel is stiffer per dollar and per kilo, full stop — a welded steel rig will always be the most rigid frame you can build for the money. But profile wins on everything else for most builders. It needs no welder, no grinder, and no shop. It comes apart for a house move. It reconfigures for new gear without cutting metal. And it looks finished out of the box without paint or rust-proofing. The same welder that builds my steel projects welded my current rig, so I went steel — but that is because I already had the kit and the skill, not because profile was not good enough.
If you can weld and you want the absolute stiffest rig and never plan to reconfigure it, build it from steel, and the welded sim-rig design guide walks through cut lists and weld callouts. For everyone else — which is most people — 8020 aluminum profile is the right answer, and it slots straight into the rest of the sim racing rig build guide. Once the frame is up, route your wiring with the cable management guide and mount your screens with the monitor mounting guide.
Frequently Asked Questions
What size 8020 profile do I need for a direct-drive sim rig?
Use 40-series profile for the structural parts. A 4040 bar (40 by 40 mm) handles a base up to about 12 Nm, and 4080 (40 by 80 mm) handles any consumer direct-drive base. Reserve lighter 2040 profile for non-structural extras like monitor crossbars.
Do I need to weld an 8020 aluminum rig?
No. That is the entire point of profile. The bars bolt together with corner brackets and T-nuts that slide into the slots, so the whole rig assembles with hex keys and comes apart the same way. No welding, drilling, or grinding is required.
How much does an 8020 sim racing rig cost to build?
A solid 4040 profile frame runs roughly $400 to $900 in materials, depending on length, the number of brackets, and whether you buy pre-cut bar. That is frame only — the wheelbase, pedals, seat, and screens are separate.
What T-nuts do I need for 8020 profile?
Match the T-nut to your slot size. A standard 40-series profile has an 8 mm slot that takes M8-compatible T-nuts. Drop-in or roll-in T-nuts that you can add after partial assembly are worth the small premium over end-feed nuts that only slide in from the open end.
How do I stop an 8020 rig from flexing?
Triangulate it. Add diagonal gusset plates at the highest-load corners, especially where the wheel deck meets the rails and at the front pedal mount. Doubling up bars or stepping up to 4080 at load points also kills flex. Brace the pedal end most, since braking forces are the largest on the rig.