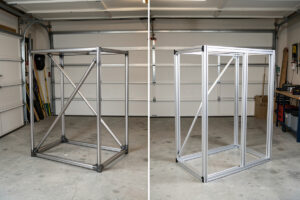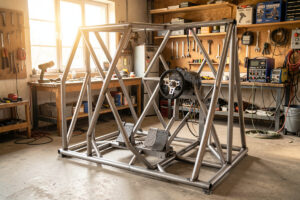
A welded steel sim racing rig is the stiffest cockpit you can build for the money: a mild-steel tube frame, MIG-welded at the joints, that holds a direct-drive base and a load-cell brake dead still under 15+ Nm of torque and 60+ kg of pedal force. Mine cost about $180 in steel and consumables and doesn’t move a millimeter. That last part is the whole point.
I welded my first rig because I was chasing a ghost. I had a mid-torque direct-drive base bolted to a folding aluminum cockpit, and every time I loaded the front on trail-brake the wheel center would wander — not the FFB, the actual frame twisting under my hands. On my telemetry overlay the force trace looked fine; in my hands it felt like the car was made of rubber. Six weekends later I had a rectangular steel-tube frame welded in my garage, and the wander was gone. Not reduced. Gone.
This is the hub for everything I’ve learned building sim rigs out of steel — sizing the tube, designing it in CAD before a single cut, MIG welding the frame, deciding where to bolt and where to weld, killing the last of the flex, and finishing the raw steel so it doesn’t rust onto your carpet. Every deep-dive links out from here. If you’ve only ever bolted 80/20 together, steel is a different animal, and I’ll be honest about where it’s worth the extra work and where it isn’t.
Why Weld a Sim Rig Instead of Bolting Aluminum Profile?
You weld a steel rig for one reason: rigidity per dollar. A welded mild-steel frame is torsionally continuous — the joints are the same material as the tubes, so there’s no bracket, no bolt, no slip plane where energy can hide. That’s the single biggest thing separating a rig that transmits honest force feedback from one that eats it.
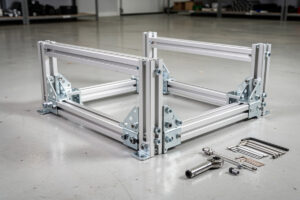
I’ve run all three common approaches side by side in my own garage: a foldable, an 80/20 aluminum-extrusion rig, and the welded steel-tube rig I use daily. The foldable is fine until you feel a real base load it. The 80/20 rig is genuinely good — I still recommend it for anyone who can’t or won’t weld, and I wrote a full 80/20 aluminum profile sim rig build guide for exactly that reader. But aluminum profile relies on gusset brackets and T-nuts at every joint, and under a hard direct-drive base those joints are where the compliance lives. Steel, welded, doesn’t have joints in the same sense.
The honest tradeoff: aluminum profile is reconfigurable, needs no welder, and looks clean out of the box. Steel is cheaper per unit of stiffness, uglier until you finish it, and permanent — cut it wrong and you’re cutting again. If you already own a MIG welder and an angle grinder, steel wins on cost and rigidity every time. If you don’t, factor the tool cost honestly before you decide. I break the frame-flex physics down in detail in the steel tube vs aluminum profile rigidity test.
What Does a Welded Steel Sim Rig Actually Cost to Build?
A complete welded steel frame — cockpit, pedal deck, wheel deck, and seat mounts — runs roughly $150 to $250 in mild steel tube and consumables if you buy new full-length sticks, and closer to $80 if you scavenge from a metal recycler. That excludes the seat, the base, pedals, and monitor stand. It also excludes the welder itself, which is the real gate.
Here’s the breakdown from my last build, in Swedish krona converted roughly to USD. About $120 for six meters of 40×40 mm 2 mm-wall mild steel tube, $20 for a fresh 0.8 mm wire spool, $15 in gas top-up, $10 in flap discs and cut-off wheels, and $15 in bolts for the bolt-on interfaces (seat rails, pedal plate). Call it $180 all-in for the frame. A comparable 80/20 aluminum rig in the same footprint ran me closer to $420 by the time I’d bought the brackets and T-nuts, and a pre-built steel rig from a name brand would have been $500–$900 before shipping.
| Approach | Frame cost (typical) | Torsional rigidity | Tools needed | Reconfigurable? | Best for |
|---|---|---|---|---|---|
| Welded steel tube | $150–$250 | Highest per dollar | MIG welder, grinder, chop saw | No (permanent) | Builders who weld, high-torque bases |
| 80/20 aluminum profile | $350–$500 | High (joint-dependent) | Hex keys only | Yes (fully) | No welder, want to rearrange |
| Folding/tubular kit | $200–$350 | Low–medium | Hex keys only | Partly | Small spaces, mid-torque max |
| Pre-built brand steel rig | $500–$900 | High | None | Limited | No shop, budget flexible |
| Repurposed office/desk | $0–$50 | Very low | None | No | Testing the water only |
The number that matters isn’t the frame cost — it’s cost per unit of stiffness. Steel wins that comparison decisively, which is why I keep coming back to it even though it’s more work. If your budget is tight and you own a welder, this is the cheapest way to a rig that won’t flex under a real base.
What Steel Should You Use for a Sim Rig Frame?
For a home sim rig, 40×40 mm square mild-steel tube with a 2 mm wall is the sweet spot: stiff enough for any prosumer direct-drive base, cheap, and easy to weld with a hobby MIG. I’ve built with 30×30 mm and it flexes noticeably at the wheel deck; I’ve built with 50×50 mm and it’s overkill weight for a home rig you might move.
Square and rectangular hollow section is what you want, not round tube — flat faces make bracket mounting and clamping trivial, and square section resists twist better than round for the same wall thickness. Mild steel graded to a structural tubing standard like ASTM A500 (cold-formed welded structural tubing) is the common cold-formed hollow section your metal supplier stocks, and it welds cleanly with standard 0.8 mm wire. You do not need chromoly, you do not need anything exotic, and you should not use galvanized tube indoors without grinding the coating off the weld zone — the zinc fumes are genuinely dangerous.
Wall thickness is where people either overbuild and add dead weight or underbuild and reintroduce the flex they were trying to escape. I go deep on the exact size-and-wall math, including where a diagonal brace beats a thicker wall, in choosing steel tube size and wall thickness for a sim rig. The short version: 40×40×2 for the main structure, and put your money into geometry and triangulation, not into thicker steel.
Should You Design the Rig in CAD Before Cutting Steel?
Yes — spend an evening in CAD before you spend a Saturday cutting steel. Steel is unforgiving: an aluminum-profile mistake is a 30-second reconfiguration, but a welded joint in the wrong place is an angle-grinder amputation. A dimensioned model catches the mistakes that cost real money and real weekends.
I model every rig in Fusion 360 before I cut. Not for pretty renders — for the cut list and the ergonomics. The model gives me exact tube lengths and miter angles so I cut once, and it lets me sit a mannequin at my real seating position to check pedal-deck angle, wheel height, and seat-to-wheel distance against my actual body. The first steel rig I built without CAD, I set the wheel deck 40 mm too high and lived with a cramped shoulder position for a month before I cut it off and redid it. Never again.
CAD also lets you plan the bolt-on interfaces — the seat rails, pedal plate, and monitor mount — so the welded frame stays a frame and the wear items stay serviceable. I walk through the whole workflow, including how to turn a model into a printable cut list, in designing a sim rig in CAD before you cut steel. The same printer that makes my button-box plates and wheel-side brackets — the 3D-printing bench I keep for exactly this — also prints test jigs so I can check a joint’s geometry in plastic before committing it in steel.
Do You Have to Weld Every Joint, or Will Bolts Hold?
You weld the structural frame and bolt the interfaces. A welded joint is dramatically stiffer than a bolted one because it can’t slip — but you don’t want to weld the seat rails or pedal plate, because those are the parts you’ll adjust and replace. The craft is knowing which joints carry load and which carry adjustment.
In my own testing, a bolted lap joint between two steel tubes has measurable play under a hard base load no matter how tight I torque it — the bolt clamps friction, and friction slips. A welded joint of the same two tubes is effectively one piece. So every joint that resists the wheelbase reaction torque and the pedal thrust gets welded; every joint I need to move — seat position, pedal-deck angle, monitor height — gets bolted through captive nuts or nut-plates so it stays serviceable. I put real numbers to the bolted-vs-welded stiffness gap in bolt-on vs welded sim rig joints, because “just weld everything” is bad advice and so is “bolt it, it’s fine.”
How Do You MIG Weld the Frame Without a Pro Shop?
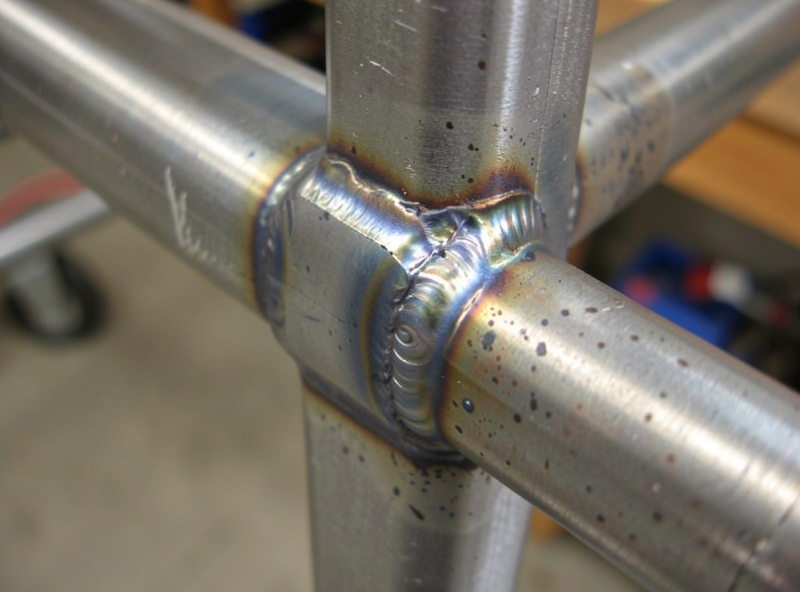
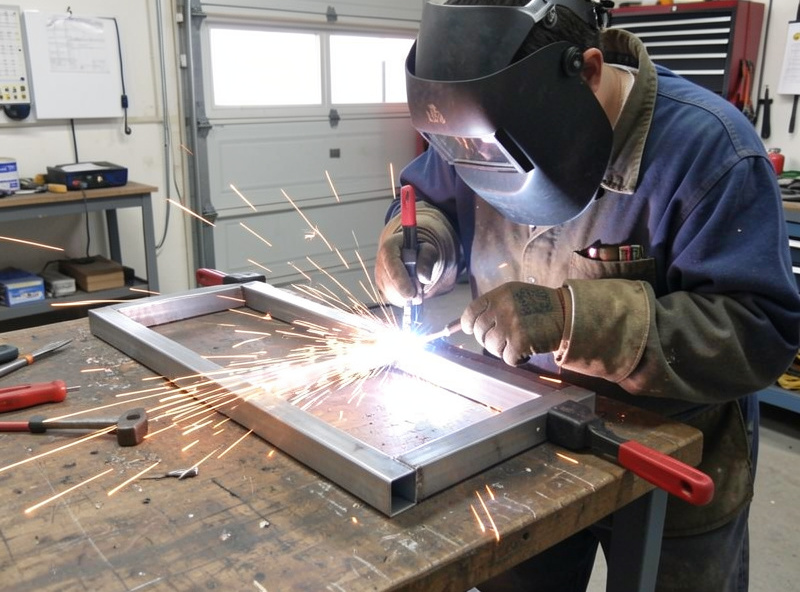
A hobby MIG welder running 0.8 mm wire on 2 mm mild steel is all you need for a sim rig — this is thin structural steel, not a truck chassis. I run mine at around 18–19 volts with wire speed to match, on 75/25 argon-CO2 gas, and lay short stitch welds at each joint rather than one long bead so the thin tube doesn’t warp from heat.
The rig I race on was welded on my own MIG in a Swedish garage, clamped square on a scrap-steel bench, tacked at all four corners first, checked for square with a framing square, then filled in. The single biggest beginner mistake — one I made on my first frame — is welding a full bead down one side of a joint before tacking the opposite side, which pulls the whole frame out of square as the weld cools and contracts. Tack everything, check square, then weld in a balanced sequence. The American Welding Society‘s structural welding code AWS D1.1 covers the fundamentals of sound structural welds if you want the formal reference, though for a sim rig you’re nowhere near that demand.
The full step-by-step — machine settings, joint prep, tack sequence, and the “your first three welds will look terrible and that’s fine” reality — is in MIG welding a sim rig frame: a builder’s walkthrough. The same welder and the same technique that built my sim-rig frame is the one I’ve used on heavier projects — rigidity under load is rigidity under load, whether the load is a direct-drive base or a boat trailer.
How Do You Eliminate Frame Flex Once It’s Welded?
Frame flex on a welded rig almost always comes from three places: an unbraced wheel deck cantilevered too far forward, a pedal deck that isn’t triangulated back to the main frame, and the frame’s feet flexing on carpet. Fix those with diagonal bracing and you’ve killed 90% of the movement.
Even a welded frame flexes if the geometry is wrong. On my rig the last bit of wheel wander came from the wheel-deck upright being a straight cantilever — the tube itself was bending, not any joint. Adding a single diagonal brace from the top of the upright back down to the main rail stiffened it more than doubling the wall thickness would have. Triangulation beats mass, every time. I also feed my telemetry overlay while I load the frame by hand: if the wheel center moves when I twist the rim against a locked base, the overlay shows me exactly where, and I chase the flex to its source. That diagnostic method plus the full brace-placement guide is in how to eliminate frame flex in a sim rig.
One more source people miss: the rig-to-floor interface. A stiff frame on soft carpet on adjustable feet can rock, and that rock reads as flex in your hands. Wide feet, a rig bar across the front, or a plywood base plate under the whole thing cures it. Rigidity is a system, not a single tube.
Paint, Powder Coat, or Leave It Raw?
Raw mild steel will surface-rust in a humid room within weeks, so you finish it — the only question is how much effort. A rattle-can etch primer plus enamel topcoat is the cheap, do-it-tonight answer; professional powder coat is the durable, do-it-once answer that costs more and means you can’t easily modify the frame afterward.
I’ve done both. My daily rig is rattle-can matte black over self-etching primer, and after two years it still looks fine because I degreased and scuffed properly before painting — prep is 90% of the result. I powder-coated a second frame because I wanted it to survive being moved between rooms without chipping, and it’s tougher, but I had to strip and re-drill a mount later and cursed the coating the whole time. Leaving steel raw with just an oil or wax finish is a legitimate industrial look if you accept re-oiling it and never resting a sweaty forearm on bare metal. The full decision — surface prep, primer choice, and why powder coat fights future modifications — is in finishing a steel sim rig: paint, powder coat, or raw.
What Order Should You Build and Upgrade the Rig In?
Build the frame first, then pedals, then the wheelbase, then the rim — same order I preach for any sim rig, because rigidity and pedals decide whether you can even feel an upgrade. A $1,000 base on a flexing frame feels worse than a mid base on a stiff one. Get the steel right and everything you bolt to it works harder.
The rig is the foundation, and that’s why it’s the hub of this whole cluster. Once the frame is stiff and finished, your pedals matter more than your base — I’d put a load-cell brake before a torque upgrade, and I make that case in hydraulic vs load-cell brake. Then comes matching the base torque to your frame and your room; my guide to how much wheelbase torque you actually need keeps you from overspending on Nm your rig can’t even transmit honestly. Where you mount the wheel and how you rig the monitors comes last: my wheel mounting options and monitor mounting and FOV guide both assume the stiff steel foundation you just built.
One system-level note that competitors skip: the frame isn’t the only thing that has to be rigid and low-latency. The wired ethernet run from my sim PC straight to the router matters as much as the weld quality for how the car feels — Wi-Fi is for laptops, not racing. If you’re building the whole cockpit properly, wire it like you welded it.
What Tools Do You Actually Need to Build a Steel Rig?
The real gate on a welded steel rig isn’t skill, it’s four tools: a MIG welder, a way to cut steel square, a way to clean welds, and a way to hold parts still. Everything else is nice-to-have. Miss any of the four and the build gets miserable fast.
Here’s my honest shortlist from building three of these. A hobby MIG welder in the 140–180 amp range runs 2 mm steel all day; you do not need a 250-amp industrial machine for tube this thin, and I’ve welded entire frames on a small gasless flux-core unit when my gas bottle ran dry. A metal chop saw or a 4.5-inch angle grinder with cut-off wheels handles cutting — the chop saw gives you clean square cuts fast, the grinder is cheaper and slower and throws more sparks. Buy the chop saw if you can; a crooked cut is a bad weld waiting to happen. The angle grinder pulls double duty for cutting, grinding welds flush, and cleaning mill scale off the joint before you weld, which genuinely matters for weld quality.
Then the parts everyone underrates: clamps and a flat welding surface. A frame welds square only if you hold it square while it cools, and steel moves as it cools whether you’re watching or not. I built a cheap welding table from a slab of 6 mm plate on a scrap frame, and a fistful of F-clamps and a couple of magnetic squares do the rest. My first rig I tried to eyeball the corners and tack them freehand — it came out 4 mm out of square across the wheel deck, enough that the monitor stand leaned visibly. Clamp everything. Check it with a framing square and a tape measured corner-to-corner both ways before you commit a single full weld.
Safety kit is not optional and I won’t pretend otherwise: an auto-darkening welding helmet, welding gloves, and a respirator or good cross-ventilation, because even mild steel puts out fumes you don’t want in your lungs. The smell of hot steel and flux is part of the job; the metallic taste at the back of your throat means your ventilation is bad and you should stop. I keep a fire extinguisher within arm’s reach and clear the sparks’ path before every session — a stray grinding spark found a cardboard box in my garage once, and once was enough to make me paranoid in a useful way.
Frequently Asked Questions
Do I need welding experience to build a steel sim rig?
No. A sim rig is thin 2 mm mild-steel tube welded with a hobby MIG, which is about as forgiving as structural welding gets. If you can lay a stitch weld and clamp a frame square, you can build a rig. Your first few welds will look rough and still hold fine, because a sim rig sees a fraction of the load these joints are capable of.
How much does a welded steel sim rig cost to build?
Roughly 150 to 250 US dollars in mild-steel tube and welding consumables for the frame, buying new full-length sticks, and closer to 80 dollars scavenging from a metal recycler. That excludes the seat, pedals, wheelbase, and monitor stand, and it assumes you already own a MIG welder and an angle grinder.
What size steel tube is best for a sim rig?
For a home rig, 40 by 40 mm square mild-steel tube with a 2 mm wall is the sweet spot: stiff enough for any prosumer direct-drive base, cheap, and easy to weld with a hobby MIG. Put your money into triangulation and geometry rather than thicker walls.
Is a welded steel rig stiffer than 80/20 aluminum profile?
Per dollar, yes, because welded joints cannot slip the way bolted aluminum-profile joints can under a hard direct-drive base. A well-braced aluminum rig is still very good, but its compliance lives at the bracketed joints. If you own a welder, steel gives you more rigidity for less money.
Do I have to finish the steel, or can I leave it raw?
You should finish it. Raw mild steel surface-rusts within weeks in a humid room. A self-etching primer plus enamel rattle-can topcoat is the cheap answer, powder coat is the durable one, and a bare oiled finish works only if you accept re-oiling it and never resting bare skin on the metal.
Can I move a welded steel rig, or is it too heavy?
A 40x40x2 frame in a single-seat footprint weighs enough to feel solid but is still a two-person lift, not a one-person carry. If you know you will move rooms often, either design bolt-together sub-frames into the CAD model up front or accept that steel is a permanent, stay-put choice compared to a folding aluminum rig.
Keep Building
- Steel Tube vs Aluminum Profile Sim Rig: Honest Rigidity Test
- Choosing Steel Tube for a Sim Rig: Size and Wall Thickness
- Designing a Sim Rig in CAD Before You Cut Steel
- MIG Welding a Sim Rig Frame: A Builder’s Walkthrough
- Bolt-On vs Welded Sim Rig Joints: Which Is Stiffer?
- How to Eliminate Frame Flex in a Sim Rig
- Finishing a Steel Sim Rig: Paint, Powder Coat, or Raw?
As an Amazon Associate I earn from qualifying purchases. If you’re shopping for the build, a hobby MIG welder and a metal chop saw are the two tools that make this project realistic at home — you can compare current hobby MIG welders and metal cutting chop saws to get started.