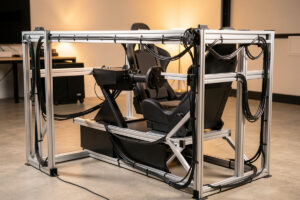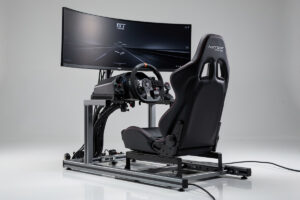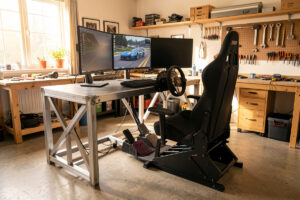
A sim racing rig build comes down to one thing before anything else: rigidity. A frame that flexes under a 9 Nm direct-drive base will wash out the exact force-feedback detail you paid for, so the money belongs in the frame and the mounts first, not the wheel rim. I learned that the hard way before I welded my own.
I run a DIY welded steel-tube cockpit I built in my own shop, and before that I ran an 80/20 aluminum-extrusion rig and a folding wheel stand side by side. That gives me a baseline most reviewers never get: I have felt the same wheelbase and the same pedals bolted to three different frames, and the difference between a stiff rig and a wobbly one is not subtle. This guide is the whole build, in the order I would do it again, with each major decision broken out into its own deep-dive.
Why the Frame Decides Everything Else
The frame is the single component that touches every other part. Your wheelbase, pedals, seat, and shifter all transfer load into it, and whatever the frame does with that load is what your hands and feet feel. A torsionally rigid frame returns the force-feedback signal cleanly; a flexible one smears it into a vague, springy mush that telemetry will show as rounded-off force traces.
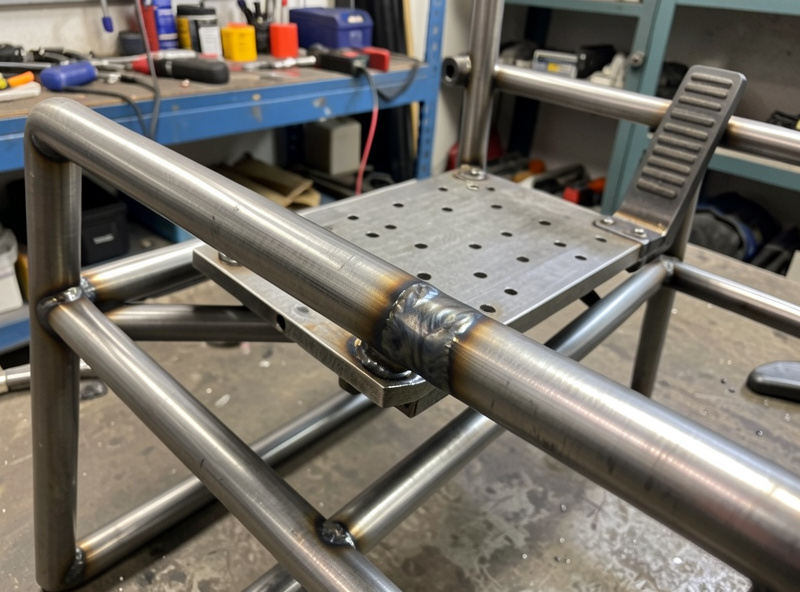
Here is the part the spec-sheet crowd misses: under hard braking on a load-cell pedal set, you can push 60 to 90 kg of force into the pedal deck. If that deck or the front of the frame moves even a few millimeters, the whole rig rocks, the wheel torque shifts in your hands, and your braking point wanders lap to lap. Rigidity is not a luxury — it is what makes the rest of the rig measurable. On my telemetry overlay, the single biggest consistency jump I ever logged came from stiffening the pedal mount, not from a fancier base.
The Upgrade Order That Actually Matters
If you take one thing from this hub, take the order: frame first, pedals second, wheelbase third, rim last. Most people invert this completely — they buy a flashy GT3-replica rim and a strong base, then bolt it to a folding stand that turns the whole thing into a trampoline. The result feels worse than a mid-torque base on a rigid frame.
The logic is simple. A rigid frame is the prerequisite that lets every later upgrade actually register. Pedals are where lap time hides, because braking is the hardest input to repeat and a load-cell brake measures force instead of travel. The wheelbase determines how much honest detail reaches your hands, but only after the frame can hold it still. The rim is feel and ergonomics — real, but the smallest performance lever of the four. Spend the way you would build any machine that has to stay accurate under load: foundation, then the parts that carry force, then the interface.
I cover the contact points individually below, but the spending priority is the through-line of this entire build.
Choosing Your Frame: Welded Steel vs 80/20 Aluminum vs Folding
There are three honest paths to a rig frame, and I have run all three. Welded steel is the stiffest per dollar and the most permanent. The 80/20 aluminum profile route — extruded T-slot bar bolted together with brackets and T-nuts — is the modular favorite for good reason: no welder needed, infinitely reconfigurable, and stiff enough for almost anyone if you brace it right. A folding wheel stand is the cheapest entry and the easiest to store, and it is also where flex lives.
The table below is how I would summarize the trade-offs after living with each. None of these is wrong — the right one depends on whether you can weld, how much you will reconfigure, and whether the rig has to fold away between sessions.
| Frame Type | Rigidity | Cost Range | Reconfigurable | Best For |
|---|---|---|---|---|
| Welded steel tube | Highest | $150–$400 in steel | No (cut and weld to change) | Permanent rig, you can weld |
| 80/20 aluminum profile | High (with bracing) | $400–$900 | Yes, fully | Most builders, no welder |
| Pre-built aluminum kit | High | $500–$1,200 | Yes, within the system | Bolt-together, no sourcing |
| Folding wheel stand | Low | $120–$250 | Limited | Small spaces, belt-drive |
If you cannot weld, the 80/20 aluminum profile build is the path I steer most people toward, and it has its own complete walkthrough — sizes, brackets, gussets, and the bolt-up sequence — in the 80/20 aluminum profile sim rig guide. The same welder that builds my boat frames welded my sim-rig frame, and if you want to go that route, the cut-list and welding-callout approach is covered in the sim rig welding design guide.
Mounting the Four Contact Points
A rig is really four mounting problems: the wheel, the pedals, the seat, and the shifter. Each one transfers load differently, and each one has its own spoke in this cluster because each is deep enough to get wrong on its own.
The wheel deck has to resist the base trying to twist itself off its mounts under peak torque — a strong direct-drive base will physically rotate a weak deck. Your options run from a flat top-mount plate to a side-mount cantilever, and the choice changes how stiff the deck needs to be. I break the whole decision down in the steering wheel mounting options guide.
The pedals fight you in the opposite direction: they push forward and down, not in rotation, so the pedal plate and its bracing are about resisting a long lever trying to fold the front of the rig. A heel rest changes your whole braking geometry too. That is its own deep-dive in the pedal plate and heel rest guide.
The seat sets your entire driving position, which sets your arm reach, your pedal angle, and whether you can actually brace against the load. A bucket seat on rails versus a formula-style reclined position is not just comfort — it changes how you transmit force. The full breakdown is in the seat choice and mounting guide.
The shifter and handbrake are the fourth contact point, and unlike the wheel and pedals they bolt to the frame rather than to a deck. An H-pattern or sequential shifter takes a surprising sideways load when you bang a fast upshift, so it wants a stiff bracket clamped to the main rail at the height your hand falls to naturally without leaving the wheel — mount it too low or too far back and you will fight it on every gear change. A handbrake for rally and drift wants the same solid mounting and a position you can yank without hunting for it mid-slide. Both are owned-and-mounted territory on my rig, not spec-sheet guesses, and whether you actually need a handbrake at all is a firsthand verdict — I break down the placement, the upright-versus-horizontal mounting debate, and the do-you-really-need-one question in the shifter and handbrake guide.
Displays, FOV, and Where the Monitor Mounts
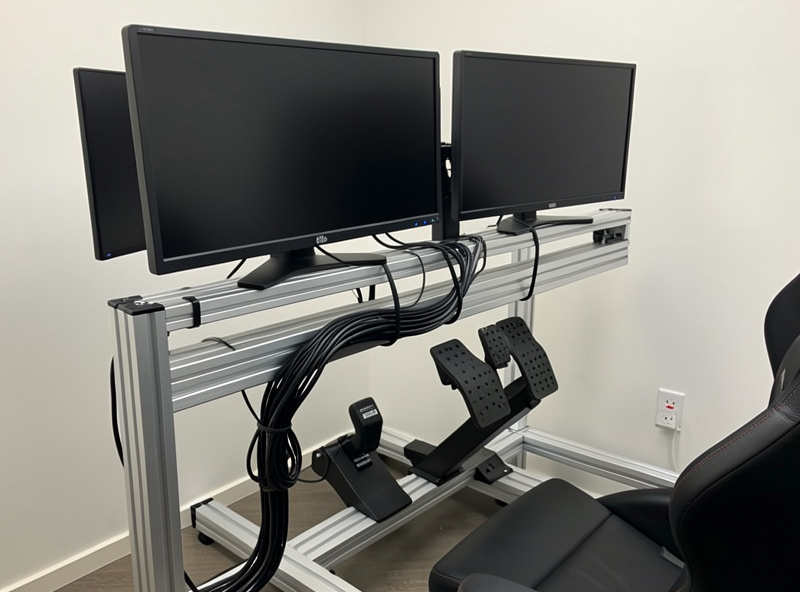
The display is part of the rig structure, not a separate purchase you bolt on afterward. A triple-monitor array or a heavy ultrawide on a poorly braced stand will shake every time the FFB kicks, and a shaking screen is its own kind of immersion killer. Mounting the monitors to the rig itself — or to a separate, equally rigid stand — keeps the image steady and lets you set the geometry properly.
That geometry is FOV, and most home setups get it badly wrong. Field of view is a math problem set by your screen size and your eye-to-screen distance, and when you solve it correctly the car suddenly feels the right size and your braking references stop lying to you. The mounting distances and bracing are in the sim rig monitor mounting guide, and the geometry side lives in the FOV calculator guide. If you are still deciding between triples and a single ultrawide, the triple vs ultrawide comparison is the place to start.
Cable Management and the Network Are Part of the Build
A finished rig has a dozen cables — base power, pedal USB, wheel data, shifter, handbrake, button box, monitor power and signal, shaker amp, PC link. Left loose, they snag your pedals, pull on connectors, and turn a clean cockpit into a hazard. Routing them along the profile channels with clips and sleeve is a 30-minute job that makes the rig feel finished and keeps a yanked cable from corrupting a session.
The network matters more than people think, too. I run wired ethernet straight from the sim PC to the OPNsense router — the same box that segments my IoT VLAN puts the sim PC on a low-latency wired link, because Wi-Fi is for laptops, not racing. A few milliseconds of jitter is the difference between a clean draft and a disconnect in online racing. The cable routing walkthrough is in the cable management for sim rig guide, and the connection side is in the sim racing internet setup guide.
Sourcing Hardware and Printed Brackets
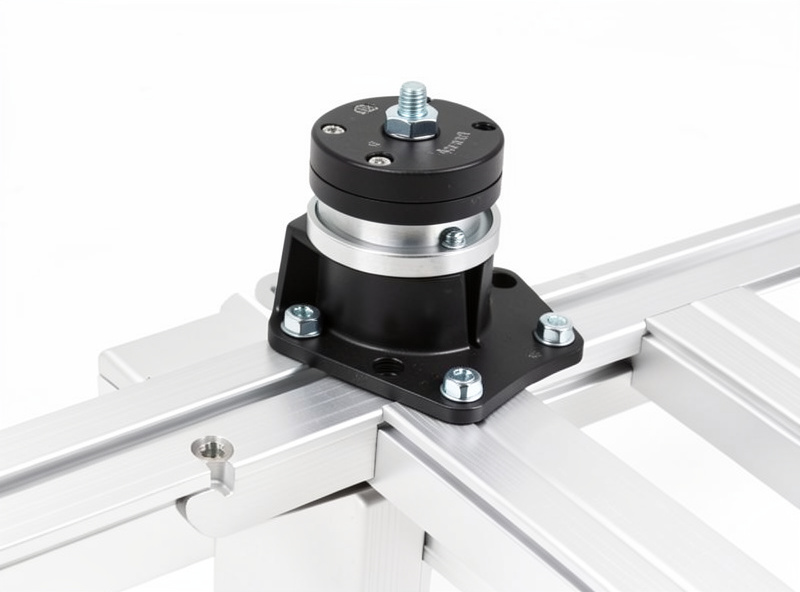
Half of a good build is the small hardware — T-nuts, brackets, gussets, and fasteners. For an 80/20 build you will buy a lot of aluminum extrusion brackets and T-slot hardware, and getting the right T-nut size for your profile series is the detail that trips up first-time builders. Many of the wheel-side brackets, button-box plates, and small mounts on my rig came off my own 3D printer — the same printer that prints my other shop parts — so if you have a printer, the bracket cost drops to pennies in filament.
As an Amazon Associate I earn from qualifying purchases.
For the structural parts you would not print — the profile bar itself, heavy-duty monitor stands and mounts, and the seat rails — buy once and buy stiff. The frame and the mounts are the parts you should never have to revisit.
Budgeting the Whole Build
A complete rig spans a wide range, and the smart move is to spend in the upgrade order above rather than blow the budget on a single hero part. A genuinely good entry rig — rigid frame, load-cell pedals, mid-torque direct drive, a single solid display — lands roughly in the $1,200 to $2,000 range if you build the frame yourself, and most of that is the base, pedals, and screen, not the frame.
The frame is the cheapest structural part and the one that protects every other dollar, which is exactly why building it well first is the highest-leverage decision in the whole project. Skimp on the base before the frame and you will feel a mush you cannot tune out; skimp on the frame and you will never know how good the base actually is. For a broader look at where a full setup fits together, the complete sim racing setup guide and the cockpit and stand guide both add context, and the force-feedback tuning guide is what you read once the rig is bolted together and you are ready to dial it in.
The Driving Position Comes First
Before any bolt goes in, decide your driving position, because everything else dimensions off it. A GT or touring-car position sits you fairly upright with the wheel higher and closer, knees bent more, the way you would sit in a road-based race car. A formula position lays you back with legs stretched out nearly horizontal and the wheel in your lap. These are not interchangeable, and a rig built around one feels wrong set up for the other.
Get the position right and the rest of the build falls into place: the seat angle sets the pedal distance, the pedal distance sets where the pedal plate bolts, and the seat height plus your eye line sets the monitor height. I built my rig around a slightly reclined GT position because it is the most versatile for the iRacing and ACC GT3 cars I run most, and I left enough adjustment range in the seat rails to stretch toward a formula position when I jump into open-wheel. The mistake is building the frame to a fixed geometry and discovering later that you cannot reach the pedals comfortably without your knees fouling the wheel deck. Mock up the position in a real chair with a broomstick for a wheel before you cut or order a single piece of frame.
What You Need Before the First Bolt
An 80/20 aluminum build needs surprisingly little: a chop saw or miter saw with a metal-cutting blade (or a supplier who cuts to length for you), a set of hex keys, a deburring tool, a tape measure, and a square. That is genuinely the whole tool list for a bolt-together profile rig, which is a big part of why it is the path I recommend to most people. A welded steel build needs a MIG welder, a chop saw, an angle grinder, and the skill to lay a clean structural bead — the same kit I use for every other steel project in my shop, which is exactly why welding my rig was a natural move for me and is not for someone who has never struck an arc.
Plan the build on paper or in CAD before you buy. Measure your space, including the swing room you need to get in and out and the depth the monitors and pedals will eat. A rig is bigger in the room than it looks in a product photo — a full triple-screen cockpit can occupy a footprint close to two square meters once you account for the seat travel and the screen depth. Knowing your numbers before you order means you cut once and bolt once instead of discovering the rig does not fit the room after it is built.
Common Rig-Build Mistakes I See Constantly
The same handful of errors come up again and again, and every one of them traces back to ignoring rigidity or ignoring geometry. The most common is buying the strong base before the strong frame — a 12 Nm direct-drive bolted to a flimsy deck feels worse than an 8 Nm base on a rigid one, because the flex eats the very detail the bigger base produces. The second is under-bracing the pedal end, where the largest forces actually live; the pedals deserve more bracing than the wheel deck, not less.
The third recurring mistake is mounting monitors to a separate cheap stand that shakes independently of the rig, so the image judders every time the wheel loads up. The fourth is wrong FOV — running a field of view far too wide because the correct number looks uncomfortably zoomed-in at first, which throws off every braking and apex reference. And the fifth is leaving cables loose, which sounds trivial until a pedal catches a USB lead mid-corner and drops your brake input. None of these cost money to avoid; they cost attention at build time, which is exactly what this cluster is here to give you.
Future-Proofing: Haptics and Motion
A rig you build well is a rig you can grow. The cheapest and highest-impact add-on is tactile feedback: a bass shaker or tactile transducer bolted to the seat or frame translates engine, road, and lockup vibration into something you feel through the chassis, and it bolts to any rigid frame with a single bracket. I run a shaker on mine and consider it one of the best dollar-for-immersion upgrades on the whole rig — the detail it adds in the motion and haptics layer is real and measurable in how early you can catch a slide.
Full motion is the genuine deep cut above prosumer gear. Motion-platform owners report that an actuated rig changes how you read grip — you feel weight transfer and kerbs through your body rather than only your hands — but it demands a frame engineered for the loads and forces a whole separate set of decisions about power and bracing. I would not start there. Build the rigid static rig first, add a shaker, dial in your FFB, and only then think about whether motion is worth the cost and complexity for how you actually race. A frame built stiff from the start is one you can hang almost anything on later.
Frequently Asked Questions
Do I need to weld my own sim racing rig?
No. Welded steel is the stiffest frame per dollar if you can weld, but an 80/20 aluminum profile rig bolts together with brackets and T-nuts and reaches near-welded rigidity when you brace it properly. Most builders go aluminum profile because it needs no welder and stays fully reconfigurable.
What is the correct upgrade order for a sim rig?
Frame first, pedals second, wheelbase third, rim last. A rigid frame lets every later upgrade actually register, pedals are where braking consistency hides, the wheelbase sets how much detail reaches your hands, and the rim is the smallest performance lever of the four.
How much torque can a sim rig frame really need to handle?
A strong direct-drive base produces 8 to 20 Nm of torque and will physically try to twist a weak wheel deck off its mounts. Under braking, a load-cell pedal set can push 60 to 90 kg of force into the pedal deck, so the frame must resist both rotation at the wheel and forward folding at the pedals.
Is a folding wheel stand good enough to start?
For a belt-drive or gear-drive wheel, a folding stand works and stores away easily. But it flexes noticeably under a strong direct-drive base, which smears the force-feedback signal. If you plan to run direct drive, build or buy a rigid frame instead.
How much does a complete sim racing rig cost to build?
A solid entry rig with a rigid self-built frame, load-cell pedals, a mid-torque direct-drive base, and one good display lands roughly between $1,200 and $2,000. Most of that is the base, pedals, and screen — the frame itself is the cheapest structural part.
Should the monitors mount to the rig or a separate stand?
Either works as long as it is rigid. Mounting monitors to the rig keeps the screens moving with you and saves floor space, while a separate heavy stand isolates screen shake from the frame. The non-negotiable is that the mount does not wobble when the force feedback kicks.