An elastomer stack is the set of rubber and polyurethane bumpstops behind a load-cell brake pedal that shapes how the pedal feels — how far it travels, how progressively the resistance builds, and where it goes solid. Stacking pieces of different hardness in the right order turns a light-switch pedal into a progressive one you can actually modulate, and it’s the cheapest meaningful upgrade in sim braking.
The first time I tuned a proper stack, threshold braking stopped feeling like a coin-flip. There was suddenly a firm shelf right at the edge of lockup that my foot could sit on — I could hear the stack load up and go firm as I approached full pressure. That “shelf” is what a real brake pedal has and what a bare load cell lacks. For the price of a bag of rubber, you can buy it. Here’s how the pieces work and how to order them.
What Is an Elastomer Stack and Why Does It Exist?
An elastomer stack exists to give a load-cell brake a progressive, car-like resistance. A load cell only needs to sense force, so left bare the pedal would barely move — you’d push against a near-solid sensor with no travel to modulate against. The stack adds controlled travel and a rising rate, so early pressure meets soft resistance and peak pressure meets a firm wall.
A real hydraulic brake in a car doesn’t move far, and it gets firmer as line pressure builds — that progressive ramp is exactly what your foot uses to meter braking. Cheap sim pedals skip this: a little foam squish, then a hard stop, with nothing in between. The stack rebuilds the ramp. By combining a soft element (early give) with progressively firmer ones (the wall), you create a pedal that tells your foot where it is in the braking range.
This is why the stack is central to the whole brake pedal tuning chain. It’s the mechanical feel layer that sits between your force setting and your curve. Get it right and you may not need a curve at all; get it wrong and no software setting will save the feel.
What Does Durometer Mean for Brake Feel?
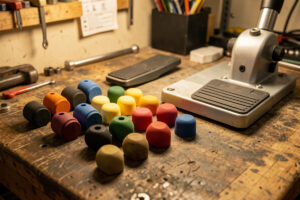
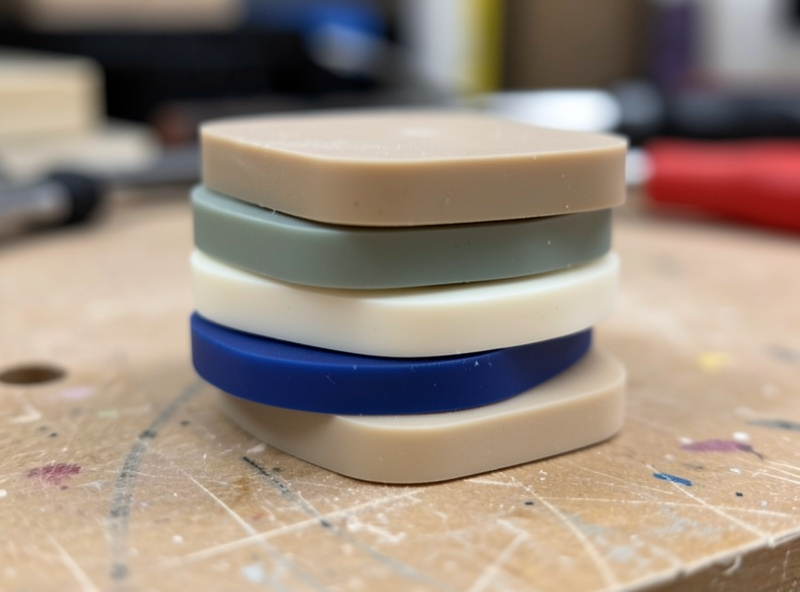
Durometer is a measure of how hard an elastomer is — higher numbers are firmer. Softer pieces (low durometer) compress early and give the pedal its initial travel and give; firmer pieces (high durometer) resist late and form the solid wall at full pressure. Mixing durometers is how you build a progressive ramp rather than a single abrupt stiffness.
You don’t need to memorize exact numbers, but understanding the roles helps you buy and order the pieces:
| Element | Relative hardness | Role in the stack | Feel it creates |
|---|---|---|---|
| Foam / soft rubber | Softest | Early travel and initial give | Light, gentle first contact |
| Medium elastomer | Mid | Builds the mid-range ramp | Progressive loading zone |
| Firm polyurethane | Firm | Approaches the wall | Strong reference near threshold |
| Hard / solid stop | Hardest | Defines full pressure | The firm shelf at 100% |
A short, firm stack gives a stiff pedal with little travel — fast and precise but tiring, and it drifts less over time. A taller, softer stack gives more travel and a gentler feel that’s easier for newcomers but takes a bigger compression set. There’s no universally right answer; it’s a feel preference, and it’s worth trying both.
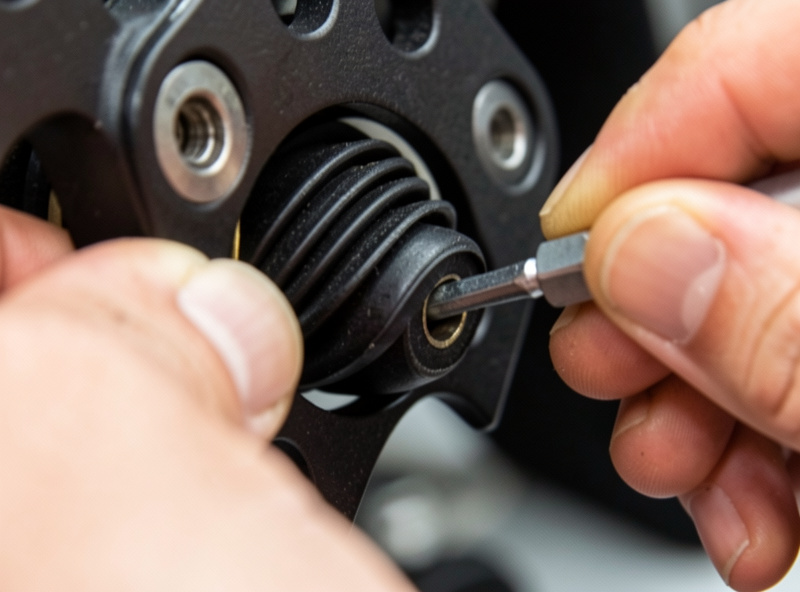
What Order Should I Stack the Elastomers In?
Stack softest first (closest to where the pedal starts moving) and firmest last (against the solid stop). Soft-to-firm order is what creates a progressive ramp: your foot meets gentle resistance early and rising resistance as it pushes. Reverse it — firm in front of soft — and you kill the progressive feel, because the hard piece dominates from the first millimetre.
This is the single most common mistake, and I made it myself the first time. I put a firm piece where I could see it, at the front, figuring firmer meant better. The pedal felt like a brick wall with a weird soft afterthought behind it — all bite, no modulation. Flipping the order so the soft element led and the firm one anchored the back transformed it into the progressive ramp I was after. Order matters more than which exact pieces you use.
If your kit came with a printed suggested order, start there, then experiment one swap at a time. And if you 3D-print your own spacers or retainers to hold an unusual stack, that’s a legitimate DIY path — I cover printed pedal parts in the DIY brake pedal mods guide.
How Do I Set Preload on the Stack?
Preload is how much the stack is compressed before you even touch the pedal, set by tightening the retaining nut or bolt. More preload means a firmer initial pedal and less free travel; less preload gives a softer, longer initial feel. Set it so the pedal has no slop at rest but still offers a clear, modulatable early travel.
Too little preload leaves a dead zone at the top where the pedal moves but nothing happens — you lose the light-braking region. Too much and the pedal feels stiff from the very first contact, erasing the gentle initial give the soft element is supposed to provide. I set mine by backing off until there’s a hint of slop, then snugging up just past that point so rest position is firm but the early ramp survives. It’s a feel adjustment; a few minutes of trial gets it.
After any preload or stack change, recalibrate your force setting — the point where 100% brake lands will have moved. That interaction is exactly why I treat the stack and the force ceiling as one job, not two.
Can I Build a DIY Elastomer Stack Cheaply?
Yes — you can build a capable stack from hardware-store polyurethane bumpstops and rubber spacers for a fraction of the price of branded “tuning kits.” As long as you can source pieces in a few hardness levels and fit them to your pedal’s retainer, a DIY stack performs the same job: a soft-to-firm progressive ramp.
I’ve built stacks from generic urethane bumpers meant for cabinet doors and machinery, sorted by feel into soft, medium, and firm, then ordered soft-to-firm behind the pedal. The result was indistinguishable from a boxed kit costing several times more. The only thing you’re really buying with a branded kit is pre-sorted, labelled durometers and a retainer that fits — convenient, not magic. If you want off-the-shelf options, an elastomer tuning kit saves sourcing time, but the DIY route works.
As an Amazon Associate I earn from qualifying purchases.
Whichever route you take, buy a range of hardnesses so you can experiment. The whole point of a stack is tunability, and you can’t tune with one piece.
How Does Changing the Stack Affect My Other Settings?
Changing the stack shifts where full travel and full force land, so it directly affects your force calibration and can change what curve you want. A firmer stack reaches 100% force with less travel, so you’ll usually recalibrate the force ceiling and may soften the bottom of your curve to keep fine control. Never change the stack without re-checking downstream settings.
When I moved to a firmer stack for a shorter, more precise pedal, three things changed at once: the pedal went solid sooner, my old force ceiling suddenly clipped, and my linear curve felt slightly grabby at initial application. I recalibrated the ceiling, softened the bottom 15% of the brake curve, and re-verified on the telemetry overlay. Ten minutes of downstream work, but skipping it would have left the pedal feeling worse, not better — and I’d probably have blamed the stack.
So treat a stack change as the start of a short re-tune, not a standalone tweak. The stack, the force ceiling, and the curve are three settings on one system.
What is a brake pedal elastomer stack?
It is the set of rubber and polyurethane bumpstops behind a load-cell brake pedal that shapes how the pedal feels: how far it travels, how progressively resistance builds, and where it goes solid. Stacking pieces of different hardness in order turns a stiff, light-switch pedal into a progressive one you can modulate.
What order should I stack brake elastomers?
Stack softest first, closest to where the pedal starts moving, and firmest last against the solid stop. Soft-to-firm order creates a progressive ramp, so your foot meets gentle resistance early and rising resistance toward full pressure. Reversing the order, firm in front of soft, kills the progressive feel.
Can I make a DIY elastomer stack?
Yes. You can build a capable stack from hardware-store polyurethane bumpstops and rubber spacers in a few hardness levels for a fraction of the price of a branded kit. Sort them by feel into soft, medium, and firm, then order them soft-to-firm behind the pedal. A branded kit mainly buys you pre-sorted, labelled durometers.
Do I need to recalibrate after changing the elastomer stack?
Yes. Changing the stack shifts where full travel and full force land, so it affects your force calibration and may change the curve you want. A firmer stack reaches full force with less travel, so recalibrate the force ceiling and re-check your curve on telemetry after any stack change.
What I’d Do Starting Today
Buy a range of elastomer hardnesses — branded kit or hardware-store bag, either works — and build a soft-to-firm stack behind your brake. Set preload so there’s no slop but a real early ramp, then recalibrate your force ceiling. Do this before you touch a single software curve; the mechanical feel is the foundation everything else sits on.
The stack is where sim braking stops feeling like a game input and starts feeling like a brake. Pair it with the right force setting and solid pedal bracing, and the full picture is in the brake pedal tuning hub.
Related:
- Sim racing brake pedal tuning: the complete guide
- Load cell brake force: how many kilograms should you set?
- Brake pedal curve tuning for consistent threshold braking
- How to brace pedals so hard braking doesn’t move them
- DIY brake pedal mods that actually help