Your brake pedal is the single most tunable thing on a sim rig, and almost nobody touches it. Swap a travel-based pedal for a tuned load cell and most drivers cut their lap-to-lap braking variance by more than half within an afternoon — not by buying a more expensive wheelbase, but by dialing in the force curve, the elastomer stack, and the bracing behind it. Get those three right and your threshold braking gets repeatable within a lap or two.
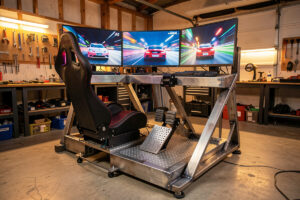
I run a load-cell pedal set as my daily on a steel pedal deck I welded into the rig myself, and I’ve had a hydraulic set bolted on next to it for months to settle the “is it worth it” argument. Here’s the thing most spec-sheet reviewers miss: the pedal is where lap time actually lives. You can feel a wheelbase’s torque in the first corner, but you find the last three tenths in whether you can hit the same brake pressure into Turn 1 lap after lap after lap. That’s a tuning problem, and it’s one you can solve for the price of a bag of rubber bumpstops.
This guide is the map for the whole cluster. I’ll walk the full chain — how sim pedals actually sense your foot, how much force to set, how to shape the brake curve, what the elastomer stack does, how to stop the pedals walking away under load, and where hydraulic genuinely beats load cell (spoiler: less often than the marketing says). Each section links to the deep-dive where I go further.
Why Does the Brake Pedal Matter More Than the Wheelbase?
The brake pedal matters more than the wheelbase because braking is the highest-precision input you make, and it’s the one input where the hardware directly limits how repeatable you can be. A wheelbase communicates the car; the brake pedal is where you control it. On a 12 Nm base with a mushy potentiometer brake, I’m slower than on a 5 Nm base with a well-tuned load cell.
Here’s why. Threshold braking — getting to the edge of lockup and holding it — is a force target, not a position target. Your foot is far better at reproducing a pressure (say, “push like I’m standing on a bathroom scale reading 40”) than reproducing a distance (“push the pedal down exactly 18 mm”). That’s the whole reason load-cell pedals exist and why they changed sim braking. A potentiometer pedal reads travel; your ankle is a lousy ruler. A load cell reads force; your leg is a decent scale.
Once you accept that, the tuning priorities fall out naturally. The order I actually follow — and the order I’d tell anyone building a rig — is rig rigidity first, then pedals, then wheelbase, then rim. Most people do it exactly backward, spending on a fancy rim while their pedals flex the whole desk. If you want the full argument on that upgrade order, it’s woven through every section below, but the short version is: fix the foot before you fix the hands.
Potentiometer, Load Cell, or Hydraulic: How Do Sim Pedals Sense Braking?
Sim pedals sense braking one of three ways: a potentiometer or Hall sensor reading pedal travel, a load cell reading applied force, or a hydraulic cylinder that builds real fluid pressure against a load cell. Travel-based pedals are cheapest and least consistent; load cells are the modern standard; hydraulics chase the last few percent of realism at a steep price.
I’ve run all three. On my first rig, years ago, the whole set was potentiometer-based, and I could never brake the same twice — not because I was bad, but because the sensor rewarded a moving target. Switching to a load cell was the single biggest jump in my consistency I’ve ever measured on my telemetry overlay, bigger than any wheelbase upgrade. Here’s how the three technologies actually stack up:
| Sensing type | What it measures | Consistency | Typical price band | Best for |
|---|---|---|---|---|
| Potentiometer / Hall | Pedal travel (position) | Low — ankle angle is hard to repeat | Entry (bundled sets) | Casual driving, first rig |
| Load cell | Applied force (kg/lb) | High — you target a pressure | Mid ($200–$400 sets) | The 95% sweet spot for hobbyists |
| Hydraulic + load cell | Real fluid pressure vs force | Very high, with progressive feel | Premium ($500–$1,000+) | Owners chasing the last few percent |
| DIY load-cell mod | Force, retrofitted | High once calibrated | Cheap (upgrade an old set) | Builders on a budget |
Manufacturers like Fanatec and Moza Racing now put load cells even on their mid-tier bundled sets, which tells you where the market landed. If you’re still on a travel-based brake, that’s your first upgrade — ahead of any wheelbase. And if money’s tight, you can retrofit a load cell to an old pedal for cheap; I cover the specifics in the DIY brake pedal mods guide.
How Much Brake Force Should You Actually Set?
Set your brake force so that 100% braking lands at a peak force you can hit hard but hold precisely — for most people that’s somewhere in the 30–50 kg range at the load cell, not the 90 kg the hardware can read. Setting the ceiling too high wastes half your pedal in a range you never use; too low and you lock up by breathing on it.
This is the number people get most wrong. The load cell in a good pedal might be rated to 90 or 100 kg, and beginners assume they should use all of it. You shouldn’t. If your 100% output happens at 90 kg, you’ll spend races nowhere near the top of the range, so your fine control all lives in a narrow band and threshold braking feels twitchy. I set mine so full lock arrives at roughly the force of standing my full weight through my leg — firm, but modulatable. Then I re-check it on the telemetry overlay to confirm I’m using the top 90% of the range without clipping the input.
The exact kilogram number is personal — it depends on your leg, your seat angle, and how your deck is braced. I go deep on how to find your number, how to set it in the pedal software versus in-sim, and why you should re-calibrate after any bracing change, in load cell brake force: how many kilograms should you set. Start there before you touch anything else.
What Does a Brake Curve Do, and Is Linear Always Right?
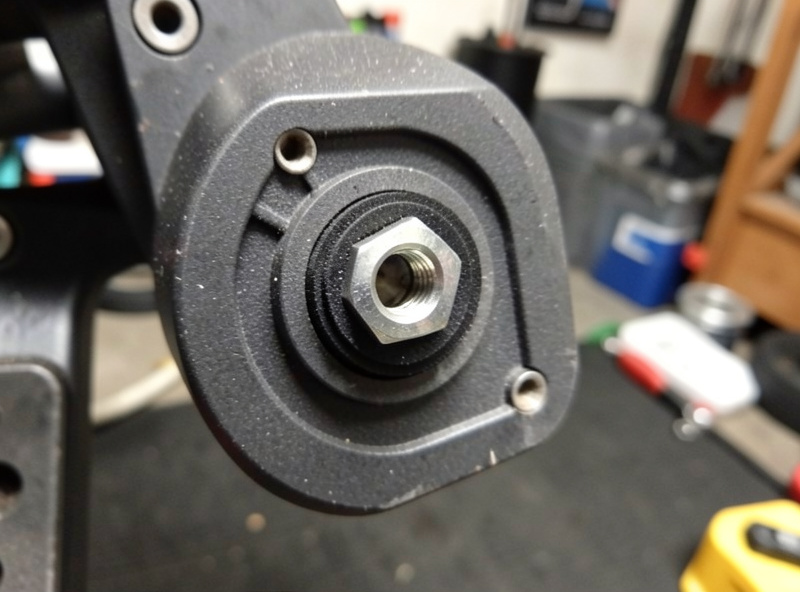
A brake curve maps how your applied force translates into in-sim brake input. A linear curve gives 1:1; an S-curve softens the initial bite and the top end; a progressive curve makes the first part of the travel less sensitive so you can trail-brake finely. Linear is the right default, but it is not always right — and knowing when to bend it is a real skill.
Most drivers should start linear and leave it there until they have a specific complaint. The mistake I see is people flattening the curve to mask a hardware problem — a pedal that flexes, or a force ceiling set wrong — when the fix is mechanical, not a software band-aid. That said, once your hardware is honest, a gentle curve tweak can genuinely help. When I moved to a stiffer elastomer stack, I softened the bottom 15% of my curve so initial application wasn’t so abrupt, and my trail-braking got smoother without losing threshold feel.
Curves also change per title. AMS2 and rFactor 2 report brake pressure differently than iRacing does, so a curve I love in one feels grabby in another. I keep separate profiles. The full walkthrough — reading a brake trace, spotting when a curve is hiding a hardware fault, and setting per-title profiles — is in brake pedal curve tuning for consistent threshold braking.
What Do Elastomer Stacks Do to Brake Feel?
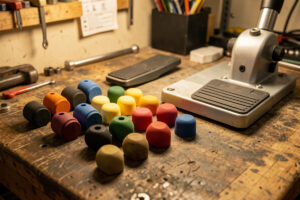
An elastomer stack is the set of rubber and foam bumpstops behind a load-cell brake pedal that determines how the pedal feels as you push — how far it travels, how progressive the resistance is, and where it goes solid. Swapping elastomers is the cheapest, most effective way to change brake feel, and it’s the tuning knob most people never learn exists.
A real car brake pedal doesn’t move much and gets progressively firmer as pressure builds. Cheap sim pedals feel like a light switch: a little squish, then a wall. The elastomer stack is how you fix that. By stacking rubber pieces of different durometers — softer material first, firmer behind it — you build a progressive ramp that gives your foot somewhere to modulate. The first time I tuned a proper stack, threshold braking stopped feeling like a coin-flip; there was suddenly a “shelf” my foot could sit on right at the edge of lockup.
The variables are durometer (how hard each piece is), stack order, and preload. Get the order wrong — firm in front of soft — and you kill the progressive feel entirely. I explain durometer numbers, good starter stacks, and the ordering rules in elastomer stacks explained: tuning brake pedal feel. It pairs directly with the force setting above; change the stack and you’ll usually want to re-check your kilogram target.
Why Do My Pedals Move Under Hard Braking?
Your pedals move under hard braking because the force you’re applying — often 40 kg or more — exceeds what the pedal mount and rig frame can resist without flexing or sliding. If the whole assembly walks forward when you stand on the brake, every braking zone starts from a different geometry, and consistency is impossible. Bracing is the fix, and it’s usually free.
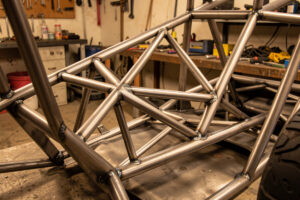
This is the silent killer of new rigs. People buy a great load-cell set, bolt it to a flimsy foldable frame, and wonder why their braking is inconsistent. The pedal itself is fine; the rig is moving. When I A/B tested this on a foldable versus the welded steel deck, the difference on my brake trace was night and day — on the flexy frame, peak pressure wandered because I was subconsciously chasing a target that physically shifted under me. I welded a heel plate and cross-braced the pedal deck; you can hear the difference before you even check the trace — the dull thud of a solid stop instead of the hollow rattle of a deck flexing against its bolts — and the wander disappeared.
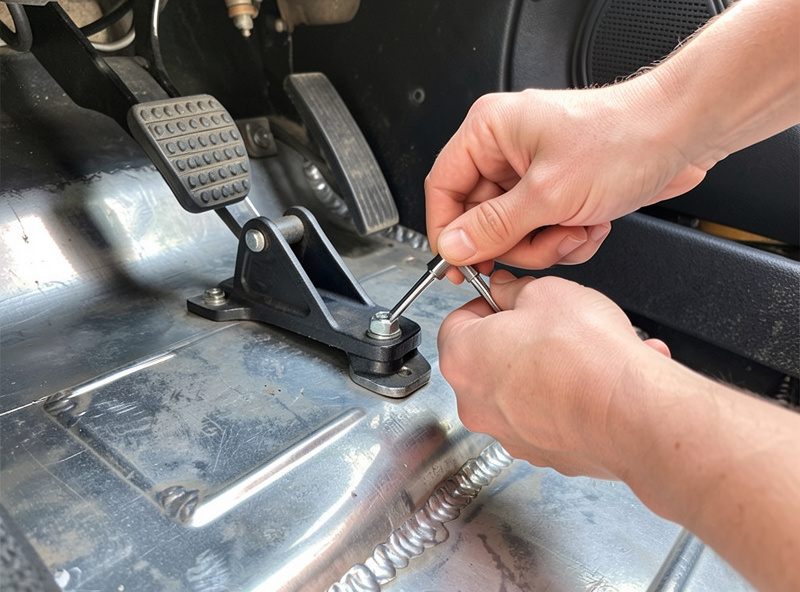
You don’t need a welder to fix this — though the same welder that builds my other projects welded this rig, and a bolted brace works nearly as well. Wedging the deck against a solid wall, adding a foot plate, or bracing to the seat frame all help. The full set of bracing techniques, from no-tools wedging to a proper welded plate, is in how to brace pedals so hard braking doesn’t move them. Do this before you blame your curve.
Which DIY Brake Mods Actually Help?
The DIY brake mods that actually help are the ones that address force sensing, feel, and rigidity: retrofitting a load cell to a travel-based pedal, building or swapping an elastomer stack, printing a rigid pedal-face spacer or heel rest, and bracing the deck. The mods that don’t help are cosmetic — anodized covers and pedal plates that change nothing your foot can feel.
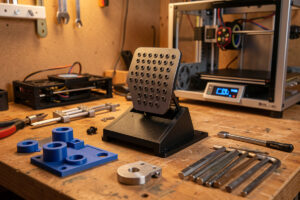
I’ve done most of these on the bench. My favorite cheap win is a 3D-printed pedal spacer that repositions the brake face for my leg length — it came off the same printer that makes my button-box plates and wheel-side brackets. A few grams of PETG fixed an ergonomic problem that no amount of software could. Another is a DIY elastomer stack built from hardware-store bumpstops for a fraction of the branded “tuning kits.”
The rule I follow: spend effort where your foot can feel it. A load-cell retrofit changes everything; a carbon-look pedal plate changes nothing. I rank the mods by actual benefit-per-hour, with print files and material notes, in DIY brake pedal mods that actually help. If you print your own brackets, you can also grab rig-part ideas from my notes over at PrintForgeHQ.
Hydraulic vs Load Cell: Is Hydraulic Worth the Money?
For the vast majority of sim racers, hydraulic brakes are not worth the money over a well-tuned load cell — the consistency gain is small and the tuning burden is higher. Hydraulics deliver a genuinely more progressive, more “real car” feel, but a good load cell with a proper elastomer stack gets you most of the way there for a fraction of the cost.
I ran a hydraulic set alongside my load-cell daily for months specifically to answer this. The hydraulic pedal does feel better — the pressure builds like a real master cylinder, and there’s a fluid progressiveness a rubber stack only approximates. But when I looked at my lap times and my brake-trace consistency, the difference was within my normal noise. The load cell wasn’t holding me back. What held me back was, and always is, tuning and practice.
Hydraulics also add maintenance — fluid, bleeding, the occasional weep — and they demand rock-solid bracing because the forces are higher. If you’ve already maxed your load-cell tuning and you have money burning a hole, sure. Otherwise, spend it on seat time. I lay out the honest cost-benefit, including where hydraulic genuinely wins, in hydraulic vs load cell brake: the diminishing-returns verdict.
What About Throttle and Clutch Pedal Tuning?
Throttle and clutch tuning is the part almost everyone skips, and it costs corner-exit speed and clean starts. The throttle needs a linear, well-calibrated curve and enough resistance to modulate; the clutch needs a proper bite-point calibration so your dual-clutch launches are repeatable. Neither is a load cell, but both reward the same careful setup you give the brake.
People obsess over the brake and leave the throttle at whatever the software shipped. That’s a mistake — wheelspin on exit is often a throttle-modulation problem, not a car-setup problem. I add a little spring resistance to my throttle so my ankle has something to push against, which makes fine throttle application on corner exit far more consistent. For the clutch, calibrating the exact bite point turned my race starts from a lottery into something I can actually repeat.
If you run an H-pattern shifter or do dual-clutch launches, the clutch calibration is worth an afternoon. I cover throttle curves, spring mods, and clutch bite-point setup in throttle and clutch pedal tuning most people skip. It’s the easiest lap time you’re currently leaving on the table.
How Do I Know If My Brake Input Is Clipping?
Your brake input is clipping when you hit 100% brake before you reach the pedal’s mechanical limit — the trace flat-lines at the top and any extra force does nothing. It’s the braking equivalent of FFB clipping, and it destroys threshold control because your foot has run out of resolution exactly where you need it most. You diagnose it on a telemetry overlay by watching the brake trace pin at 100% while you’re still pushing harder.
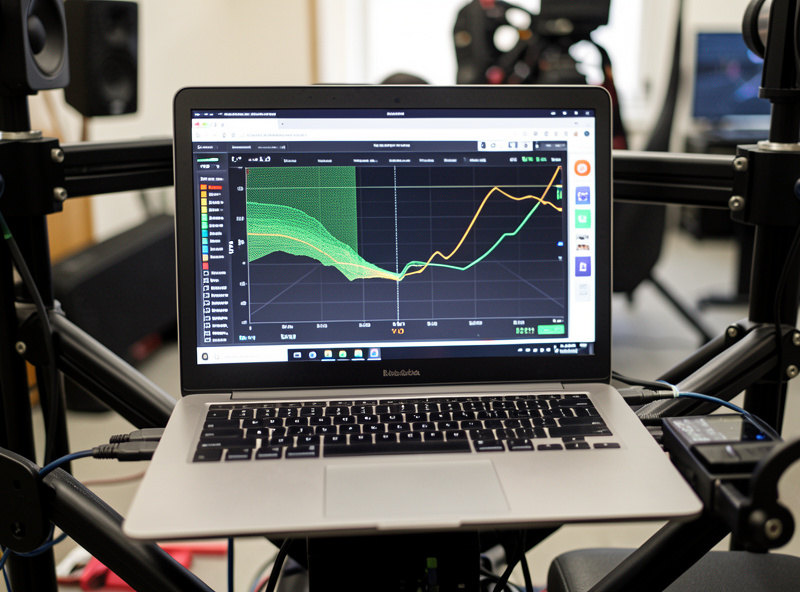
This is where the telemetry overlay earns its keep. I pull up the brake channel and do a few hard stops. If the trace slams to 100% and sits there like a table edge, my force ceiling is set too low — I’m saturating the input before the lockup point. If it never gets near 100% even when I stand on it, the ceiling’s too high and I’m wasting range. The goal is a trace that reaches 100% right at the pedal’s hard stop, using the full sweep in between. The first time I saw my own trace clipping, it explained months of inconsistent Turn 1 braking in one glance — I’d been fighting a hardware setting, not my technique.
Do this in each sim you race. Because AMS2, rFactor 2, and iRacing scale brake pressure differently, a ceiling that’s perfect in one can clip in another. Five minutes with the overlay per title beats a season of guessing.
Does Seat and Pedal Geometry Change How I Brake?
Yes — seat angle, distance to the pedals, and the pedal face angle all change how much force your leg can apply and how precisely you can modulate it. A pedal set that’s too close makes you brake with your ankle; set at the right distance, you brake with your whole leg through the seat, which is both stronger and far more repeatable. Geometry is tuning too, and it’s free.
The principle is that you want to push against the seat, not against your own body weight. If your seat’s too upright or the pedals are too close, hard braking pushes you back into the seat instead of loading the pedal, and your force target gets mushy. I run a fairly reclined seat with the pedals set so my leg is only slightly bent at full brake — that lets me drive force through my heel and hip rather than just flexing my ankle. When I got this right, my repeatable peak force jumped without any change to the pedal itself.
This is also why bracing and geometry interact. A 3D-printed pedal-face spacer or a repositioned heel plate can fix a geometry problem that’s quietly wrecking your consistency — another cheap DIY win covered in the mods guide. Get your body position sorted before you blame the hardware.
How Often Should I Re-Calibrate the Brake?
Re-calibrate your brake force any time you change the elastomer stack, move the pedals, alter your seat position, or change bracing — and spot-check it every few weeks even if nothing changed, because elastomers take a compression set over time. A stack that felt perfect two months ago will have softened slightly, shifting where your 100% lands.
This trips people up. They tune everything perfectly, then months later their braking drifts and they assume they’ve lost form. Usually it’s the rubber. Elastomers — especially softer foam pieces — compress permanently with use, so the effective force curve creeps. I re-check my calibration on the overlay roughly monthly and always after any mechanical change. It takes five minutes and saves a lot of second-guessing. When I finally started logging my calibration alongside my stack config, I stopped chasing ghosts and started actually trusting the pedal.
The other trigger is a new title or a major sim update — physics changes can shift how brake pressure is interpreted. Treat any of those events as a reason to pull up the trace and confirm you’re still using the full, un-clipped range.
The Brake Tuning Order I’d Actually Follow
If I were setting up a pedal set from scratch tomorrow, here’s the order: brace the deck first, then set the force ceiling, then tune the elastomer stack, then shape the curve, and only then think about throttle and clutch. Skipping straight to the curve — which is what most people do — is tuning on top of a moving foundation.
Bracing comes first because every other setting depends on the pedal staying put; if the deck flexes, your force calibration is a lie. For that, start with bracing your pedals. Then set the brake force ceiling so you’re using the full useful range. Next, tune the elastomer stack for a progressive feel, re-check the force, and finally refine the brake curve per title. Budget-limited? The DIY mods get you 90% of the way for pocket change, and if you’re deciding whether to spend big, read the hydraulic vs load cell verdict before you buy. Then don’t forget throttle and clutch.
One more thing the influencer videos skip: none of this shows up unless you can measure it. I diagnose every change on a telemetry overlay, watching the brake trace for clipping and for how repeatable my peak pressure is lap to lap. Titles like iRacing expose enough telemetry to prove a setting rather than feel your way to it. Tune with data, not vibes.
How much brake force should I set on a load-cell pedal?
Set 100% braking to land at a peak force you can hit hard but hold precisely, usually somewhere in the 30 to 50 kg range at the load cell rather than the 90 kg the hardware can read. Setting it too high wastes range you never use; too low and you lock up too easily. The exact number is personal and depends on your leg, seat angle, and bracing.
Are load-cell pedals worth it over potentiometer pedals?
Yes. A load cell reads applied force instead of pedal travel, and your leg reproduces a pressure far more consistently than it reproduces a distance. Moving from a travel-based brake to a load cell was the single biggest jump in braking consistency I have measured, bigger than any wheelbase upgrade. It should be your first upgrade, ahead of the wheelbase.
Do I need hydraulic brake pedals?
For most sim racers, no. A hydraulic pedal feels more progressive and more like a real master cylinder, but a well-tuned load cell with a proper elastomer stack gets you most of the way there for a fraction of the cost and with no fluid maintenance. Spend the money on seat time unless you have already maxed your load-cell tuning.
Why do my pedals slide forward when I brake hard?
Because the braking force exceeds what the pedal mount and rig frame can resist without flexing or sliding. The pedal itself is usually fine; the rig is moving. Bracing the deck against a wall, adding a foot plate, or cross-bracing to the seat frame fixes it, and it is usually free.
Should my brake curve be linear?
Start linear and leave it there until you have a specific complaint. A gentle curve tweak can help once your hardware is honest, but many people flatten the curve to mask a mechanical problem like a flexing pedal or a wrong force ceiling, when the real fix is mechanical. Curves also differ per title, so keep separate profiles.
Where to Start Today
If you take one thing from this guide: the brake pedal is a tuning problem, not a shopping problem. Before you spend a krona on new hardware, brace your deck and set your force ceiling properly — two free changes that will do more for your lap times than a wheelbase upgrade. Then work down the chain, measuring each change on telemetry so you know it actually did something.
Keep building:
- How to brace pedals so hard braking doesn’t move them
- Load cell brake force: how many kilograms should you set?
- Elastomer stacks explained: tuning brake pedal feel
- Brake pedal curve tuning for consistent threshold braking
- DIY brake pedal mods that actually help
- Throttle and clutch pedal tuning most people skip