Creating a Sim Racing Space That Works
A well-designed simulator room keeps you in the seat longer and protects your body while you’re there. On the rig I welded in my workshop, I can run a two-hour iRacing stint and stand up without back pain — and that didn’t happen by accident. The lighting, the cable routing, the pedal position, and the ambient temperature all contribute to whether you finish the race or quit halfway through because something hurts or something’s flickering in your peripheral vision. This isn’t decoration. It’s part of the build.
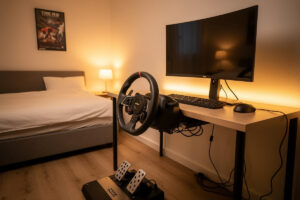
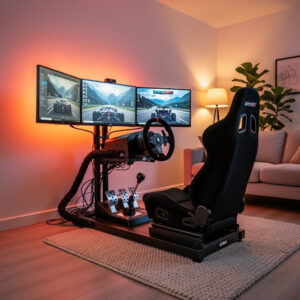
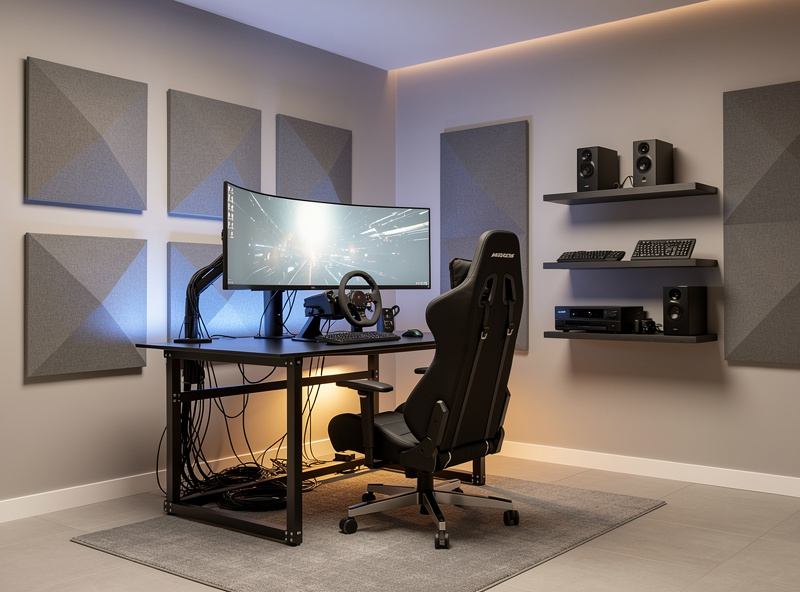
Dedicated vs. Shared Spaces: I’ve run both. Before I built the permanent welded cockpit, I was on a foldable stand in a shared room — and I raced about half as often. Setup friction kills sessions. Every minute you spend hauling out the stand, plugging in USB cables, and re-clamping the wheelbase is a minute of motivation bleeding away. The permanent rig I have now lives in a dedicated corner, and my triple monitors never move. If a dedicated room isn’t possible, a quality foldable stand with a single cable bundle you can plug in at once brings the startup time down to maybe five minutes. The key is reducing the number of individual steps between you and the grid.
Lighting That Doesn’t Fight Your Eyes: Behind my triple-monitor setup I run a bias LED strip set to roughly 6500K — matching the native white point of my screens. The difference in eye strain between bias-lit and a pitch-black room is real, and it’s not subtle. Complete darkness forces your pupils to constantly adapt between bright display content and a dark surround; after forty minutes you feel it as a dull ache behind the eyes. Avoid direct glare on the screens — any light source you can see reflected in the panel when it’s off needs to move. I also keep a small adjustable lamp aimed at my button box and shifter so I can find controls by feel or glance without hunting.
Acoustic Control on a Budget: The biggest surprise when I built out my space was how much the rig itself transmits noise. My bass shaker — bolted directly to the steel frame under the seat — turns the whole cockpit into a low-frequency resonator. Rubber isolation pads under each corner of the rig cut the floor transmission enough that my downstairs neighbor stopped texting me during late-night ACC sessions. For room reflections, a heavy curtain behind the monitors and a throw rug on the floor behind the rig did more than any foam panel kit I tested. Hard walls and bare floors create slap echo that muddies tire-squeal detail and makes footsteps harder to pick up in iRacing.
Start your cockpit build the right way with our guide to building aluminum profile racing rigs — the frame is the foundation that makes every cable-routing and ergonomic choice possible.
Cable Management and Routing — The Part Nobody Photographs
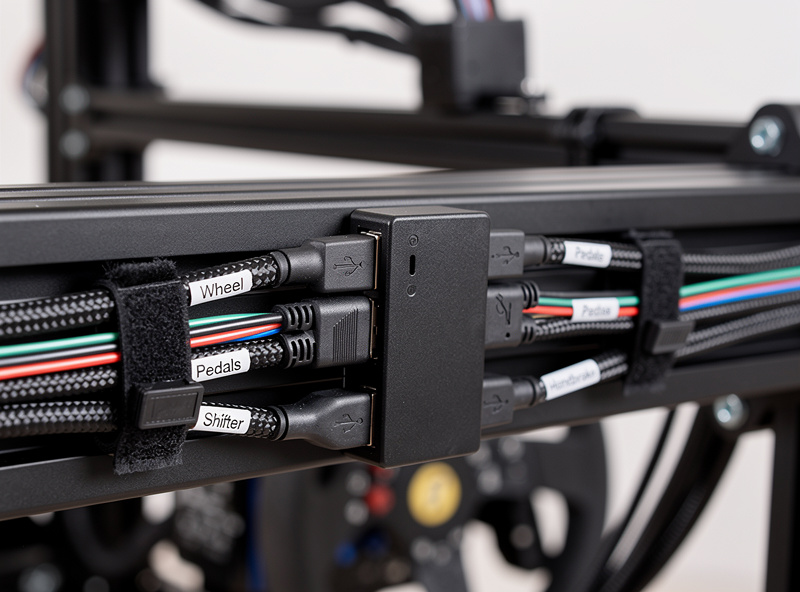
Every photo of a sim rig on social media hides the cables. On my welded steel cockpit, I treat cable routing as part of the frame design — not something you tidy up after. A clean setup isn’t vanity. It means you can slide under the rig to troubleshoot a USB dropout without untangling a nest, and it means your cables aren’t getting pinched or stretched every time the wheelbase rotates.
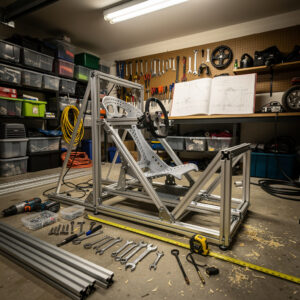
Routing Strategy: I separate power from data along different paths through the frame. On my rig, power cables run along the left-side rail and USB/data along the right, and they never cross. The steel tubing on a welded frame has no internal channels, so I use adhesive-backed cable raceway and heavy-duty velcro wraps instead. If you’re on aluminum profile, the T-slot channels are perfect for routing — drop the cables into the slot and cap it with slot cover. The bracket holding my button box came off the same printer that prints my hydroponic lids — a 3D-printed cable guide that clips onto the profile and keeps three USB lines tidy. Grouping by function means that if I need to replace a pedal USB cable, I’m not also unpicking a power cord from the same bundle.
USB Hubs and Power Distribution: I mount a powered USB hub under the seat pan — one USB cable runs from the hub to the PC, and every peripheral (wheelbase, pedals, shifter, button box, bass shaker amp) plugs into the hub. That single-cable run to the PC is the only part of the USB loom that ever moves. A surge-protected power strip is bolted to the underside of the pedal deck; every power brick lives there, off the floor, accessible but invisible from the seat.
Strain Relief for Moving Parts: The wheelbase on my rig rotates through 900 degrees lock-to-lock, and the USB cable feeding it moves on every steering input. I provide a slack loop anchored to the wheel deck with a strain-relief clip — enough travel for full rotation without tugging the connector. The same goes for the pedal cables; my load-cell brake sees enough force that the pedal deck flexes slightly, and a cable zip-tied too tight to the frame will stress the connector over months of hard braking. Give the cables a gentle S-curve, not a straight pull.
Maintenance Access: I label both ends of every cable with a Brother label maker. When a peripheral stops being recognized mid-session — and it will eventually — being able to trace the right cable in thirty seconds instead of thirty minutes is the difference between fixing it and giving up for the night.
Ergonomic Positioning — The Part That Decides Whether You Can Race Tomorrow
Poor ergonomics will end your sim racing hobby faster than a broken wheelbase. I spent three afternoons dialing in my pedal deck position before the load-cell brake felt predictable under threshold braking, and I still tweak the seat angle between seasons. The goal is a position you can hold for two hours without your lower back screaming.
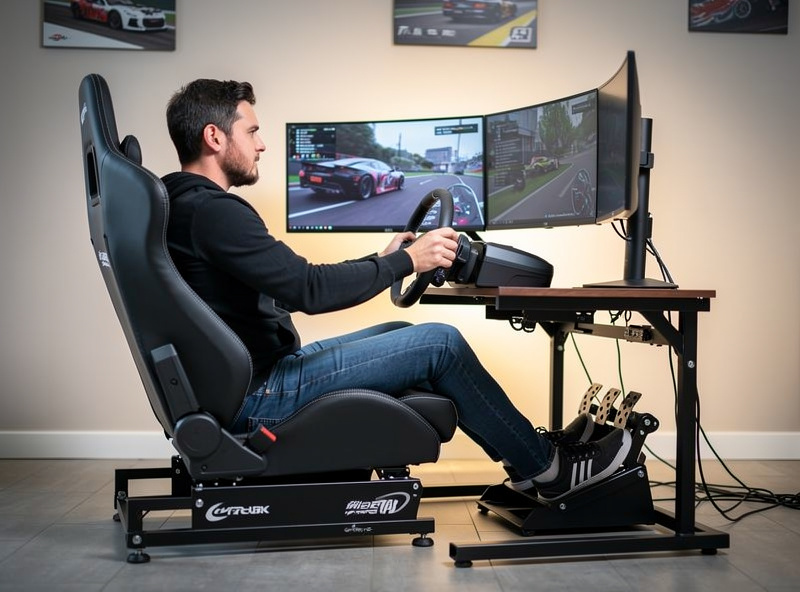
Seating Posture: I run a semi-reclined position, roughly twenty degrees from vertical, with my hips just below my knees. This isn’t F1-lay-flat — my rig is a steel-tube cockpit, and the angle is closer to a GT car. A lumbar cushion matching the curve of my spine sits between my lower back and the seat shell. The key test: with pedals fully extended, there should still be a slight bend in your knee. Locked-straight legs mean you’re reaching with your toes to modulate brake pressure, and that’s where inconsistency comes from.
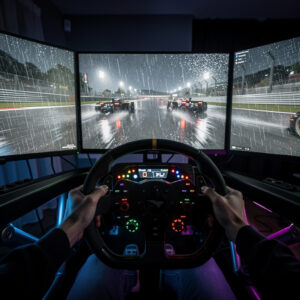
Monitor Positioning and FOV: On my triple-monitor setup, the center screen sits twenty-six inches from my eyes, directly behind the wheel rim. The side screens wrap at roughly sixty degrees, and the top edge of each panel aligns with my horizontal eyeline. I ran the FOV math — not eyeballed it — and the result is that my in-sim brake markers match the geometry my brain expects. Most home setups have the FOV so wrong that a corner that should look sixty meters away looks like a hundred, and you’re braking early without knowing why. Use our FOV Calculator to dial in the mathematically correct setting for your screen size and distance.
Pedal and Wheel Reach: With my shoulders pressed into the seat back, my wrists rest on top of the wheel rim with my arms extended — not fully straight, just enough that I can turn lock-to-lock without leaning forward. If your shoulders leave the seat during steering inputs, your wheel is too far away. If your elbows hit your ribs at ninety degrees of rotation, it’s too close.
Taking Breaks: I set a forty-five-minute timer on my phone. Even with perfect ergonomics, sustained focus produces micro-tension in your neck and shoulders that accumulates. I stand, walk to the kitchen, and focus on something twenty feet away for two minutes — a longer-session version of the American Optometric Association’s digital eye strain guidance. It resets the accommodation reflex that makes your eyes feel sandpapery after staring at a screen at a fixed distance for an hour.
VR and Motion Platform Space Requirements
VR and motion add spatial demands that a static triple-monitor rig doesn’t have. I run VR occasionally — mostly for hot-lapping where immersion matters more than stint length — and the setup considerations are different enough to treat them as a separate checklist.
VR Space: Around six feet by five feet of clear floor around the cockpit is the bare minimum. I’ve knocked a drink off my desk mid-corner in VR because I reached for something that wasn’t there in the real world. Boundary systems help, but physical clearance is the only guarantee. Heat is the bigger killer for me — after thirty minutes in a Quest 3, the facial interface is warm enough that I want it off my face. I position a floor fan aimed at my head, angled slightly upward, and keep the room at the low end of the temperature range I’d normally run.
Motion Platform Safety: Motion-rig owners I’ve talked to consistently emphasize two things: an emergency stop switch within immediate reach, and enough clearance around the platform that no body part can get caught between the moving rig and a wall or desk. Platforms with significant travel transmit force through the floor — if you share walls or live above someone, ground-floor placement or a serious isolation system is the only route that doesn’t generate complaints. I don’t run a motion platform on my rig, so I’m reporting what the community has settled on, not my own long-term firsthand impression.
Before you mount a wheelbase, make sure the FFB is dialed in for your space — read our guide to optimizing force feedback settings so the forces you feel are clean information, not noise that shakes your cable management apart.
Temperature, Humidity, and Airflow — The Comfort Layer
My sim rig lives in a room that gets direct afternoon sun, and the direct-drive wheelbase on my rig puts out noticeable heat after ninety-minute stints. I’ve had sessions where I quit not because I was slow, but because I was sweating through my gloves. Environmental control isn’t a luxury — it directly determines how long you can stay in the seat.
Temperature Management: I aim for sixty-eight to seventy-two degrees Fahrenheit. In summer, the combination of a direct-drive base running at 8 Nm, a gaming PC pushing triple 1440p screens, and my own body heat raises the room temperature by about four to five degrees over the course of an hour. A floor fan aimed at the cockpit plus an open door keeps it manageable. If you have air conditioning, position the vent so the airflow crosses your racing position — not just the room generally.
Humidity Considerations: Dry air is worse than warm air for me. In winter, when the heating runs, the room drops below thirty percent humidity, and I get dry-eye irritation during long sessions — especially if I’m wearing contact lenses. A small humidifier on a shelf behind the rig brings it back to around forty-five percent, which is enough that I stop blinking like I’m staring into a headwind.
Ventilation for VR: When I run VR, airflow is the single biggest comfort variable. I position a fan to hit my face directly without creating noise that bleeds into the headset audio. Some VR racing regulars I know have modified their facial interfaces with small active-cooling fans; I haven’t gone that far, but I understand the impulse — sixty minutes in a sealed headset without airflow is genuinely unpleasant.
Storage and Organization — Keeping the Rig Area Functional
Sim racing generates gear. I have a round formula-style rim and a GT rim, both on quick-releases, plus an H-pattern shifter, a handbrake, spare USB cables, Allen keys for pedal adjustments, and cleaning supplies. If all of that lives in a heap on the floor next to the rig, the space feels chaotic and you’re less likely to sit down for a quick session.
Accessory Storage: I mounted a pegboard on the wall to the left of my cockpit. The spare rim hangs vertically in a protective sleeve. Tools sit in a small magnetic tray on a shelf. Cleaning cloths and a can of compressed air live in a drawer under the pedal deck. The rule is: anything I need during a session is reachable from the seat without standing up.
Digital Documentation: I keep a folder on my sim PC with screenshots of ergonomic reference positions, exported FFB profiles for each title, and notes on what brake calibration curve I landed on for each sim. When I update a pedal face or swap rims, I update the reference photos. If something feels wrong mid-session, I can pull up the baseline and compare instead of guessing.
Building an Atmosphere That Makes You Want to Sit Down
The physical setup gets you comfortable. The atmosphere gets you to actually use it. The OPNsense router that segments my IoT VLAN at home puts the sim PC on a dedicated wired Ethernet link — no Wi-Fi, no shared traffic, no latency spikes from a streaming device on the same network. That’s a homelab decision that directly affects whether my iRacing connection stays stable through a two-hour endurance stint. Wi-Fi is for laptops, not racing.
Audio Environment: I run closed-back headphones for racing — they block the fan noise and let me hear tire scrub and engine pitch without room reflections muddying the soundstage. Between sessions, I sometimes put on a playlist that builds energy without being distracting; silence between races makes the transition back into focus harder.
Routine as Performance Prep: Before I join a competitive session, I run the same sequence every time: check tire pressures in the sim, adjust my seating position against the reference marks, run two warm-up laps, and take a sip of water. It’s a ritual that signals to my brain that it’s time to focus, and it eliminates the “something feels off” feeling that comes from starting cold.
A well-built sim racing space is part of the equipment list — as important as the wheelbase torque rating or the pedal brake curve. The time I spent routing cables, positioning my triple monitors correctly, and isolating the bass shaker from the floor pays back every session. Start with the ergonomics: seat position, monitor distance, FOV math. Then lock down the cables so nothing snags or stresses. Treat the room temperature and lighting as variables you tune, the same way you tune FFB. The rig I welded is rigid because I built it that way. The space around it is the same project — and a project that keeps you racing instead of recovering.
For the full room-to-first-lap walkthrough covering equipment choices and budget planning, read our first sim racing setup guide — it covers the space assessment and component selection that precede everything above.
Frequently Asked Questions
How do I manage cables in a sim racing setup?
Separate power and data cables into different routing paths. On aluminum profile rigs, use the T-slot channels with slot covers. On tube-frame rigs, use adhesive cable raceway and velcro wraps. Mount a powered USB hub on the cockpit to reduce individual cable runs to the PC. Provide slack loops at the wheelbase and pedal connectors so steering rotation and brake force don’t stress the connections.
What lighting is best for sim racing?
Run bias LED lighting behind your monitors at a color temperature matching your screen’s native white point (typically 6500K). This reduces the pupil-dilation cycling that causes eye strain in dark rooms. Add a small directional lamp aimed at your button box and shifter for finding controls without hunting. Avoid any light source that creates visible glare on your screen panels.
How do I reduce noise from sim racing for neighbors or family?
Place rubber isolation pads under each corner of your cockpit to decouple bass shaker and pedal vibration from the floor. Run closed-back headphones instead of speakers for late sessions. Heavy curtains or a rug behind the rig absorb room reflections. The bass shaker is the biggest transmission culprit — isolate the rig from the ground first, then treat room acoustics.
What is the ideal room temperature for sim racing?
Aim for 68-72 degrees Fahrenheit (20-22 degrees Celsius). A direct-drive wheelbase and gaming PC raise room temperature by 4-5 degrees over an hour of racing. Position a fan to move air across your seating position. For VR sessions, direct airflow at your face without creating audio-interfering noise. Sweat on your wheel grips degrades control and comfort quickly.
How should I position my monitor for sim racing?
Place the center screen 24-30 inches from your eyes, directly behind the wheel rim, with the top edge aligned to your horizontal eyeline. For triples, wrap the side screens at roughly 60 degrees. Use an FOV calculator with your specific screen size and distance — guessing produces braking-point errors. On my rig, the mathematically correct FOV changed my corner-entry consistency within two sessions.
How do I take care of my health during long sim racing sessions?
Take a break every 45-60 minutes — stand, walk, and focus your eyes on a distant object for two minutes to reset accommodation strain. Maintain a semi-reclined position with hips slightly below knees and a slight knee bend at full pedal extension. Hydrate consistently. A phone timer prevents losing track of time during competitive sessions.
Can I set up sim racing in a shared or small room?
Yes. A quality foldable wheel stand with a single bundled cable connection reduces setup time to about five minutes. The key metric is session-startup friction — if it takes twenty minutes to get racing, you will race less. Permanent dedicated space is ideal but not required. I raced on a foldable stand for a year before building my permanent rig, and the lap time doesn’t care about your floor plan.
Related Articles
- Building a DIY Sim Racing Rig — Cockpit construction with integrated cable management
- How to Plan Your First Sim Racing Setup — Space assessment and equipment selection
- What Is Sim Racing? — Understanding space requirements for different setup levels
- DIY Sim Racing Upgrades — Transducers, button boxes, and peripherals to integrate
- Sim Racing Driving Techniques — Ergonomic positioning that supports proper driving form