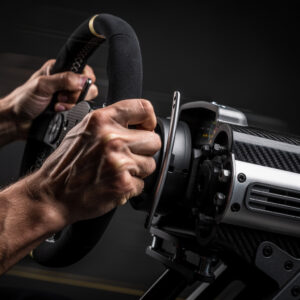
I’ve spent hundreds of hours on the direct-drive rig I welded in Sweden chasing lap time, and the truth that emerged from my telemetry overlay is this: the hardware determines what you can feel, but driving technique determines what you do with that information. Sim racing driving techniques — trail braking, threshold braking, throttle modulation, and racing-line discipline — separate the driver who posts one quick lap from the one who delivers race after race. Below, I break down the techniques the pro side has settled on as the core of competitive pace, with the hardware connection that my load-cell pedals and direct-drive base make immediately clear.
Understanding the Racing Line
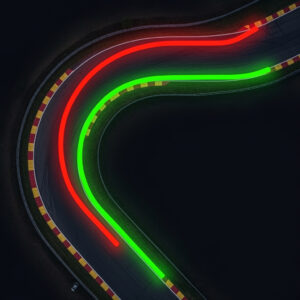
The racing line represents the fastest path around a circuit, but fast driving requires understanding why specific lines work rather than memorizing them. On the rig I run, I’ve found this knowledge transfers directly into adapting lines to specific car and track combinations — something a memorized turn-in point never does.
Geometric vs. Ideal Lines: The geometrically shortest line follows the inside edge of every corner, minimizing distance traveled. But it rarely proves fastest because it compromises exit speed. The ideal racing line sacrifices some entry speed and mid-corner speed to maximize exit velocity, carrying that speed down subsequent straights. On most corners, exit speed matters more than entry speed — and through a direct-drive base, you feel exactly where the front tires want to push wide when you shortchange the exit.
Late Apex Technique: The classic racing line uses a late apex, turning in later than the geometric center of the corner. This straightens the exit, allowing earlier and harder acceleration. You sacrifice some mid-corner speed but gain significant time on the following straight. Late apex lines also provide better visibility through the corner and more run-off room when you misjudge entry — something I rely on heavily in iRacing top-split traffic where the margin shrinks to nothing.
Corner Entry, Middle, and Exit Phases: Divide each corner into three phases with distinct objectives. Entry focuses on braking and positioning for the apex. The middle phase prioritizes maintaining minimum speed while preparing for exit. Exit phase emphasizes accelerating as early and aggressively as possible without losing traction. When I compare my telemetry traces against faster drivers, the exit phase is almost always where the gap opens — I’m getting on throttle 2-3 car lengths later than the quick guys, and the lap time loss compounds down every straight.
Compromise Corners: Not all corners deserve equal attention. Corners leading onto long straights allow more time to recover from conservative entries, making them priority corners for maximizing exit speed. Corners before short straights or other corners matter less because you have limited opportunity to use extra exit speed. Identify priority corners on each track and focus your optimization efforts there.
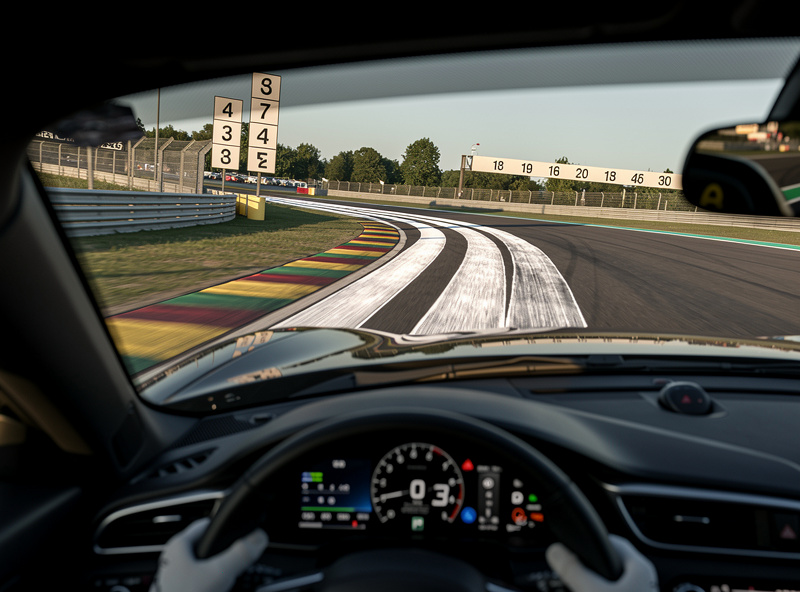
Analyze your racing lines objectively using telemetry tools discussed in our guide to sim racing software and telemetry.
Mastering Trail Braking
Trail braking — gradually releasing brake pressure while turning into a corner rather than completing all braking in a straight line before turn-in — is the technique the pro side has settled on as the single biggest separator between competent drivers and truly fast ones. On my load-cell pedal set, I’ve found the muscle-memory advantage of pressure-based braking makes trail-braking modulation learnable in days rather than weeks, because you’re training a squeeze-release curve, not a pedal-position number.
Weight Transfer Mechanics: Braking shifts weight forward onto the front tires, increasing their available grip. Turning also requires front grip. By trail braking, you maintain forward weight transfer while beginning to turn, maximizing front tire capacity during corner entry. This allows later braking points and higher entry speeds than separating braking and turning completely — and through the direct-drive base on my rig, the moment front grip starts to wash out under combined braking-and-turning loads telegraphs as a subtle lightening of the steering column.
Brake Pedal Modulation: Trail braking requires smooth, progressive brake release. Snap off the brakes completely and you lose the weight transfer advantage suddenly, causing understeer. Release too slowly and you delay corner entry, losing time. With load-cell pedals measuring force rather than position, I practice finding the release rate that maintains optimal front grip throughout the turn-in process — it becomes a pressure-release curve your foot learns, not a distance you’re guessing on a potentiometer pedal.
Risk Management: Trail braking increases risk because you are turning while braking. Brake too hard while turning and you exceed front tire capacity, understeering off track. Release too abruptly and weight transfers rearward, potentially causing oversteer. Esports-level racers start conservatively and gradually increase trail-braking aggression as sensitivity to tire limits improves — the pace difference is earned corner by corner, not in one aggressive session.
Car-Specific Adaptations: Different vehicles respond differently to trail braking. Front-wheel-drive cars benefit enormously from maintaining forward weight during turn-in. Rear-wheel-drive cars with powerful engines require careful balance to avoid power-on oversteer after trail braking. All-wheel-drive systems distribute weight and power differently. I adjust technique per car class — the pedal feel through my load-cell brake set stays consistent, but the release curve changes completely between a GT3 and a Formula car.
Throttle Control and Traction Management
Smooth, progressive throttle application proves more effective than stabbing the pedal, particularly in powerful rear-wheel-drive cars where traction limits determine acceleration capability. Through the direct-drive base bolted to my welded rig, rear-tire slip transmits as a deadening of the steering column — I’ve learned to back off throttle the instant that signal arrives, and the lap time stays.
Progressive Application: Apply throttle gradually as steering angle decreases through the corner exit. Full throttle should coincide with straightening the wheel, not while still turning significantly. This coordination prevents overwhelming rear tires with combined lateral and longitudinal forces that cause power oversteer. The direct-drive base I run makes this coordination possible because the FFB transmits trailing-throttle understeer onset before it becomes unrecoverable — on a gear-driven base, you’d miss the window entirely.
Feeling Traction Limits: Quality force feedback systems communicate rear traction through subtle steering sensations. As rear tires approach their limit, steering feels lighter and less connected. With the FFB profile I’ve tuned in ACC, I recognize rear-tire slip onset before the car steps out — that half-second warning is everything. If steering suddenly lightens dramatically, you’ve exceeded limits and need to lift slightly.
Power Oversteer Recovery: When rear tires break traction under acceleration, resist the instinct to lift completely. Sudden throttle reduction transfers weight forward abruptly, potentially causing snap oversteer. Instead, maintain or slightly reduce throttle while countersteering smoothly. Once the rear regains traction, gradually straighten the steering and continue accelerating. On my load-cell brake set, I’ve found the muscle memory from braking practice transfers directly to throttle foot discipline — both are pressure curves your foot internalizes.
Front-Wheel Drive Considerations: Front-drive cars suffer traction loss differently. Excessive throttle while turning causes understeer as front tires overwhelmed by both steering and acceleration lose grip. Trail off throttle slightly to allow front tires to regain steering traction, then progressively reapply as the car straightens.
Braking Techniques and Threshold Braking
Maximum braking occurs at the threshold where tires are nearly but not quite locked. Finding and maintaining this threshold consistently saves significant lap time — and on the load-cell pedals I run, pressure-based muscle memory makes threshold consistency achievable in a way position-based pedals never could.
Braking Points: Identify consistent visual references for initiating braking on each track — curbs, marshal posts, shadow patterns, or track markings. Consistent braking points enable consistent lap times and provide baselines for experimentation. Move braking points later as your confidence and technique improve. On tracks I know well in iRacing, I typically gain 5-10 meters of braking depth over a season just by creeping the reference mark forward lap by lap.
Threshold Sensation: At maximum braking, tires vibrate slightly and steering feels light as front tires approach their longitudinal grip limit. Learn to recognize these sensations without actually locking tires. Lock-ups cause flat spots, increased stopping distances, and handling disruptions. Load cell pedals help significantly by allowing consistent pressure application rather than requiring precise position judgment — your foot learns 80% pedal force, not 80% pedal travel, and force memory is far more repeatable.
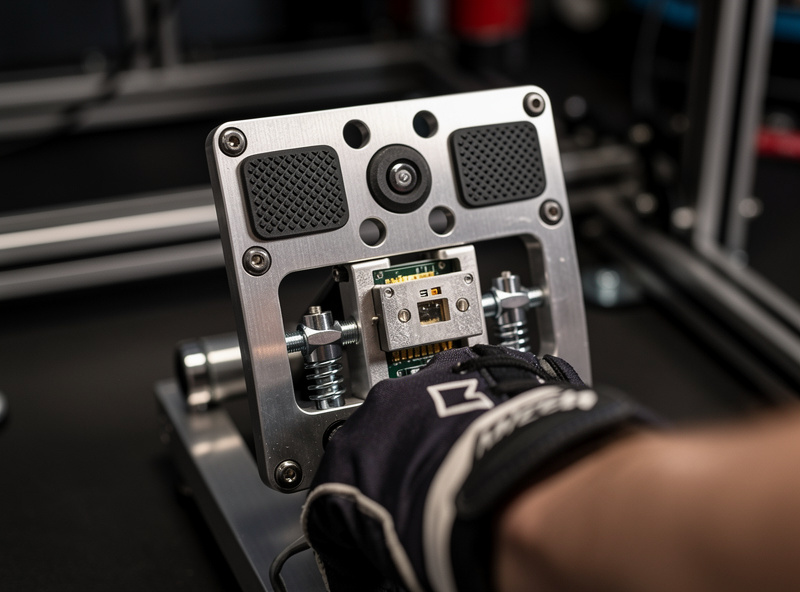
Cadence Braking: When braking thresholds prove difficult to maintain — wet conditions, cars with poor brake balance — cadence braking helps. This technique pulses brake pressure rapidly around the threshold, allowing brief moments of tire recovery between maximum pressure applications. While less efficient than perfect threshold braking, cadence braking provides more consistent results when conditions challenge sensitivity. In wet iRacing sessions, I default to cadence rather than chasing threshold — the lap time consistency wins races over one hero braking zone.
| Technique | FWD Cars | RWD Cars | AWD Cars |
|---|---|---|---|
| Trail Braking | Essential — maintains front weight for turn-in grip; release late to rotate the rear | Use carefully — too much trailing brake at turn-in induces lift-off oversteer | Most forgiving — weight distribution masks minor modulation errors |
| Threshold Braking | Straightforward — front weight bias means front tires do most work | Needs balanced pedal — rear lockup under threshold braking spins the car | Stable under threshold — all four tires share braking load |
| Throttle Application | Early throttle possible — understeer is the limiting factor, not oversteer | Progressive only — too much throttle too early equals snap oversteer | Most aggressive possible — AWD puts power down earlier than RWD |
| Corner Exit Priority | Carry speed through corner — exit matters less than mid-corner momentum | Maximize exit — straighten the wheel before full throttle | Balanced approach — early throttle possible but exit geometry still matters |
| Learning Difficulty | Easiest to learn fundamentals on — understeer is safer to manage | Highest skill ceiling — rewards clean technique, punishes sloppiness | Good intermediate platform — forgiving enough to build confidence |
Master these techniques within a well-configured cockpit by following our guide to optimizing force feedback settings for maximum information transfer.
Tire Management and Strategy
Tires represent your only contact with the track surface. Managing their temperature, pressure, and wear significantly affects performance throughout races — and in the endurance events I run on iRacing, tire management wins more races than qualifying pace ever does.
Temperature Windows: Each tire compound operates optimally within specific temperature ranges. Below these ranges, tires lack grip. Above them, tires degrade rapidly and lose performance. Monitor tire temperatures through telemetry or in-car displays, adjusting driving style to maintain optimal ranges. I watch my tire temps on the telemetry overlay during practice sessions — aggressive sliding overheats tires quickly; smooth driving maintains consistent temperatures across a stint.
Wear Management: Tires degrade with use, particularly when sliding or locking. Manage wear by avoiding unnecessary slip, taking care of tires during early race phases, and preserving performance for crucial late-race moments. In endurance racing, tire management often determines victory more than outright pace — the pro side has settled on the rule that the first 20% of a stint sets tire life for the remaining 80%.
Wet Weather Adaptations: Wet conditions fundamentally change grip characteristics. Brake earlier and more gently to prevent lock-ups on reduced grip. Apply throttle progressively to prevent wheelspin. Alter racing lines to find grip on less polished surfaces away from traditional racing lines where rubber buildup becomes slippery when wet. Standing water requires avoiding puddles that cause hydroplaning.
Using Telemetry for Improvement
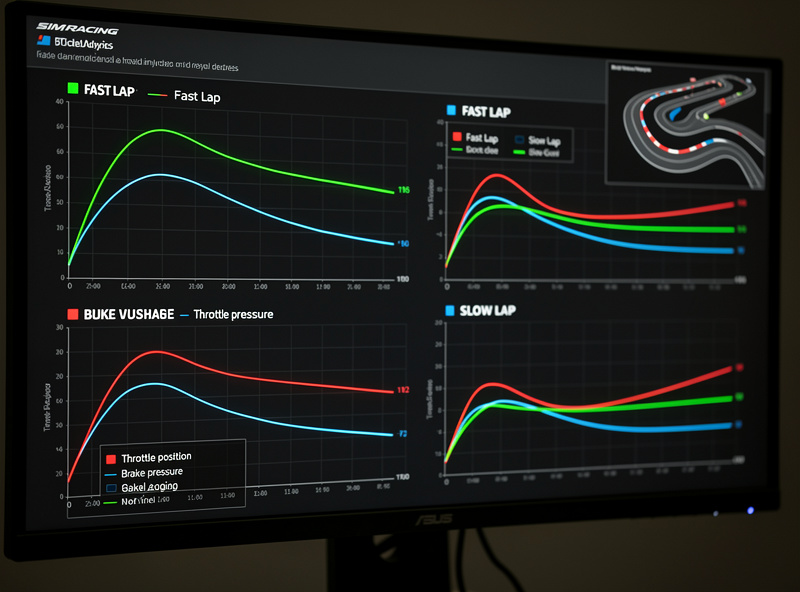
Objective data reveals improvement opportunities subjective feel misses. On my rig, I run a telemetry overlay that traces brake pressure, throttle position, and steering angle against faster reference laps — it transformed my practice sessions from guessing into targeted work.
Comparing Laps: Overlay your fastest lap against slower laps or against faster reference telemetry. Identify specific sectors where time is lost. Examine speed traces, throttle position, and brake pressure to understand exactly where differences occur. This precision eliminates wasted practice time on already-optimized sections — when I overlay my telemetry against a faster driver’s trace, the brake-pressure graph alone usually tells the story.
Identifying Patterns: Look for consistent patterns across multiple laps. Do you always brake too early in Turn Three? Do you consistently apply throttle too aggressively exiting Turn Seven? Patterns indicate technique issues rather than one-off mistakes. Addressing patterns yields greater improvement than fixing isolated errors — a brake-point pattern across 10 laps is a technique gap; one bad braking zone in one lap is a mistake you already know about.
Setting Targets: Use telemetry to set specific, measurable improvement targets. Rather than vague goals like “get faster,” aim for “brake five meters later at Turn One” or “apply full throttle two car lengths earlier exiting Turn Four.” These concrete targets focus practice sessions and provide clear success metrics.
Combine technical skill development with proper physical setup by reading our comprehensive guide to setting up your sim racing space for ergonomic positioning that supports optimal driving technique.
Mental Approach and Consistency
Raw speed means little without consistency. The difference between drivers who occasionally set fast laps and those who deliver race after race is mostly mental — and the pro side has settled on deliberate practice structures that work.
Practice Structure: Effective practice involves deliberate focus on specific skills rather than mindless lap repetition. Dedicate sessions to particular techniques: one session practicing trail braking, another working on throttle application, another focusing on racing lines. When I’m working on a weakness, I spend 30-lap blocks on one corner rather than hot-lapping the full circuit — the skill gain per minute is dramatically higher.
Mistake Recovery: Everyone makes mistakes. The difference lies in recovery speed. Shake off errors immediately rather than dwelling on them. A single mistake ruins one corner; poor recovery ruins entire laps. Maintain focus on the present moment, not past errors — the fastest drivers I’ve shared splits with have the shortest memory for their own mistakes.
Racecraft and Overtaking: Being fast in clean air differs from being fast while racing others. Practice defensive positioning, reading opponents’ moves, and executing clean overtakes. Racing intelligence often triumphs over raw pace in competitive environments. Study racing etiquette and respect competitors to earn respect yourself — our sim racing etiquette guide breaks down the exact rules that keep you incident-free in online races.
Developing driving technique takes time and deliberate practice. Each technique mastered unlocks new performance levels and deepens appreciation for the complexity of fast driving. The data from my telemetry overlay proves the hardware and the technique have to work together — but the journey rewards those willing to study, practice, and persist through the inevitable plateaus.
Frequently Asked Questions
What is trail braking in sim racing?
Trail braking is gradually releasing brake pressure while turning into a corner instead of completing all braking before turning. It maintains forward weight transfer during turn-in, maximizing front tire grip and allowing later braking points. On load-cell pedals, the pressure-release curve becomes muscle memory faster than position-based pedal travel, making trail braking learnable in days rather than weeks.
How do I learn the racing line on a new track?
Start by driving slowly to identify corner sequences, braking reference points, and apex locations. Then progressively increase speed while maintaining the line. Focus on exit speed from corners leading onto long straights, as these sections yield the most lap time. Use telemetry overlays to compare your line against faster reference laps and identify exactly where the gap opens.
What is threshold braking in sim racing?
Threshold braking applies maximum brake pressure just below the point where tires lock up. Load cell pedals measure pressure rather than position, matching how muscle memory works — your foot learns 80% pedal force, not 80% travel, making threshold consistency far more repeatable than with potentiometer pedals. At threshold, tires vibrate slightly and steering feels light.
How can I be more consistent in sim racing?
Use fixed visual braking references for each corner, practice the same car and track combination for extended sessions, and focus on smooth inputs rather than aggressive ones. Consistency comes from repeatable technique, not natural talent. Analyze telemetry to identify which corners cause time variation and practice those specifically in 30-lap focused blocks.
What is the best way to manage tire temperatures?
Drive smoothly without excessive sliding or locking. Monitor tire temperatures through telemetry or in-car displays, adjusting style to maintain optimal operating windows. The pro side has settled on the rule that the first 20% of a stint sets tire life for the remaining 80%. In endurance races, preserve tire performance early and push harder in crucial late stints.
How long does it take to get fast at sim racing?
Reaching competitive lap times typically takes 2-4 months of regular practice for most drivers. Mastering racecraft and consistency takes 6-12 months. Focus on one car and track combination at a time rather than constantly switching, which fragments skill development. The hardware matters — load-cell pedals and direct-drive bases accelerate technique development by providing honest feedback.
Keep Building
- What Is Sim Racing? — Understanding the physics that driving techniques exploit
- How to Configure Force Feedback — Sensing tire limits through steering feedback from your base
- Sim Racing Software Explained — Telemetry tools for analyzing driving technique
- Setting Up a Sim Racing Space — Ergonomic positioning that supports proper technique
- How to Plan Your First Sim Racing Setup — Equipment that enables technique development