Building Custom Button Boxes
Button boxes add physical controls for functions typically accessed through keyboard shortcuts or on-screen menus. Custom-built boxes match your specific needs and cockpit layout better than commercial options.
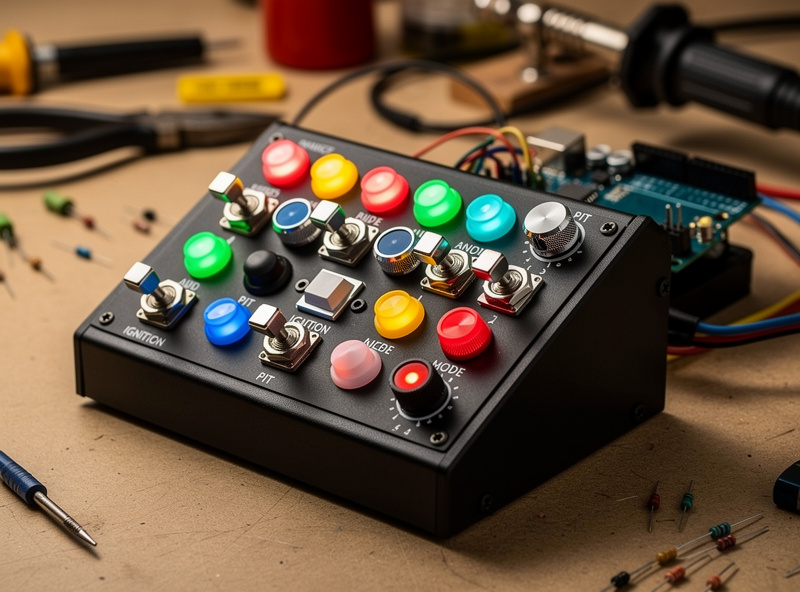
Planning Your Layout: Identify functions you access frequently during races. Common candidates include brake bias adjustment, engine map selection, pit limiter toggles, and ignition controls. Map these functions to physical switches, rotary encoders, or push buttons positioned within easy thumb reach while maintaining steering grip.
Component Selection: Arduino boards or dedicated USB controller boards like the Leo Bodnar BU0836 provide USB connectivity recognized by Windows as game controllers. Momentary push buttons suit single-action functions like ignition toggles. Rotary encoders work brilliantly for incremental adjustments like brake bias or traction control settings. Toggle switches maintain state for functions like headlights or windshield wipers. Choose quality components from electronics suppliers rather than cheapest alternatives to ensure reliability.
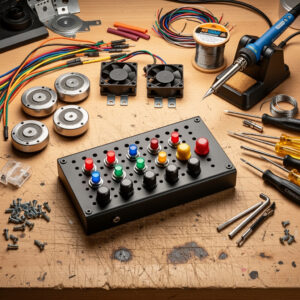
Construction: Enclosures range from 3D-printed cases to project boxes from electronics stores to custom aluminum panels. Mount your Arduino internally, connecting switches and encoders through panel-mount connectors or direct soldering. Label each control clearly with engraved labels or quality stickers. The goal is professional appearance matching your cockpit aesthetic while providing immediate recognition without looking down.
Software Configuration: Program your Arduino using libraries like Joystick.h to present your button box as a standard USB game controller. Map each physical control to distinct button numbers or axis inputs. Within your simulator, assign these inputs to specific functions. Test thoroughly to ensure all controls register reliably and consistently.
Learn more about integrating peripherals into your cockpit design in our comprehensive guide to building aluminum profile racing rigs.
Adding Bass Shakers and Tactile Transducers
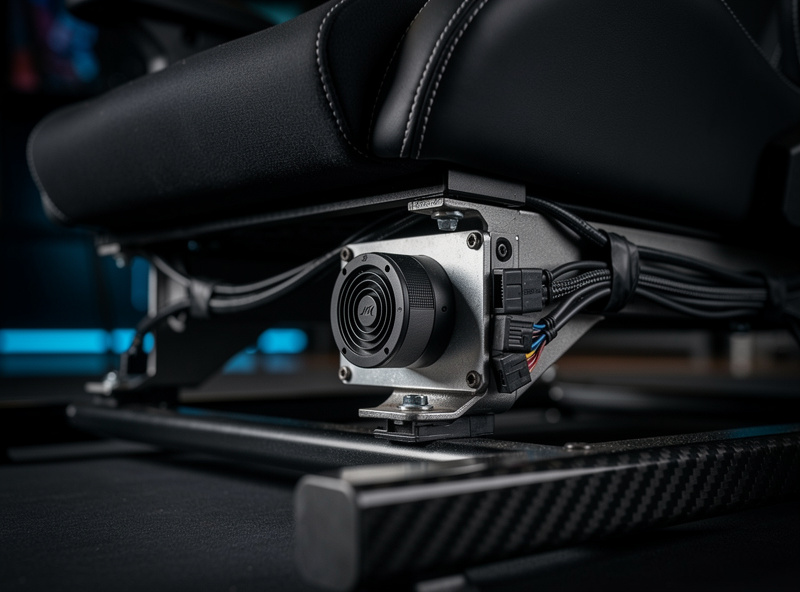
While force feedback wheels communicate steering information, tactile transducers add chassis-level sensations that significantly enhance immersion. These devices convert low-frequency audio into physical vibration through your seat or cockpit frame.
How Transducers Work: Bass shakers attach to your seat or cockpit structure, vibrating in response to audio signals sent through amplifiers. You configure software to output specific frequency ranges to these devices, creating sensations like engine rumble, curb impacts, gear shifts, and traction loss. The physical sensation complements visual and steering information for more holistic immersion.
Hardware Selection: Entry-level options like the Aura Bass Shaker or Dayton Audio TT25 provide effective vibration for under fifty dollars per unit. Premium options from ButtKicker offer stronger output and better frequency response for around two hundred dollars. Most installations use two to four shakers strategically positioned, typically one in the seat back and one under the seat cushion, with additional units on pedal decks for brake feedback.
Amplification Requirements: Transducers require dedicated amplification separate from your audio system. Basic stereo amplifiers from thrift stores or budget audio equipment work adequately. You need roughly fifty to one hundred watts per channel depending on transducer quantity and desired intensity. Many sim racers use old car audio amplifiers, which handle the low-impedance loads effectively. If you are choosing between a standard bass shaker and a tactile transducer for your rig, the bass shakers vs transducers comparison maps the frequency response, mounting options, and output differences that actually matter for sim racing haptics.
Software Integration: SimHub dominates tactile feedback software, offering sophisticated filtering and routing. Configure frequency ranges to specific effects: engine RPMs might occupy twenty to eighty hertz, gear shifts create momentary spikes at specific frequencies, and curb impacts register as broadband impulses. SimHub extracts these effects from simulator telemetry and outputs appropriate audio signals to your amplifiers.
DIY Wind Simulation Systems
Wind simulation adds environmental immersion particularly effective for open-cockpit cars or driving games with weather effects. DIY solutions cost significantly less than commercial options while providing adequate functionality.
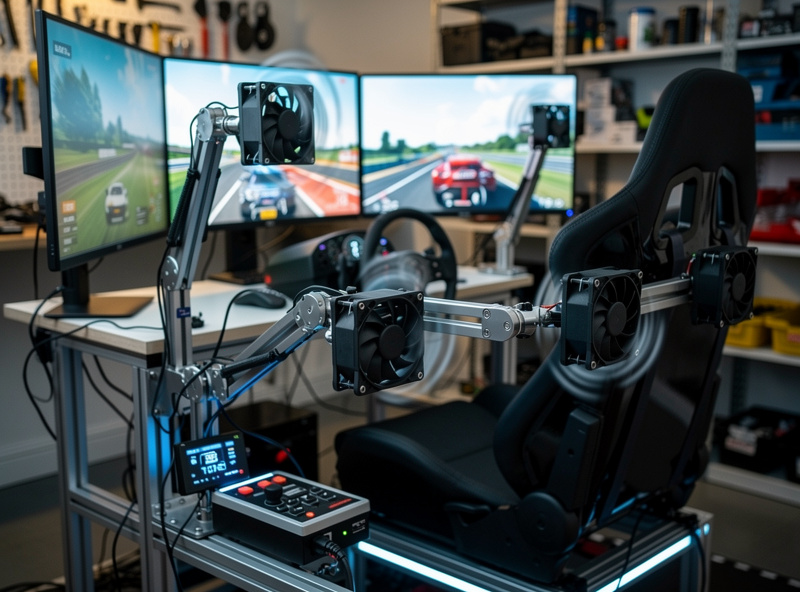
Basic Fan Systems: Simple PC case fans or small desk fans positioned strategically create airflow sensations. Connect multiple fans to a fan controller responding to vehicle speed telemetry. As you accelerate, fans increase speed proportionally. This basic approach costs under fifty dollars and provides noticeable speed-related wind effects.
Advanced PWM Control: More sophisticated systems use PWM-controlled fans capable of precise speed modulation. Arduino boards read telemetry data and output appropriate PWM signals, creating nuanced wind patterns that respond to cornering forces, slipstreaming, and weather conditions. Fans mounted on adjustable arms position airflow precisely where you feel it naturally while driving.
Directional Wind Effects: Multiple fans positioned around your cockpit can create directional sensations. Fans on the left side activate during right-hand corners when centrifugal force would naturally push air across you. This directional feedback adds subtle but noticeable realism layers beyond simple speed-based wind.
Enhance your overall sim racing environment by reading our guide to optimizing your sim racing space for comfort and performance.
Sequential Shifter and Handbrake Modifications
While many wheels include paddle shifters, dedicated sequential shifters and hydraulic handbrakes add authenticity for specific racing disciplines. Building or modifying these components provides satisfying projects with functional results.
Sequential Shifter Construction: Commercial sequential shifters cost between one hundred and three hundred dollars, but DIY alternatives using motorcycle shift mechanisms or custom mechanical linkages cost significantly less. The mechanism needs to provide distinct detents between gears, spring return to center, and solid mounting that prevents flex during aggressive shifts. Connect to your PC via USB controller boards or modify Logitech/Thrustmaster shifter electronics for custom mechanical inputs.
Hydraulic Handbrake Builds: Hydraulic handbrakes essential for rally and drifting read pressure through load cells or potentiometers attached to master cylinders from real cars or motorcycle brake systems. Mount the cylinder horizontally with appropriate lever geometry providing progressive resistance matching real handbrake feel. Calibration determines how much lever travel corresponds to full lock in-simulator.
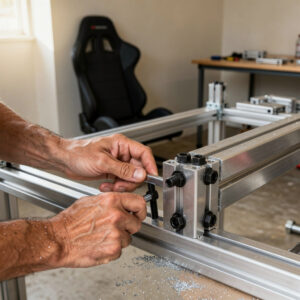
Mounting Solutions: Both shifters and handbrakes require solid mounting resisting the forces you apply during use. Aluminum profile cockpits accommodate these mounts easily through T-slot nuts and custom brackets. Position shifters at heights and angles matching real cars you simulate, considering different disciplines have different ergonomic requirements.
Cost-Effective Upgrade Strategies
DIY upgrades provide excellent value but require strategic planning to maximize impact per dollar spent. Prioritize upgrades based on their contribution to immersion and performance.
High-Impact, Low-Cost: Button boxes using Arduino boards cost under fifty dollars in materials but significantly improve your control over vehicle settings during races. Basic bass shakers add noticeable immersion for under one hundred dollars total including used amplifiers. These projects deliver substantial improvements for minimal investment.
Medium Investment: Quality sequential shifters or improved pedal modifications fall between one hundred and two hundred dollars. These upgrades improve authenticity for specific disciplines you enjoy regularly. Consider whether your primary interests justify these specialized investments.
Evaluating Commercial Alternatives: Before committing to DIY projects, research commercial alternatives. Sometimes manufacturers offer reasonable prices for professional solutions that outperform DIY attempts. DIY makes most sense when commercial options cost multiples of your build budget or when you enjoy the building process itself.
Start your upgrade journey by optimizing your force feedback settings with our guide to configuring force feedback, then add tactile layers through these DIY projects. Each enhancement builds upon previous improvements, creating increasingly immersive and personalized racing environments.
Safety and Practical Considerations
DIY projects involve electricity, moving parts, and significant time investment. Approach these projects with appropriate safety consciousness.
Electrical Safety: All DIY electronics projects require understanding basic electrical safety. Use appropriate wire gauges for current loads, secure connections properly to prevent short circuits, and fuse power connections to protect equipment. Never work on powered circuits, and verify proper grounding for all metal components that might contact electrical wiring.
Mechanical Safety: Ensure all moving parts have appropriate guards preventing pinch points or entanglement hazards. Hydraulic systems require careful bleeding to prevent air locks that cause inconsistent performance. Securely mount all components to prevent detachment during enthusiastic use that could damage equipment or injure you.
Time Investment: DIY projects consume significant hours beyond material costs. Evaluate whether the time required fits your schedule and whether you will enjoy the process or view it as frustrating obligation. Sometimes purchasing commercial solutions saves money overall when valuing your time appropriately.
DIY sim racing upgrades represent a natural progression for enthusiasts wanting personalized, cost-effective enhancements beyond commercial offerings. Start with simple projects like basic button boxes, progressing to more complex builds as your skills and confidence grow. The satisfaction of using equipment you built yourself adds meaning to every lap.
Integration with Your Sim Racing Setup
Successfully implementing DIY upgrades requires understanding how each enhancement integrates with your existing equipment and software ecosystem. Proper integration ensures all components work harmoniously rather than creating conflicts or complications.
USB Port Management: Multiple DIY peripherals quickly consume available USB ports and bandwidth. Quality USB hubs with external power supplies expand connectivity while maintaining stable data transmission. Position hubs conveniently near your cockpit to reduce cable runs. Consider USB controllers with multiple device support that consolidate several inputs into single USB connections, simplifying wiring and reducing port consumption.
Power Distribution: DIY projects often require various voltage levels: five volts for Arduino and logic circuits, twelve volts for fans and some transducers, and higher voltages for motion platforms or powerful tactile systems. Plan power distribution carefully using appropriate power supplies with adequate amperage for all connected devices. Fused distribution blocks protect equipment from shorts or overloads.
Software Coordination: Each DIY peripheral requires recognition within Windows and your simulator. Verify that all devices appear in Windows Game Controller settings with appropriate button and axis mappings. Some simulators limit the number of recognized controllers, potentially requiring virtual controller software that combines multiple physical devices into single logical controllers. Test thoroughly to ensure all inputs register reliably without conflicts.
Maintain system organization by following our guide to cable management and ergonomic setup that accommodates expanding DIY additions.
Advanced DIY Projects
Beyond basic button boxes and shakers, ambitious DIYers create sophisticated enhancements that rival commercial products at fraction of cost.
Custom Dashboard Displays: Small LCD or OLED screens mounted in button boxes or separate enclosures display telemetry data beyond standard simulator dashboards. Arduino or Raspberry Pi controllers drive these displays, showing custom information like tire temperatures, fuel consumption rates, or delta times. These projects require programming skills but deliver personalized data presentation impossible with commercial alternatives.
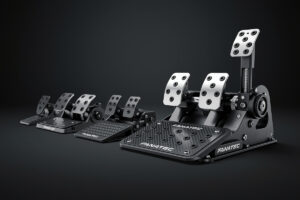
Haptic Pedal Systems: Advanced builders modify pedal sets with vibration motors or additional transducers that communicate ABS activation, traction control intervention, or road surface texture through your feet. These systems complement wheel-based force feedback with chassis-level sensations, providing more complete vehicle communication.
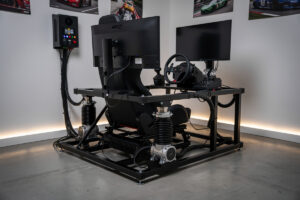
DIY Motion Platforms: Ambitious projects create single or multiple degree-of-freedom motion platforms using electric actuators or scissor mechanisms. These platforms physically tilt and move your cockpit in response to vehicle acceleration, braking, and cornering forces. While complex and requiring significant mechanical and electrical engineering knowledge, DIY motion platforms cost thousands less than commercial alternatives while providing comparable motion cues.
Before attempting advanced projects, master fundamentals through our guide to configuring force feedback systems that form the foundation of all tactile communication in sim racing.
Troubleshooting Common Issues
DIY projects inevitably encounter problems requiring systematic diagnosis and resolution. Understanding common issues and solutions saves frustration and prevents abandoned projects.
Intermittent Connections: Loose solder joints, damaged cables, or poorly seated connectors cause devices that work sometimes but fail unpredictably. Inspect all connections visually, wiggle testing cables while observing device behavior. Reflow suspicious solder joints and replace damaged cables. Secure connections with hot glue or heat shrink to prevent future loosening.
Software Recognition Failures: Devices not appearing in Windows usually indicate driver issues, power problems, or USB protocol errors. Verify correct drivers are installed, particularly for Arduino boards requiring specific USB chip drivers. Check that devices receive adequate power; underpowered devices often fail enumeration. Try different USB ports and cables to isolate hardware from connection issues.
Ground Loops and Noise: Multiple powered devices sharing grounds can create ground loops causing audio hum, erratic behavior, or phantom button presses. Isolate power supplies where possible, use isolated USB hubs, and verify that all devices share common ground references. Ferrite cores on cables reduce high-frequency noise that interferes with sensitive electronics.
Mechanical Failures: Moving parts like rotary encoders, toggle switches, and potentometers wear with use. Keep spare components on hand for quick replacement. Design your builds for serviceability, ensuring you can access and replace components without complete disassembly. Document wiring configurations to facilitate future repairs or modifications.
Frequently Asked Questions
What DIY sim racing upgrades give the most immersion for the money?
Bass shakers cost under $100 including a used amplifier and add engine vibration, curb impacts, and traction loss sensations. Arduino-based button boxes cost under $50 in materials and dramatically improve control access during races. These two upgrades deliver the highest immersion per dollar spent.
How do bass shakers work in sim racing?
Bass shakers attach to your seat or cockpit frame and vibrate in response to audio signals from amplifiers. SimHub software extracts telemetry data from simulators and converts it to audio signals that create specific sensations like engine rumble at 20-80Hz, gear shift spikes, and curb impacts as broadband impulses.
Can I build a button box without soldering?
Yes, many Arduino boards use screw terminals or plug-in connectors that eliminate soldering. The Leo Bodnar BU0836 controller board connects via push-on terminals. Mount switches in a project box, connect wires to the controller, and Windows recognizes it as a standard USB game controller. Programming requires basic Arduino IDE familiarity.
What is SimHub and is it free?
SimHub is free software that extracts telemetry data from simulators and outputs it to dashboard displays, bass shakers, LED strips, and wind simulation fans. The free version covers most features. A $7 donation unlocks additional features like motion dashboards and advanced wind control. It supports iRacing, ACC, rFactor 2, and most major simulators.
How many bass shakers do I need?
Two bass shakers provide effective tactile feedback: one mounted under the seat and one on the pedal deck. Four shakers add directional awareness with left and right placement. Start with two and expand if the sensation feels one-dimensional. Most installations use Dayton Audio TT25 pucks ($15 each) or Aura Bass Shakers ($30 each).
Is DIY wind simulation worth building?
Wind simulation adds noticeable immersion for open-cockpit cars and speed sensation. Basic PC fan setups cost under $50 and respond to vehicle speed. PWM-controlled Arduino systems cost $80-$150 and provide nuanced directional wind effects. Build wind sim after bass shakers and button boxes, as those provide more impactful immersion improvements.
What tools do I need for DIY sim racing projects?
Basic DIY projects need a soldering iron ($20), wire strippers, screwdriver set, and a drill. Arduino projects require a USB cable and free Arduino IDE software. 3D printing is helpful but not required; project boxes and aluminum panels work well. Budget $30-$50 for tools if starting from nothing.
Related Articles
- Building a DIY Sim Racing Rig — Aluminum profile cockpit construction for mounting upgrades
- What Is Sim Racing? — Overview of the complete hardware ecosystem
- How to Configure Force Feedback — Primary tactile channel before adding transducers
- Setting Up a Sim Racing Space — Cable management for multiple DIY peripherals
- How to Plan Your First Sim Racing Setup — Prioritizing upgrades across your budget