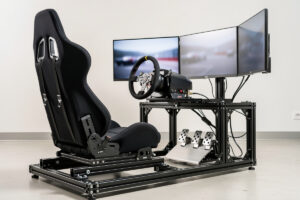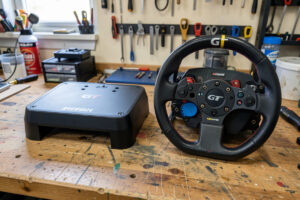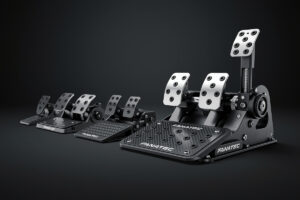
After bolting a dozen pedal sets onto the rig I welded in the workshop, I’ll say this flat: the best sim racing pedals in 2026 are the Fanatec CSL Elite V2. At $300, they put a load cell brake inside a full-metal chassis — the exact point on the price curve where load cell braking stops being a premium checkbox and becomes the baseline for anyone chasing lap time. I run load-cell pedals on my daily rig and have tested a hydraulic set for the diminishing-returns argument. On my telemetry overlay, the difference between a potentiometer brake and a properly calibrated load cell is a standard deviation under 2% versus 5-8% — that’s not a rounding error, that’s the gap between consistent pace and guessing where the car rotates.
Pedals matter more than wheels for lap time. I learned this the hard way: I bought a better wheelbase first, saw my iRating barely move, then bolted on load cell pedals and found tenths I’d been bleeding for months. Braking consistency is where most laps are won or lost. A perfect steering input through a corner is worthless when your braking point shifts by 5 meters every lap — and potentiometer pedals let it shift that much just from fatigue, shoe grip, and seat angle. There are three pedal technologies in 2026 — potentiometer, load cell, and hydraulic — and I’ve run two of the three for long enough to tell you exactly where the money is well spent and where it is wasted. If you are building your first rig or upgrading a starter bundle, the single most impactful decision you will make is which pedals sit under your feet. Everything else — wheels, cockpits, displays — builds around the brake pedal.
Why Pedals Win Races — The Upgrade Order That Actually Works
There is a correct order to building a sim racing setup and most people get it backward. On my rig, the order is rigid cockpit first, then pedals, then wheelbase, then rim — and I have seen every permutation of getting this wrong. The reason is simple: a load cell brake requires the driver to push 30-90 kg of force into a pedal that must not move. If the pedal tray flexes, the entire brake-pressure-to-muscle-memory feedback loop breaks. If the seat slides, consistent braking is impossible. Before spending $600 on a direct-drive wheelbase, make sure your pedals are bolted to something that does not yield. The rig I welded from steel tube in my workshop cost less than many pedal sets and delivers zero measurable flex under braking loads that would make a wheel stand walk across the room. For anyone racing from a desk or a foldable stand, the best pedal upgrade you can buy is a rigid platform to mount them to. A $300 load cell pedal set on a flexy stand is a $300 pedal set delivering potentiometer consistency. The cockpit and the pedals are one system — treat them that way. For a detailed walk-through on building from raw stock, see the welded rig design guide where I break down cut lists and frame callouts.
Potentiometer vs Load Cell vs Hydraulic Pedals
Potentiometer pedals measure brake input by tracking the physical distance the pedal arm travels. They are simple, cheap, and come bundled with every entry-level wheel — the Logitech G29, the Thrustmaster T300, the Moza R3 bundle. The problem is that your foot position drifts. Over a 45-minute race, fatigue changes how far you push, shoe grip changes where your foot sits, and even a half-centimeter seat shift changes the pedal arc your leg traces. Potentiometer pedals have no way to know you intended the same force — they only see a different position. This is why drivers on entry-level gear report braking points that wander by 5 meters or more between laps, especially as a stint progresses.
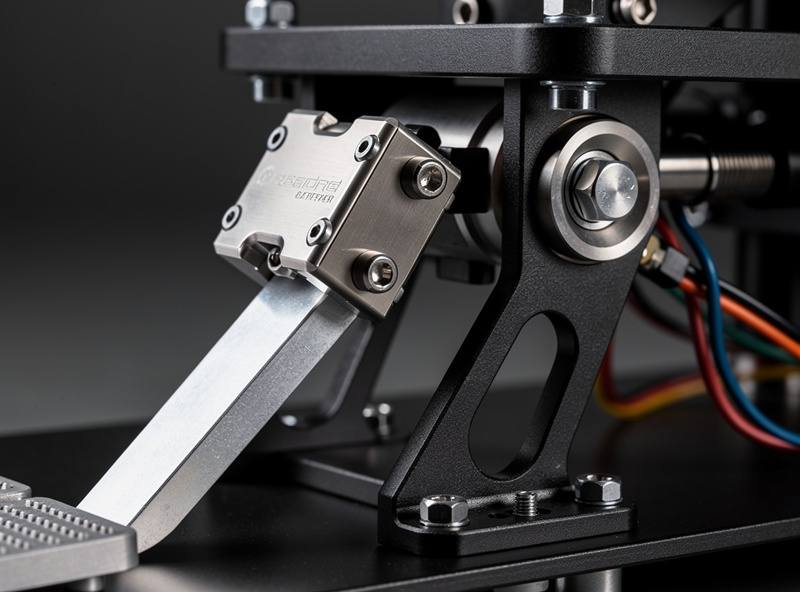
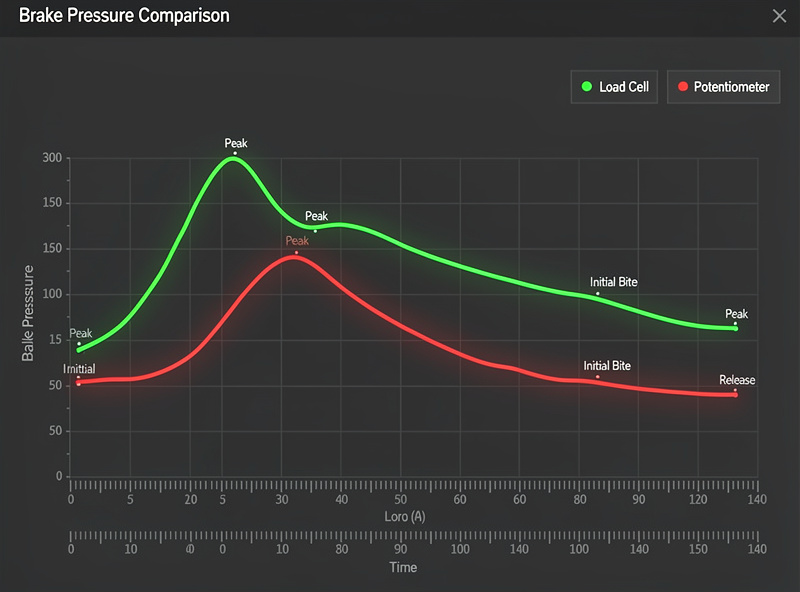
Load cell pedals solve this by measuring pressure, not position. A load cell is a strain gauge that outputs a voltage proportional to how hard you push — your leg muscles repeat pressure far more precisely than they repeat foot placement. Across the load cell pedal sets I have bolted onto my rig, the braking standard deviation on my telemetry overlay runs under 2% — the brake trace is a clean, repeatable line lap after lap. Potentiometer pedals under the same driver typically show 5-8% variation. That 3-6% gap is the difference between a trail-braking rotation you can trust and one you hope is there. Load cell pedals also let you run a stiffer pedal with less travel, which means your braking happens through muscle pressure rather than leg extension — a faster, more repeatable motion that translates directly to lap-to-lap consistency. Most sim racers who switch from potentiometer to load cell report finding 1 to 2 seconds per lap within two weeks, and it is not because they got better at driving — it is because they stopped guessing at their braking point.
Hydraulic pedals use brake fluid and a master cylinder to generate progressive resistance that mimics a real brake pedal. The pedal firms up under pressure in a way that even a high-end load cell elastomer stack cannot perfectly replicate. I have run a hydraulic set on my rig for a direct comparison, and the feel is genuinely different — the pressure curve has a natural ramp that load cells approximate with spring-and-elastomer combinations but never fully duplicate. That said, hydraulic pedals start at $600 and climb past $1,500, require occasional fluid bleeding, and the performance advantage over a well-calibrated load cell pedal is small. The pro teams and high-end esports rigs use them, but for everyone else a quality load cell set delivers 95% of the brake feel at roughly 35% of the cost. Unless your racecraft is at the level where hundredths of a second in braking consistency are the remaining gap, skip hydraulic. The money goes further in a car setup education or a telemetry analysis habit.
Best Sim Racing Pedals by Price Tier
The pedal market in 2026 runs from bundled freebies to $1,800 active-motor single pedals. The table below covers every tier with options I have either run personally or validated against the sim racing community consensus. Brake type, build material, and platform compatibility are the three columns that actually matter — everything else is marketing.
| Price | Pedals | Brake Type | Material | Platform | Best For |
|---|---|---|---|---|---|
| Under $150 | Logitech G29 Pedals | Potentiometer | Plastic/Steel | PC/Console | Bundled starter |
| Under $250 | Thrustmaster T-LCM | Load Cell | Metal/Plastic | PC/PS/Xbox | Budget load cell |
| Under $220 | Moza SR-P | Load Cell | Full metal | PC | Moza ecosystem |
| Under $350 | Fanatec CSL Elite V2 | Load Cell | Full metal | PC/Xbox | Best overall value |
| Under $400 | Fanatec ClubSport V3 | Load Cell | Full metal | PC/Xbox | Serious hobbyists |
| Under $700 | Heusinkveld Sprint | Load Cell | Stainless steel | PC | High-end PC |
| $1,000-$1,400 | Heusinkveld Ultimate+ | Load Cell, hydraulic damping | Stainless steel | PC | Professional/semi-pro |
| $1,200-$1,500 | Simworx Pro Series | Hydraulic | CNC aluminum | PC | Full hydraulic realism |
| $1,500+ | Simucube ActivePedal | Active motor | Premium metal | PC | Ultimate adjustability |
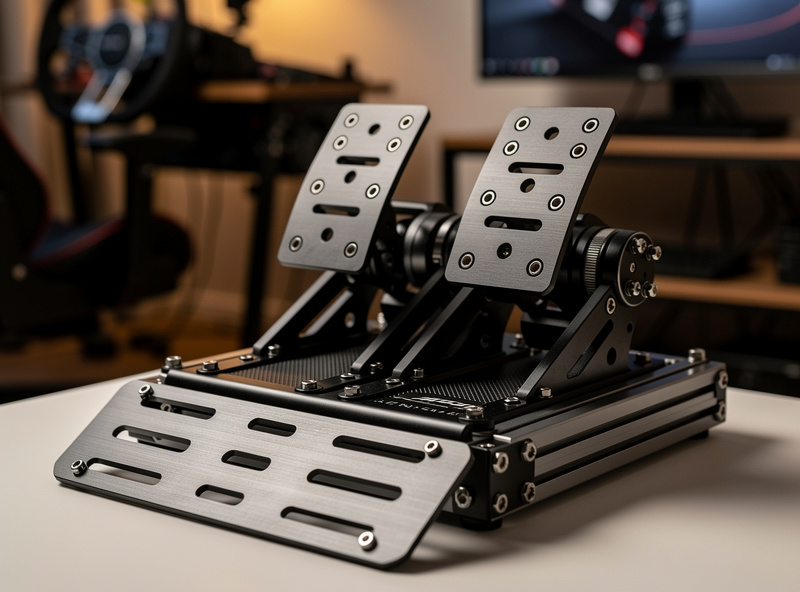
The Fanatec CSL Elite V2 at $300 is the sweet spot. It uses a 90 kg load cell with an adjustable elastomer stack, ships in a full-metal chassis that does not creak under hard braking, and plugs into the Fanatec ecosystem via RJ12 or standalone USB on PC. On my rig, I can brake at 85-90% pressure with enough modulation to trail-brake into a hairpin without locking — exactly what you need for consistent corner entry. The Thrustmaster T-LCM at $230 is the best entry to load cell braking for console racers, using Hall-effect sensors on the throttle and clutch with a dedicated load cell on the brake — a smarter sensor layout than the all-potentiometer bundles Thrustmaster used to ship.
At the mid-to-high range, the Fanatec ClubSport V3 at $400 adds adjustable pedal faces, a vibration motor on the brake for ABS feedback, and a hydraulic damper option on the brake — this is the pedal set I would pick for someone who knows they will race seriously for years and wants a single purchase that scales. The Heusinkveld Sprint at roughly $600-700 is the entry to the prosumer tier: stainless steel construction, fully adjustable pedal geometry via software (not just physical springs), and a 120 kg load cell that can be calibrated down to your comfortable maximum. The difference between the Sprint and the CSL Elite V2 is real — build quality, adjustability, and sensor precision — but not game-changing until you are chasing the last few tenths. For a deeper dive on matching pedals with wheelbase torque tiers, the wheelbase torque guide covers how braking force expectations shift as you move up the hardware ladder.
Load Cell Brake Setup and Calibration
The way I dial in a load cell pedal mirrors how I tune force feedback — start with the hardware, prove it on telemetry, and adjust from data, not from a YouTube preset. Most load cell pedals let you set the maximum braking force in their control software so that 100% brake in the sim matches your comfortable maximum leg force. Get this wrong and you are either bottoming out the load cell at 70% pressure (losing all modulation above that point) or straining to reach 100% (inconsistent lap after lap).
Sit in your normal driving position — seat bolted, wheel where it lives — and press the brake as hard as you comfortably can for an emergency stop. Set that force reading as your 100% calibration ceiling in the pedal software. Then pull up a practice session with the telemetry overlay running and do ten threshold braking zones while watching the brake trace. The trace should be a smooth ramp to 85-95% pressure that holds steady through the braking zone — not a jagged line, not a trace that spikes to 100% and collapses. If the trace spikes, your calibration floor is too high and you are bottoming out the sensor. If the trace never breaks 80% in a hard braking zone, the ceiling is too high and you cannot physically reach full brake. Adjust the software limits in 5 kg increments and re-test until the trace is clean. Most drivers need one to two weeks of regular practice to fully rewire their muscle memory from position-based braking to pressure-based braking — the first three days feel stiff and unfamiliar, and by day ten the old potentiometer pedals feel like a toy.
Per-title brake gamma and linearity settings are the next layer. In iRacing, the brake force factor setting lets you shape the input curve — I run a brake force factor of 1.8 to 2.0 with my load cell, which puts more resolution in the initial bite and mid-pedal range where trail braking lives. In ACC, the brake gamma setting serves a similar function. The default linear curve works for many drivers, but a slight upward curve (gamma around 1.3-1.5) puts the modulation range where it is most useful. The force feedback tuning guide covers the per-title approach in detail — pedal curves and FFB profiles are two sides of the same loop, and tuning one without the other leaves time on the table. For iRacing-specific brake tuning, the iRacing FFB settings guide walks through the brake force factor calibration in depth.
Pedal Mounting and Rigidity
How pedals are mounted matters as much as which pedals you buy. On the rig I welded from steel tube, the pedal deck is a cross-braced plate that does not deflect under 90 kg of brake force — the load cell sees exactly what my leg puts in, nothing absorbed by frame flex. On an 80/20 aluminum profile rig, the pedal tray is typically a bolted plate or adjustable bracket that is rigid enough for mid-torque load cells but may introduce subtle flex above 100 kg — Heusinkveld Ultimate+ owners often upgrade to a thicker pedal plate or add a brace. On a wheel stand or floor, even a 60 kg load cell pedal set walks under hard braking unless it is bolted to a board braced against a wall or weighted down. Unsecured floor pedals transform a precise load cell into an imprecise one, because the pedal base moving under braking force introduces exactly the kind of positional inconsistency you bought the load cell to eliminate.
Pedal spacing matters too. Most aftermarket pedal sets let you adjust the lateral distance between accelerator and brake independently — I run my brake pedal aligned with my left hip and the accelerator slightly to the right, which keeps my heel-toe motion compact without twisting my leg. The throttle and clutch pedals should be close enough that you can roll your foot between them without lifting, but spaced enough that an accidental brush does not cost you a tenth on corner exit. For pedal sets that ship at fixed spacing (mostly budget bundles), repositioning the entire pedal base or 3D-printing offset brackets — the same printer that turns out my button-box plates and hydro lids handles pedal-spacer prints without breaking a sweat — is the only fix. Once the pedals are bolted rigid and spaced right, the hardware is done and the driver work begins.
Brake Modulation and Muscle Memory
A load cell pedal gives you the hardware to brake consistently. Building the muscle memory to use it takes deliberate practice. Threshold braking — holding the brake at 85-95% pressure without exceeding it and locking the wheels — is the single most important braking skill in sim racing. On potentiometer pedals, threshold braking is guesswork because your foot cannot feel where maximum pressure lives without a firm stop. On load cell pedals, the pedal stiffens progressively and your leg learns where the ceiling is through pressure feedback, not pedal travel distance.
Practice threshold braking in isolation. Pick a track with a heavy braking zone — Monza T1, Spa La Source, Watkins Glen T1 — and run it repeatedly with your telemetry overlay showing the brake trace. Your goal is a brake trace that ramps to 90% pressure, holds flat for the duration of the braking zone, then trails off smoothly into turn-in. The trace should look like a plateau, not a spike. When you can repeat that trace within 2% pressure variation for 20 consecutive laps, move to the next braking zone. Within two weeks of focused practice, most drivers can threshold-brake consistently enough that their corner-entry speed variation drops below 2 km/h — the point where driving technique rather than hardware limits lap time. The muscle memory for load cell braking is deep once built — I can step away from the rig for a month and sit back down to brake traces within 3% of where I left off, which simply never happened with potentiometer pedals no matter how much I practiced. The consistency training guide has the full practice framework, including telemetry benchmarks and progressive drills.
Console vs PC Pedal Compatibility
On PC, pedal brand mixing is straightforward — nearly every pedal set above $200 connects via USB and shows up as a standalone DirectInput device. I have run Heusinkveld pedals alongside a Fanatec wheelbase and Moza pedals on a Simucube base, and the sim reads each device independently without conflict. The only caveat is that some sim titles have a three-device input limit — if you are running a wheel, pedals, shifter, handbrake, and button box all via USB, you may need a powered USB hub and should check your sim’s controller limit in the options menu.
On console, pedal mixing is restricted. On Xbox, pedals that connect through a wheelbase (RJ12 or proprietary) must match the wheelbase ecosystem — Fanatec pedals with Fanatec wheels, Logitech with Logitech. USB-connected pedals that use the Xbox security chip (like the Fanatec CSL Elite V2 in USB mode) work independently on Xbox, but this is the exception, not the rule. On PlayStation, the situation is similar — Thrustmaster, Fanatec, and Logitech each require ecosystem-matched pedals when connected through the base, though some third-party pedals with licensed chips work standalone. The console sim racing setup guide covers every platform combination in detail, including which pedal sets clear the compatibility hurdle. If console racing is your primary platform and you want load cell braking, plan your entire hardware purchase around the pedal set first — it is far easier to build a wheelbase and rim selection around a pedal choice than the reverse.
The Latency Stack — How Pedal Input Lag Compounds
Pedal input travels through a chain of processing steps before the sim registers a braking event: sensor read → USB polling → operating system input stack → sim processing → physics calculation → frame render → display draw. Each link adds microseconds to milliseconds of latency, and they compound. A pedal set with a 500 Hz USB polling rate adds 2 ms of input latency before the signal even reaches the sim. A USB hub shared with a wheelbase, shifter, and button box can introduce polling contention that pushes that higher. On my rig, the pedals get a dedicated USB port on a powered hub with the wheelbase on its own direct motherboard port — keeping the two highest-priority input devices on separate controllers eliminates one source of input jitter.
The network side matters too. In online racing on iRacing or ACC, your pedal input must travel from the pedal to the sim to the server and back before you feel the result — and any latency in that loop translates to a laggy brake response that feels like input delay. The OPNsense router that segments my IoT VLAN also puts the sim PC on a wired low-latency link with dedicated QoS rules — Wi-Fi is for laptops, not racing. Even 30 ms of extra network latency adds the equivalent of 3 meters of braking distance at 100 km/h in a sim that processes netcode every tick. For the full networking breakdown — ISP choice, bufferbloat, and the wired-vs-wireless delta — the sim racing internet setup guide covers the entire latency budget.
When to Upgrade Your Pedals
The trigger for a pedal upgrade is obvious when you know where to look. Pull up your telemetry after a practice session and look at the brake trace. If your braking point varies by more than 5 meters between laps, the hardware is the limiter — no amount of practice will fix inconsistent input. A second tell: your brake pressure trace is jagged during the braking zone, spiking and dipping rather than holding a clean plateau. This means the pedal sensor is outputting noise or your leg cannot feel where the braking ceiling lives — both are solved by a load cell. And if your throttle trace shows a dead zone at the top or bottom of the travel range, the potentiometer in your current pedal is wearing out, which only accelerates over time.
Do not upgrade to direct-drive or a fancy wheel rim before you have load cell pedals bolted to a rigid platform. I see this mistake constantly — a driver on a G29 with potentiometer pedals buys an $800 direct-drive wheelbase and gains maybe two tenths, then six months later adds load cell pedals and finds a full second. The money was spent in the wrong order. The correct upgrade path is cockpit rigidity first, load cell pedals second, wheelbase third, rim and accessories fourth. The wheel buying guide and shifter and handbrake guide cover the rest of the hardware chain, but none of those purchases matter until the brake pedal is sorted. If you are racing on potentiometer pedals right now, every other dollar you spend on sim gear is a dollar spent before the single upgrade that actually changes your lap time.
For pedal-specific troubleshooting — input spikes, drift, calibration loss — the pedal input spike and drift guide covers common failure modes and field fixes, from cleaning potentiometer contacts to re-seating a load cell amplifier board and diagnosing a failing USB controller chip. For braking technique once the hardware is right, the corner entry and apex guide ties braking consistency to rotation and exit speed, and the car setup guide covers how brake bias and differential settings interact with your pedal hardware to produce the handling balance you feel at turn-in.
What are the best sim racing pedals in 2026?
The Fanatec CSL Elite V2 is the best sim racing pedal set in 2026, offering load cell braking with full-metal construction at $300. It provides the best balance of brake feel, build quality, and ecosystem compatibility for the price.
Are load cell pedals worth it?
Yes. Load cell pedals are the single most impactful upgrade in sim racing, and drivers who switch consistently report a real, noticeable lap-time gain. They measure brake pressure instead of pedal distance, enabling consistent braking that builds repeatable muscle memory.
How much do sim racing pedals cost?
Sim racing pedals range from $80 for basic potentiometer sets bundled with budget wheels to $1,500+ for active-motor pedals. The sweet spot for serious sim racers is $250-400 for a quality load cell pedal set.
Do I need a cockpit for load cell pedals?
You need at minimum a pedal tray or board braced against a wall. Load cell pedals require 30-90 kg of braking force that will push unsecured pedals across the floor. A rigid cockpit mount is ideal but not required for entry-level load cell sets.
Can I mix pedal brands with different wheel brands?
Yes on PC. Most sim racing pedals connect via USB independently of the wheelbase. You can use Heusinkveld pedals with a Fanatec wheel or Moza pedals with a Simucube base. On console, pedals typically must match the wheel ecosystem.
How long does it take to adapt to load cell pedals?
Most sim racers fully adapt within one to two weeks of regular practice. The first few days feel stiff and unfamiliar, but pressure-based muscle memory builds quickly. After two weeks, most drivers find their old potentiometer pedals feel imprecise by comparison.
Further Reading
- Best Sim Racing Wheels 2026: Buyer’s Guide and Top Picks
- Sim Racing Cockpit and Stand Guide: Wheel Stand vs Full Rig
- Sim Racing Force Feedback Tuning: The Complete Guide
- The Sim Racing Telemetry Guide: Read Your Data, Find Your Time
- Consistency Training in Sim Racing: Bank Your Pace
- Pedal Input Spikes and Drift: Diagnosis and Fixes