A sim racing button box is a dedicated panel of switches, encoders and buttons that puts pit limiter, traction control, brake bias, fuel mix and a dozen other in-car functions under your thumb instead of buried in a keyboard map. A decent build runs $40–$120 in parts; a pre-built unit lands around $80–$250. Either way, it earns its place the first time you adjust brake bias mid-corner without looking down.
I run a DIY welded-steel rig with a mid-torque direct-drive base, and the button box bolted to it is one of the few peripherals I’ve owned in every form: a cheap eBay panel, a 3D-printed plate I designed myself, and a couple of pre-built aluminium units swapped across bases. This guide is the whole map — what a button box actually does, when to build versus buy, the components that matter, and how it wires into the rest of the cockpit. The deep dives live in the linked spokes; this is where you start.
What a sim racing button box actually does
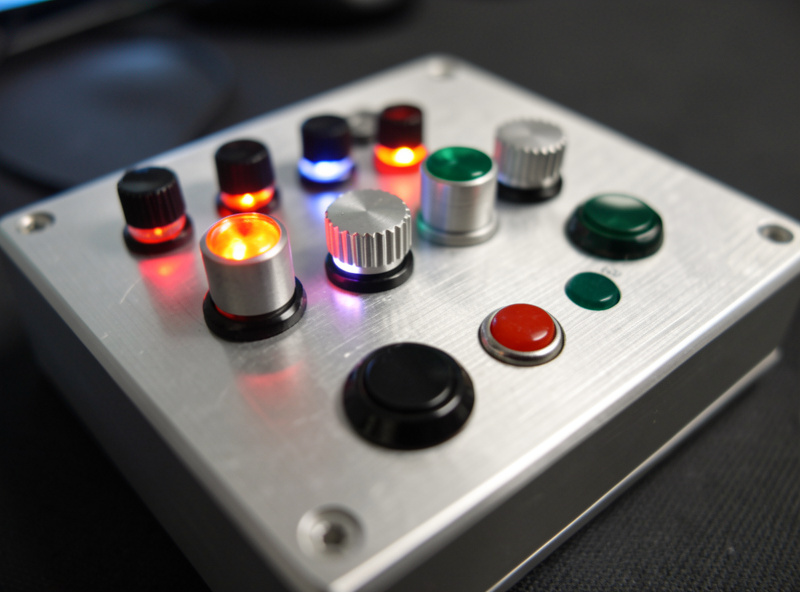
A button box is a USB human-interface device (HID) that exposes physical controls — toggles, momentary buttons, rotary encoders — to the game as extra gamepad inputs. Most modern titles let you bind any of them to any function, so a 16-input box can cover every common in-car control with room to spare. It does not need drivers in Windows; it shows up as a generic controller.
The value isn’t novelty, it’s eyes-up driving. On my rig the wheel rim carries the controls I touch every lap — shift paddles, clutch, a rotary for traction control. The button box on the deck carries everything else: ignition, starter, pit limiter, headlights, wiper, MFD page, brake-bias up/down. In iRacing and ACC those functions come up constantly, and reaching a labelled switch beats hunting a keyboard you can’t see in a dark room.
Build it or buy it: the honest split
Build if you want exact layout, labelled functions and the cheapest path to many inputs; buy if you want it working tonight with no soldering. A DIY box from a $12 controller board, $15 of switches and a printed enclosure costs roughly half a comparable pre-built and teaches you the wiring — but it costs you an evening or two. A pre-built lands assembled, often with a USB cable and mounting holes that match standard rig rails.
My first box was pre-built because I wanted to know if I’d even use it. I did, constantly — so the second one was a build, because by then I knew the exact layout I wanted and the printer was already running rig brackets. That’s the usual arc, and it’s why I tell people the build-versus-buy question is really a “do you know your layout yet” question. The full breakdown is in the DIY button box guide and the Arduino vs pre-built comparison.
| Factor | DIY build | Pre-built unit |
|---|---|---|
| Typical cost | $40–$120 in parts | $80–$250 assembled |
| Time to working | One to two evenings | Plug in tonight |
| Layout control | Exactly what you draw | Fixed by the maker |
| Skill needed | Basic soldering, a little wiring | None |
| Input count value | Best $/input | You pay for assembly |
| Repairability | You know every joint | Depends on the maker |
The components that actually matter
Three parts define how a button box feels and how long it lasts: the controller board, the switches, and the rotary encoders. Spend your attention there, not on the enclosure colour. A good board reads every input reliably; cheap switches develop contact bounce and dead presses within a season of hard use.
The controller board is the brain — on most DIY boxes that’s an Arduino Pro Micro or a Leonardo-class board running the Arduino Joystick library firmware, because the ATmega32U4 chip natively presents as a USB HID. The switches are the tactile part you live with: SPST toggles for on/off functions, momentary push buttons for one-shot actions, and a covered “missile switch” for ignition if you want the theatre. The rotary encoders deserve their own spoke entirely — they’re the part most people get wrong. I cover them in the encoder wheels guide.

Rotary encoders: the part people get wrong
Encoders are rotary controls that send a step pulse each click of rotation rather than a fixed position, which is exactly what you want for cycling traction control, brake bias or MFD pages. The catch: a raw mechanical encoder fires two inputs per detent unless the firmware or the game handles it, so a “click up” can jump two settings. Match the encoder type to how your firmware reads it.
For sim racing you want encoders that map cleanly to “increment” and “decrement” buttons the game can bind. Some pre-built boxes solve this in hardware; on a DIY box it’s a firmware setting. Getting it right is the difference between a TC dial that drops exactly one notch per click and one that’s unusable. The full encoder breakdown — types, counts, and which firmware behaviour to pick — is the encoder wheels spoke.
Wiring and how it connects to your rig
Every switch and button shares one common ground and runs a single signal wire back to a digital pin on the controller; encoders use two signal pins plus ground. That’s the whole electrical story for a basic box — a common-ground bus and a tidy run of signal wires. Keep the runs short, strain-relieve the USB cable, and label both ends as you go.
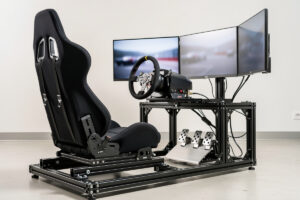
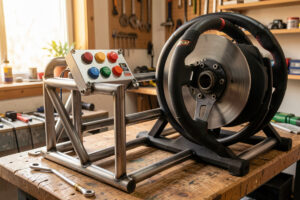
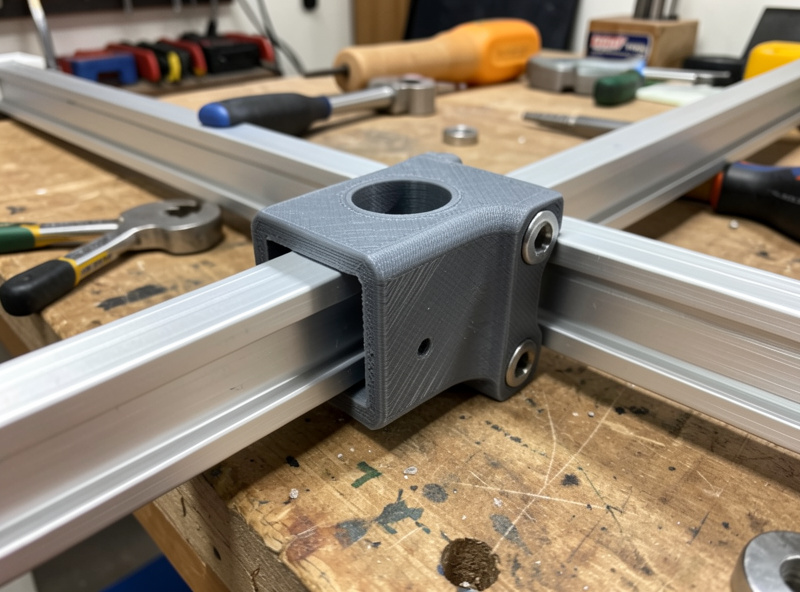
Mechanically, the box wants to sit where your hand falls naturally without leaving the wheel for long — on my rig that’s a 3D-printed plate clamped to an aluminium profile rail to the right of the wheel. A button box that flexes or walks under a firm press is worse than no box, the same way a wobbly desk ruins a wheelbase before the FFB ever matters. The step-by-step is in the wiring guide, and the upgrade order logic comes from the complete rig build guide.
Button box versus a dash display
A button box sends inputs in; a dashboard display reads telemetry out. They solve opposite problems and most serious cockpits end up with both — controls under the right hand, a dash showing gear, speed, lap delta and shift lights in your sightline. Don’t confuse the two when you’re budgeting.
If your priority is reading data rather than triggering functions, start with the dashboard display guide or the LED display panel guide instead. Many builders run a combined panel — a small display flanked by buttons — which is why the dash and button-box projects share the same SimHub plumbing and the same SimHub setup habits.
Where the button box sits in your upgrade order
A button box is a quality-of-life upgrade, not a lap-time upgrade — so it comes after the parts that actually make you faster. The order that’s held up across every base I’ve bolted on is rig rigidity first, then pedals, then wheelbase, then the rim, with electronics like the button box and dash slotting in once the core is solid.
Put bluntly: a $90 button box on a flexing wheel stand is money in the wrong place. Get the rig stiff, get a load-cell pedal set so your braking is repeatable, get a wheelbase with honest force feedback, and then the button box turns a good cockpit into one you never have to look away from. If you’re still pricing the whole thing, the under-$500 starter guide shows where electronics fall in a tight budget.
Connecting it cleanly: USB, hubs and latency
A button box is a low-bandwidth HID, so it’ll run off any USB port — but a cockpit with a wheelbase, pedals, shifter and dash quickly runs out of ports and benefits from a powered hub. Use a powered hub so a hungry wheelbase never starves the box, and keep the data path simple. Button-box latency is effectively a non-issue; the inputs are tiny.
The latency that does matter lives elsewhere — the display chain and the network. I run the sim PC on wired ethernet to the router precisely because Wi-Fi adds jitter you can feel online; that’s covered in the internet setup guide. For wiring all the peripherals together without port chaos, the USB hub guide is the companion read.
Buying components without overspending
If you’re building, the parts list is short and cheap, and you don’t need boutique switches to get a box that outlasts the rig. A controller board, a handful of switches and encoders, a printed or aluminium enclosure, and wire is the entire bill. As an Amazon Associate I earn from qualifying purchases.
Sensible component searches: a Pro Micro controller board, rotary encoder modules, and a set of toggle and momentary switches. If you’d rather not solder, a pre-built sim racing button box drops in tonight. Buy once, label everything, and it’s the rare peripheral you’ll never touch again once it’s set.
Every function worth mapping
A well-mapped box covers the controls you’d otherwise hunt for on a keyboard: ignition, starter, pit limiter, headlights, wiper, MFD page, and rotaries for traction control, ABS and brake bias. That’s roughly a dozen inputs, which is why 12–16 is the sweet-spot count — enough for every common function with a couple to spare, without a wall of switches you never touch.
Group them by how often and how urgently you use them. The one-shot, low-stakes actions — MFD cycling, reset, headlights — can live anywhere your hand reaches. The mid-stint adjustments — TC, ABS, brake bias on rotaries — want to be where your fingers fall without leaving the rim. And the consequential one-offs — ignition and starter — are worth a covered toggle or a deliberate position, because an accidental engine cut mid-race is a bad way to learn switch placement. On my deck the rotaries sit right, the one-shots left, and ignition under a flip cover where a stray elbow can’t reach it. That layout came from two builds of getting it slightly wrong, which is exactly why I tell people to sketch it before they drill.
Choosing switches: toggles, momentaries and guards
The two switch types you’ll use are SPST toggles for states that stay on or off, and momentary push buttons for one-shot actions that fire once per press. Pit limiter and starter are momentaries; ignition and a master “on” are toggles. Mixing them correctly is what makes a box feel like a real car rather than a keyboard in a fancy case.
Toggles hold their position, so they’re right for anything you set and leave — ignition, a fuel pump, lights you run for a whole stint. Momentary buttons spring back, so they’re right for anything the game treats as a single event — pit limiter toggle, starter, reset to pits, MFD page. A flip-up guard over the ignition toggle is pure theatre, but it’s good theatre and it genuinely stops accidental flips. Buy switches rated for panel mounting in 6mm or 12mm holes so they fit standard drilled enclosures, and don’t cheap out on the ones you’ll press hardest — a starter button that develops a dead spot after a season is a false economy.
Enclosure options: printed, project box or aluminium
Three enclosure routes cover everyone: a 3D-printed box for total custom fit, an off-the-shelf project box for the cheapest no-printer option, and a laser-cut or bent aluminium plate for the premium look. All three hold the same electronics — the choice is about fit, finish and what tools you already own.
A printed enclosure is my default because the same printer doing my rig brackets can produce a box sized exactly to my switch layout, with mounting tabs that match my rail. A plastic project box from the electronics shop is the cheapest path and needs only a drill — mark your layout, drill the holes, mount the switches. An aluminium faceplate looks the most like a real race-car panel and resists flex, but it’s the fiddliest to cut cleanly at home. Whatever you choose, the enclosure’s only real job beyond looks is to hold the switches rigid so a firm press doesn’t flex the panel — the same rigidity-first thinking that governs the whole rig.
Common button box mistakes to avoid
The mistakes that cost people an evening are predictable: drilling before planning the layout, using solid-core wire that snaps, forgetting USB strain relief, and buying a potentiometer when they needed a rotary encoder. Every one of those is avoidable if you know it’s coming, and together they’re the difference between a box that lasts years and one you rebuild in a month.
Layout first, always — a hole in the wrong place is permanent. Use stranded wire, not solid-core, because solid wire fatigues and breaks where it flexes near a switch. Anchor the USB cable inside the box so a yank pulls on a zip-tie, not the solder joints — a torn-off USB port is the most common long-term failure in home builds. And know the encoder-versus-potentiometer difference cold before you buy, because they look identical and behave nothing alike. These are covered in depth in the wiring guide and the encoder guide, but knowing the shortlist up front saves the most time.
How it fits the rest of the cockpit’s electronics
A button box is one node in a small network of cockpit electronics — alongside a dash display reading telemetry out, an LED shift-light panel, and any haptics like a bass shaker. They share USB ports, often share SimHub, and benefit from the same tidy cable discipline, so it pays to think of them as a system rather than one-off gadgets.
Plan port budget early: a wheelbase, pedals, shifter, handbrake, button box and dash can exhaust a motherboard’s USB ports fast, which is why a powered hub belongs on the shopping list before you’re short — the USB hub guide covers that. The dash and LED panel are the natural next builds once the box is done, and they reuse the same skills; start with the dashboard display guide. And because none of this matters if the underlying feel is wrong, keep the force feedback and FOV dialled in — the electronics make a good cockpit convenient, but the rig, pedals and FFB are what make it fast.
Getting more functions than you have buttons
When your function list outgrows your switch count, a shift button is the fix: hold one designated button and every other input fires its secondary mapping, doubling a 16-input box to 32 functions without drilling a single extra hole. Most sim titles and mapping tools support this, and it is how compact race wheels expose dozens of controls from a handful of physical buttons.
There are two ways to get there. In-game, some sims let you assign a modifier or shift directly; where they do not, a tool like JoyToKey or SimHub sits between the box and the game and turns held-button combinations into fresh keystrokes or controller outputs. On my deck I keep one momentary as a mode button — held, the brake-bias rotary becomes a TC-cut adjuster — which let me cover endurance-car functions without rebuilding the panel. The trade-off is memory load: every shifted function is one more thing to recall mid-race, so reserve the second layer for settings you change occasionally, not the ones you grab under braking.
Labelling so you never hunt for a switch
A button box only saves time if you can identify each control without studying it, so labelling matters more than beginners expect. Engraved or laser-etched labels on an aluminium plate look the part and never wear off; on a printed or project-box build, a label printer or a printed adhesive overlay does the same job for pennies. Either way, label the panel before the first race, not after you have already grabbed the wrong switch once.
Backlighting is the next tier and it earns its place in a dark sim room. Some drivers wire LED-illuminated toggles or backlit legends so the panel reads at a glance with the lights down — the same eyes-up logic behind putting shift lights and the dash in your sightline. I keep my labels deliberately terse, IGN, TC, BB, because a long word is slower to parse in peripheral vision than a two- or three-letter code your eye has been trained on. Whatever route you pick, label both the panel and the wiring: a pin map taped inside the lid turns a future dead-button repair from an hour of probing into a two-minute fix.
Frequently Asked Questions
Do I really need a button box for sim racing?
No, but it removes keyboard fumbling for functions you use every lap like pit limiter, brake bias and traction control. On a wheel without enough rim buttons it pays for itself fast; on a full button wheel it is optional.
How many buttons and encoders should a button box have?
For most cars 12 to 16 inputs plus two or three rotary encoders covers everything: ignition, starter, pit limiter, lights, wiper, MFD, and rotaries for TC, ABS and brake bias. More than that is rarely used.
Does a button box add input lag?
No meaningfully. A button box is a low-bandwidth USB HID sending tiny inputs, so its latency is negligible. The latency worth chasing in sim racing lives in the display chain and the network, not the buttons.
Is it cheaper to build or buy a button box?
Building is cheaper per input, roughly 40 to 120 dollars in parts versus 80 to 250 for a pre-built. Buying wins on time and needs no soldering. Build if you know your layout; buy if you want it working tonight.
Will a button box work with iRacing and ACC?
Yes. A button box appears as a generic USB controller with no drivers needed, and iRacing, ACC, AMS2 and rFactor 2 all let you bind any input to any in-car function in their controls menu.
What is the difference between a button box and a dash display?
A button box sends inputs into the game; a dash display reads telemetry out, showing gear, speed, lap delta and shift lights. They solve opposite problems, and many cockpits run both, sometimes combined in one panel.